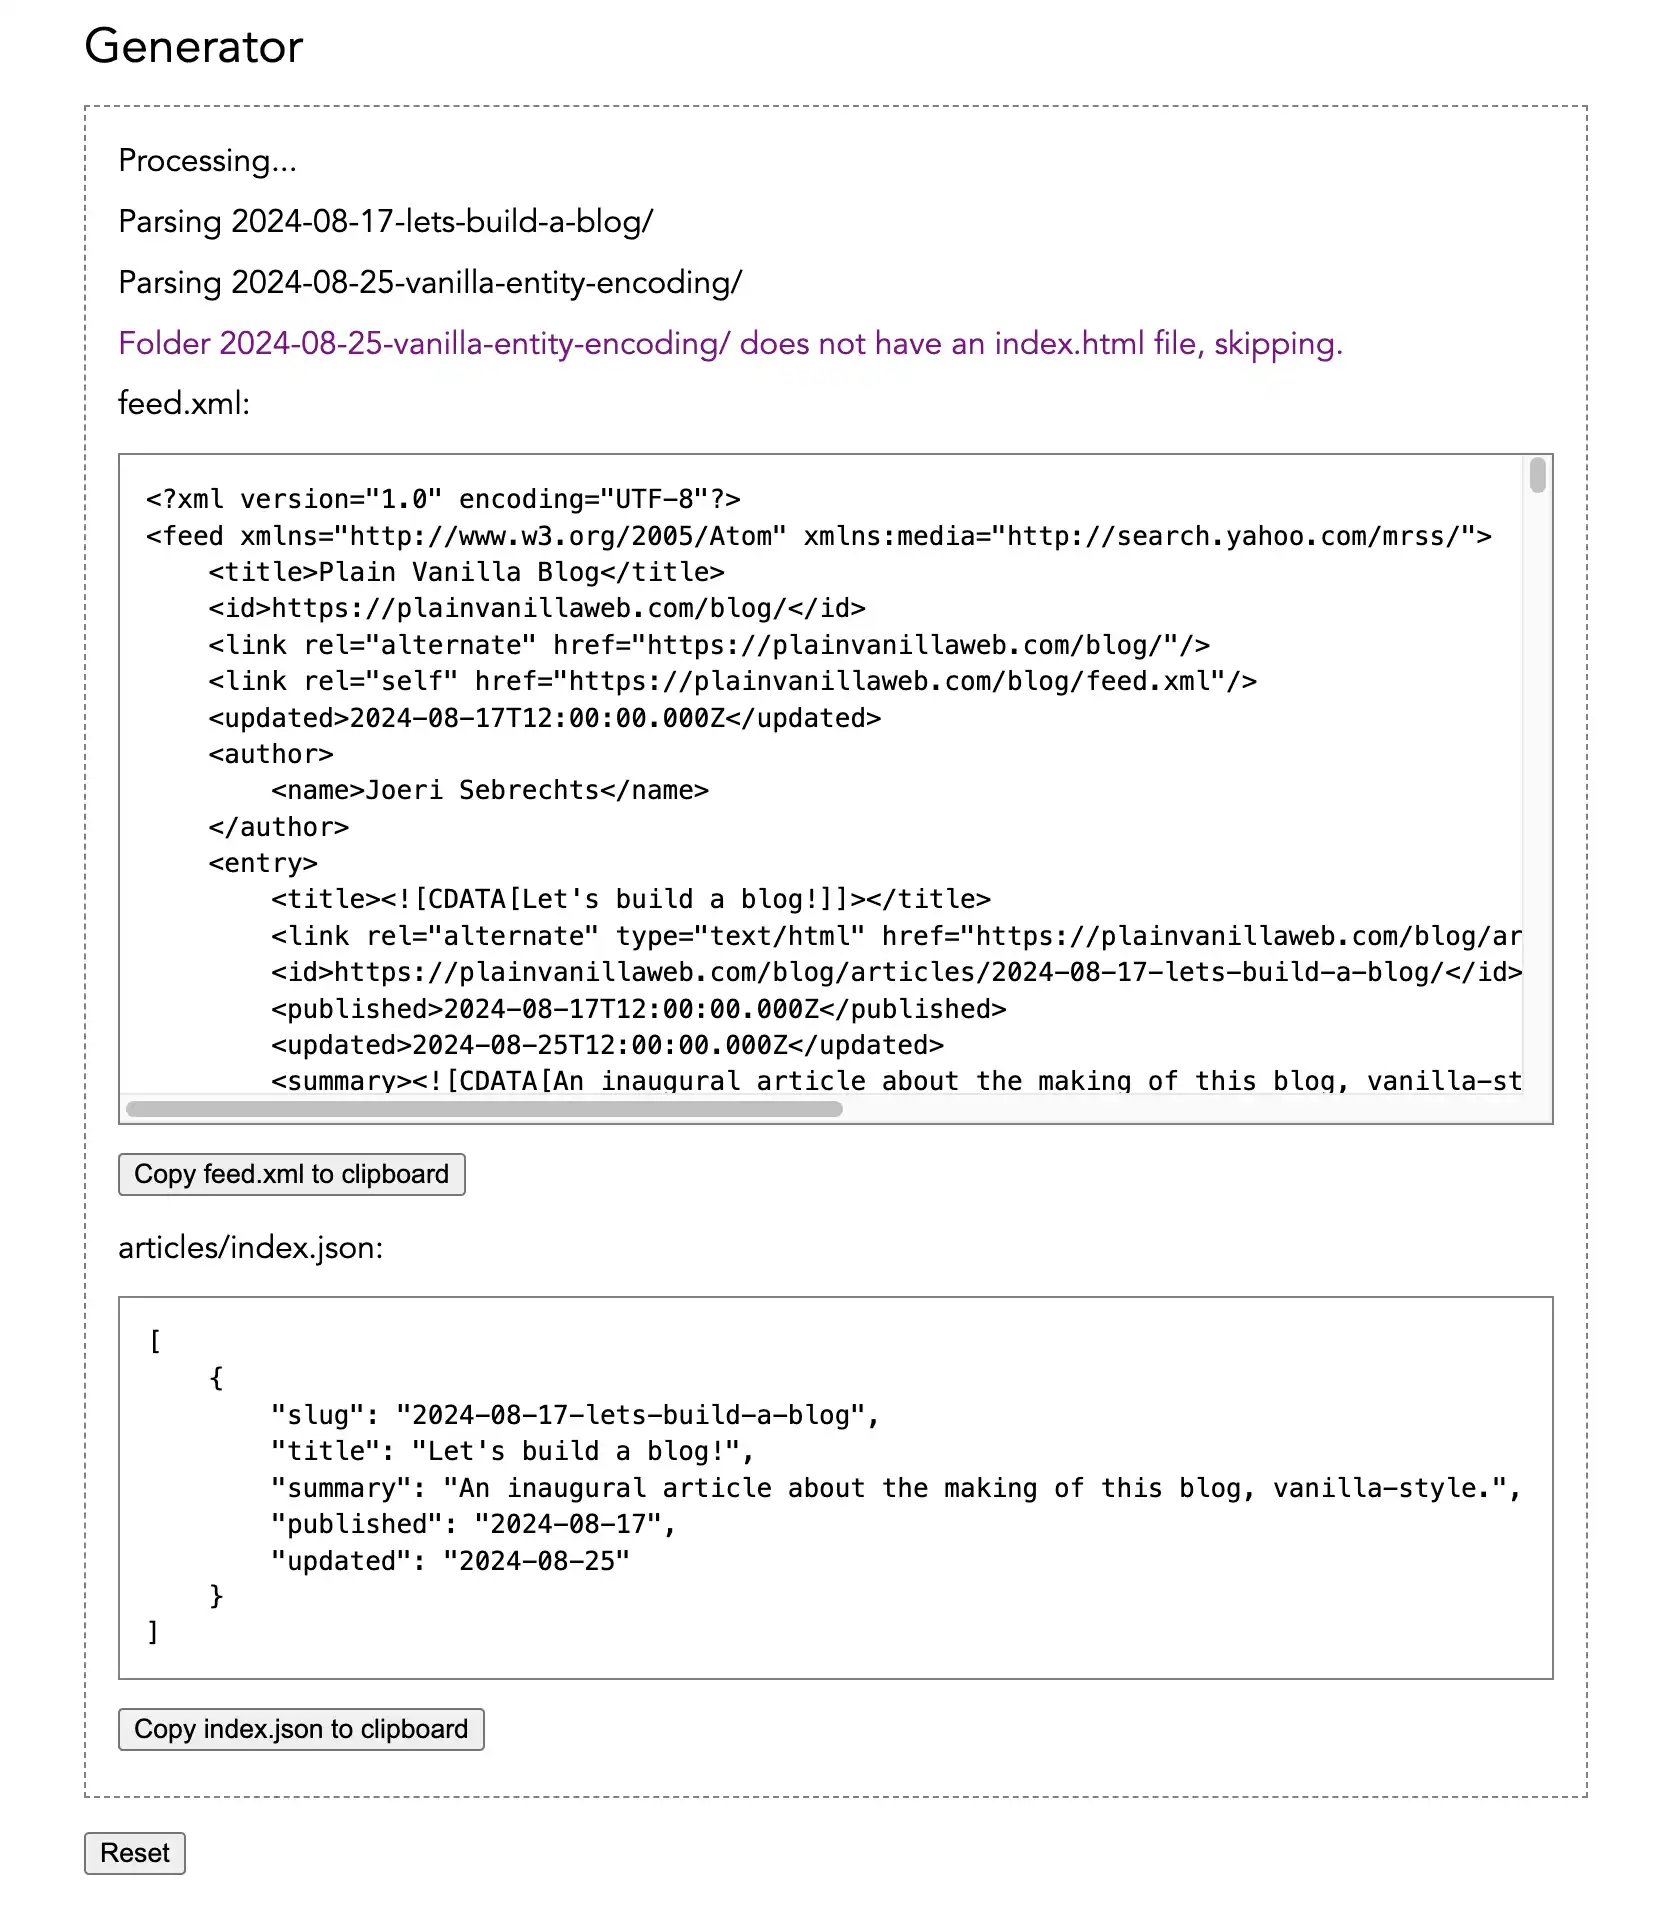
<?xml version="1.0" encoding="UTF-8"?>
<feed xmlns="http://www.w3.org/2005/Atom" xmlns:media="http://search.yahoo.com/mrss/">
    <title>Plain Vanilla Blog</title>
    <id>https://plainvanillaweb.com/blog/</id>
    <icon>https://plainvanillaweb.com/favicon.ico</icon>
    <logo>https://plainvanillaweb.com/android-chrome-512x512.png</logo>
    <link rel="alternate" href="https://plainvanillaweb.com/blog/"/>
    <link rel="self" href="https://plainvanillaweb.com/blog/feed.xml"/>
    <updated>2026-03-09T12:00:00.000Z</updated>
    <author>
        <name>Joeri Sebrechts</name>
    </author>
    <entry>
        <title><![CDATA[<details> matters]]></title>
        <link rel="alternate" type="text/html" href="https://plainvanillaweb.com/blog/articles/2026-03-09-details-matters/"/>
        <id>https://plainvanillaweb.com/blog/articles/2026-03-09-details-matters/</id>
        <published>2026-03-09T12:00:00.000Z</published>
        <updated>2026-03-09T12:00:00.000Z</updated>
        <summary><![CDATA[An oddball element set to take the main stage.]]></summary>
        <media:content url="https://plainvanillaweb.com/blog/articles/2026-03-09-details-matters/image.webp" type="image/webp" medium="image" />
        <author><name><![CDATA[Joeri Sebrechts]]></name></author>
        <content type="html"><![CDATA[
        <p>
            The richness of HTML continues to be a delightful surprise.
        </p>
        <p>
            For example, take an unassuming element like &lt;details&gt;.
            We've all seen it before. Here it is in its pure form:
        </p>
        <div><pre><code>&lt;details&gt;
    &lt;summary&gt;A summary&lt;/summary&gt;
    Some details to further explain the summary.
&lt;/details&gt;
</code></pre></div>
        <p><a href="https://plainvanillaweb.com/blog/articles/2026-03-09-details-matters/example1/index.html">undecorated details</a></p>
        
        <p>
            We can merrily click the summary to open and close the details to our heart's content.
            But this is kind of plain-looking. Can we change that triangle into something else?
        </p>
        <p><a href="https://plainvanillaweb.com/blog/articles/2026-03-09-details-matters/example2/index.html">replacing the marker</a></p>
        <p>
            In a just world, this would work by neatly styling the <code>::marker</code> pseudo-element,
            but like so often <a href="https://caniuse.com/css-marker-pseudo">Safari is being annoying</a>. 
            Thankfully we can instead replace the marker by removing it with <code>list-style: none;</code> and adding a new summary marker
            on the <code>::before</code> or <code>::after</code> pseudo-elements.
        </p>
        <div><pre><code>&lt;style&gt;
    details {
        summary {
            list-style: none;
        }
        summary::before {
            content: "\1F512";
            margin: 0 0.3em 0 -0.1em;
        }
        &amp;[open] summary::before {
            content: "\1F513";
        }
    }
&lt;/style&gt;
&lt;details&gt;
    &lt;summary&gt;A summary&lt;/summary&gt;
    Some details to further explain the summary.
&lt;/details&gt;
</code></pre></div>
        <p>
            And really, the <code>summary</code> element can contain anything at all, inviting our creativity.
            Here's a fancier example that replaces the marker by an animated svg icon.
        </p>
        <p><a href="https://plainvanillaweb.com/blog/articles/2026-03-09-details-matters/example3/index.html">replacing the marker, but more fancy</a></p>
        <div><pre><code>&lt;style&gt;
    details {
        summary {
            list-style: none;
            user-select: none;
            svg {
                display: inline-block;
                vertical-align: bottom;
                color: gray;
                rotate: 0;
                transition: rotate 0.3s ease-out;
            }
        }
        &amp;[open] summary {
            svg {
                rotate: 180deg;
            }
        }
    }
&lt;/style&gt;
&lt;details&gt;
    &lt;summary&gt;
        A summary
        &lt;svg focusable="false" width="24" height="24" aria-hidden="true"&gt;
            &lt;path d="M6.34317 7.75732L4.92896 9.17154L12 16.2426L19.0711 9.17157L17.6569 7.75735L12 13.4142L6.34317 7.75732Z" fill="currentColor" /&gt;
        &lt;/svg&gt;
    &lt;/summary&gt;
    Some details to further explain the summary.
&lt;/details&gt;
</code></pre></div>
        
        <p>
            There's no reason to stop at decorating the marker though.
            We can make the details element look like anything we want,
            all it takes is the right CSS. If we wanted, we could make it look like a card.
        </p>
        <p><a href="https://plainvanillaweb.com/blog/articles/2026-03-09-details-matters/example4/index.html">card-like appearance</a></p>
        <div><pre><code>&lt;style&gt;
    details {
        border: 1px solid gray;
        max-width: 20em;

        summary {
            position: relative;
            list-style: none;
            padding: 0.2em 0.4em;
            user-select: none;
            svg {
                position: absolute;
                right: 0.2em;
                top: 0.3em;
                color: gray;
                rotate: 0;
                transition: rotate 0.3s ease-out;
            }
        }

        &amp;[open] {
            summary {
                font-weight: bold;
                svg {
                    rotate: 180deg;
                }
            }

            &amp;::details-content {
                border-top: 1px solid gray;
                padding: 0.2em 0.4em;        
            }
        }
    }
&lt;/style&gt;
&lt;details&gt;
    &lt;summary&gt;
        A summary
        &lt;svg focusable="false" width="24" height="24" aria-hidden="true"&gt;
            &lt;path d="M6.34317 7.75732L4.92896 9.17154L12 16.2426L19.0711 9.17157L17.6569 7.75735L12 13.4142L6.34317 7.75732Z" fill="currentColor" /&gt;
        &lt;/svg&gt;
    &lt;/summary&gt;
    Some details to further explain the summary.
    And this is another sentence that spends a great deal of time saying nothing.
&lt;/details&gt;</code></pre></div>
        <p>
            One caveat with this example is the <code>::details-content</code> pseudo-element used to select
            the expanded content area. This is baseline 2025 so still pretty new. For older browsers you can wrap the content 
            in a div and style that instead.
        </p>

        <p>
            But wait, there's more! In baseline 2024 <code>&lt;details&gt;</code> picked up a neat trick
            where all the elements with the same <code>name</code> attribute are mutually exclusive,
            meaning only one can be open at the same time. All we have to do is stack them
            to magically get an accordion.
        </p>
        <p><a href="https://plainvanillaweb.com/blog/articles/2026-03-09-details-matters/example5/index.html">card-like appearance</a></p>
        <div><pre><code>&lt;style&gt;
    /* ... details styles repeated from previous example ... */

    details + details {
        border-top: none;
    }

    @supports (interpolate-size: allow-keywords) {
        :root {
            interpolate-size: allow-keywords;
        }

        details::details-content {
            /* allow discrete transitions for the details content (animating to height auto) */
            transition:
                height 0.3s ease,
                content-visibility 0.3s ease allow-discrete;
            /* hide the details content by default */
            height: 0;
            overflow: clip;
        }

        /* show the details content when the details is open */
        details[open]::details-content {
            height: auto;
        }
    }
&lt;/style&gt;
&lt;details name="accordion"&gt;
    ...
&lt;/details&gt;
&lt;details name="accordion"&gt;
    ...
&lt;/details&gt;
&lt;details name="accordion"&gt;
    ...
&lt;/details&gt;</code></pre></div>
        <p>
            There's no magic code here to make the accordion work aside from the <code>name</code> attributes. 
            HTML is doing the magic for us, which means this also happens to be fully keyboard-navigable and accessible.
            The only tricky bit is animating the expanding and collapsing of the cards.
            In this example that is implemented using <code>interpolate-size: allow-keywords</code>,
            which is a <a href="https://css-tricks.com/almanac/properties/i/interpolate-size/">Chromium-only trick</a> hopefully coming to other browsers near you.
            Thankfully in those other browsers this is still perfectly functional, just not as smoothly animating.
        </p>
        <p>
            By the way, the mutually exclusive &lt;details&gt; elements do not even need to share a parent element.
            These accordion cards could be wrapped in custom elements, or <code>&lt;fieldset&gt;</code> or <code>&lt;form&gt;</code> elements,
            and they would work just fine in all browsers, today. But you'll have to take my word for it.
            After all, I have to leave some exercises up to the reader. 😉
        </p>

        <p>
            Like I said, the richness of HTML continues to be a delightful surprise.
            If you ask me then <code>&lt;details&gt;</code> has a bright future ahead of it.
        </p>
        <p>
            No JavaScript was harmed in the making of this blog post.
        </p>
    ]]></content>
    </entry>
    <entry>
        <title><![CDATA[Redesigning Plain Vanilla]]></title>
        <link rel="alternate" type="text/html" href="https://plainvanillaweb.com/blog/articles/2026-03-01-redesigning-plain-vanilla/"/>
        <id>https://plainvanillaweb.com/blog/articles/2026-03-01-redesigning-plain-vanilla/</id>
        <published>2026-03-01T12:00:00.000Z</published>
        <updated>2026-03-01T12:00:00.000Z</updated>
        <summary><![CDATA[Stepping out of my comfort zone.]]></summary>
        <media:content url="https://plainvanillaweb.com/blog/articles/2026-03-01-redesigning-plain-vanilla/image.webp" type="image/webp" medium="image" />
        <author><name><![CDATA[Joeri Sebrechts]]></name></author>
        <content type="html"><![CDATA[
        <p>
            <em>Design</em> has never been the part of building for the web that I felt comfortable with.
            I would hide behind the shorthand "I'm not a designer" and just use someone else's design,
            or throw something together that I wasn't happy with.
            The original design of Plain Vanilla was shipped very much in that not-happy-with-it mindset.
        </p>
        <p>
            So when I decided to finally take a web design course, settling on <a href="https://designacademy.io/">DesignAcademy.io</a>
            and had to pick a project to apply the course's learnings to, turning this site's design into something I liked was top of mind. 
            This article documents how and why the new design came about.
        </p>
        <p>
            The course starts out by making you really think about the content that you want to apply a design to.
            They challenge you to make your web page work as a google doc, so I did precisely that.
            In revisiting the landing page and thinking through its text, about half of the characters were cut,
            without losing any of the meaning.
        </p>
        <p>
            <strong>Lesson 1</strong>: less is more.
        </p>
        <p>
            The next challenge the course throws at you is to decide on a style and to gather inspiration for your design.
            What I wanted the design of Plain Vanilla to communicate was a sort of timelessness,
            like a manual from an earlier time, that at the same time feels simple and fresh.
            In looking for inspiration I settled on <a href="https://en.wikipedia.org/wiki/Swiss_Style_(design)">Swiss style</a>,
            the 1950's minimalist style that manages to feel modern and old at the same time.
            I absolutely adore the old manuals from the 50's, as in the image at the top of this page,
            where minimalist design relying heavily on typography and spacing brings the content to the foreground.
        </p>
        <p>
            With this style and many googled-together examples of it as inspiration in hand, I took on the next challenge:
            make a first sketch of the design by simply copy pasting together elements of web sites and imagery
            that inspired you into a rough first outline. The second half of the challenge:
            take that design and layer your content over it. The result of this exercise was the initial redesign.
            Notice how the left half is literally copy pasted together bits of screenshots.
        </p>
        <img src="https://plainvanillaweb.com/blog/articles/2026-03-01-redesigning-plain-vanilla/sketch-1.webp" alt="initial redesign sketch" style="border: 1px solid gray;">
        <p>
            <strong>Lesson 2</strong>: taking ideas from everywhere is a quick way to get started.
        </p>
        <p>
            The rest of the course was a series of design exercises on top of that initial draft, 
            to choose fonts, colors, imagery, to apply a grid system and figure out spacing, and to sort out the finer aspects.
            Some elements of the initial redesign survived this process, others didn't, and what I ended up with
            in the final Affinity Designer file is pretty close to the shipping redesign.
        </p>
        <img src="https://plainvanillaweb.com/blog/articles/2026-03-01-redesigning-plain-vanilla/sketch-2.webp" alt="final redesign sketch" style="width: 400px; border: 1px solid gray;">
        <p>
            <strong>Lesson 3</strong>: design doesn't have to be intimidating if you have the right process.
        </p>
        <p>
            The actual work of translating of the design to code wasn't all that complicated.
            There was already a good baseline of semantic markup, so the redesign ended up mostly constrained
            to central CSS changes. Most of the time was taken up by responsiveness, something absent from the design mockup.
            Many of the final decisions on the exact behavior were made to favor code simplicity.
            This is for example why I decided not to add animations.
        </p>
        <p>
            This is also why I chose the popover API as the strategy for having a responsive hamburger menu on small screens.
            While the popover API presently only has 87% support on caniuse.com, I felt that for the audience of this site
            support should be sufficient, and the dramatic code simplification it allowed was undeniable.
            The nav menu works without <em>any</em> JavaScript. It presents as a toggled menu by default,
            and uses CSS to become permanently visible on larger screens.
        </p>
        <div><pre><code>&lt;nav id="menu-nav" popover aria-label="main"&gt;
    &lt;ol&gt;
        &lt;li&gt;&lt;a href="#" aria-current="page"&gt;Welcome&lt;/a&gt;&lt;/li&gt;
        &lt;li&gt;&lt;a href="pages/components.html"&gt;Components&lt;/a&gt;&lt;/li&gt;
        &lt;li&gt;&lt;a href="pages/styling.html"&gt;Styling&lt;/a&gt;&lt;/li&gt;
        &lt;li&gt;&lt;a href="pages/sites.html"&gt;Sites&lt;/a&gt;&lt;/li&gt;
        &lt;li&gt;&lt;a href="pages/applications.html"&gt;Applications&lt;/a&gt;&lt;/li&gt;
        &lt;li class="nav-right"&gt;&lt;a href="blog/"&gt;Blog&lt;/a&gt;&lt;/li&gt;
    &lt;/ol&gt;
&lt;/nav&gt;
&lt;button popovertarget="menu-nav" popovertargetaction="toggle" aria-label="menu"&gt;
    &amp;mldr;
&lt;/button&gt;</code></pre></div>
        <p>
            This was also a good opportunity to revisit the website's content.
            As it turns out, not a lot needed to change. Web standards don't actually change that often.
            I did update some parts where evolving baseline support took away caveats 
            (for example, CSS nesting is now safe to use), and added some links to newly baseline 
            features like popover, dialog and mutually-exclusive details.
        </p>
        <p>
            <strong>Lesson 4</strong>: when you build on top of web standards, you don't need to do a lot of maintenance.
        </p>
        <p>
            In the end, I'm finally happy with the design of Plain Vanilla.
            I still haven't gotten around to adding a dark mode, but it's on the todo list.
            There may be some hiccups with the new design, so if you see any please let me know by making an issue on GitHub.
            Do you like the new design, do you hate it? Please let me know.
        </p>
    ]]></content>
    </entry>
    <entry>
        <title><![CDATA[Local-first web application architecture]]></title>
        <link rel="alternate" type="text/html" href="https://plainvanillaweb.com/blog/articles/2025-07-16-local-first-architecture/"/>
        <id>https://plainvanillaweb.com/blog/articles/2025-07-16-local-first-architecture/</id>
        <published>2025-07-16T12:00:00.000Z</published>
        <updated>2025-07-16T12:00:00.000Z</updated>
        <summary><![CDATA[Maybe we just need to dig a little deeper (into the client).]]></summary>
        <media:content url="https://plainvanillaweb.com/blog/articles/2025-07-16-local-first-architecture/image.webp" type="image/webp" medium="image" />
        <author><name><![CDATA[Joeri Sebrechts]]></name></author>
        <content type="html"><![CDATA[
        <p>
            Previously in <a href="../2025-07-13-history-architecture/">the history of web application architecture</a> 
            I covered the different ways that people have tried to build web applications, and how all of them came with 
            their own unique set of drawbacks.
            Also mentioned was how there is one drawback that they all share: 
            there is a whole internet between a user and their data,
            and this makes it hard to deliver a top notch user experience.
        </p>

        <h3>Tail latency matters</h3>
        <p>
            On the surface, it doesn't seem like this should be the case. Networks are fast, right?
            But the truth is, they're only fast for some of the people some of the time.
        </p>
        <p>
            Look at the page load numbers (LCP) of this website for the last week (gathered anonymously):
        </p>
        <ul>
            <li>P50: 650 ms</li>
            <li>P75: 1200 ms</li>
            <li>P90: 2148 ms</li>
            <li>P99: 10,636 ms</li>
        </ul>
        <p>
            While half of the visits see page load times well below a second,
            many see times that are much, much higher. Part of this is due to geography.
            Going through <a href="https://learn.microsoft.com/en-us/azure/networking/azure-network-latency?tabs=Europe%2CWesternEurope">Azure's P50 roundtrip latency times</a> we can see that
            some remote connections, like France to Australia, are in the 250 ms range, data center to data center.
            Azure doesn't disclose P99 latency, but one may assume it is a multiple of the P50 latency.
        </p>
        <p>
            But our user isn't sitting in a data center, they're probably on a mobile phone,
            connecting through a slow network. Looking at <a href="https://developer.mozilla.org/en-US/docs/Web/Performance/Guides/Understanding_latency">mozilla's minimum latency numbers</a> 
            we can see that it's not unusual to see another 100 ms of roundtrip latency added by the mobile network,
            and in reality owing to packet loss and TCP retries it can be a lot more. My own experience taking the train into the office,
            and trying to get some work done, is that the web can slow to a crawl as I pass through dead zones.
            This is in a densely populated area in a rich country on the most expensive cell service provider. 
            Most people do not have these same luxuries.
        </p>
        <p>
            So it's not unusual to see latencies climb far above the threshold of 100 ms,
            commonly regarded as the threshold for an <em>immediate</em> response.
            For an unlucky minority of users latencies can even climb above half a second.
            This matters because if we have to hit the server to do something with the user's data 
            on every click, we will have noticeable and frustrating delay in the interaction.
            To get a feel of this delay, here's a simulator where you can try out roundtrip latencies
            from 50 ms to one second:
        </p>
        <p><a href="https://plainvanillaweb.com/blog/articles/2025-07-16-local-first-architecture/example1.html">roundtrip latency simulator</a></p>
        <p>
            Can you tell how much nicer 100 ms and below feel?
            How the buttons actually <em>feel</em> lighter to press?
            By contrast, 500 ms and above of roundtrip latency are just a slog, painful to use.
            The buttons are heavy and cumbersome. This is human psychology at work,
            and these lessons were learned in the desktop era but forgotten and never quite relearned for the web.
            If we put over 100 ms of latency in between a user's click and the resulting effect
            they will feel some degree of frustration, and we know that the internet cannot deliver below 100 ms of roundtrip latency
            except in the luckiest of cases.
        </p>
        
        <h3>Solutions</h3>

        <p>
            We can use some kind of closer-to-the-user cache,
            in the form of a CDN or a browser cache or a service worker. This allows the content that needs to be loaded 
            based on the user's click to be fetched from something that has a better shot at being below that magic 100 ms
            of latency. But this only works if what we need to load can be cached,
            and if we can afford to cache it. For a web application that works with user data, this is typically not the case.
        </p>
        <p>
            We can host the application in a georedundant way, have application servers
            across the world and use a georedundant database like Google Spanner or Azure Cosmos DB. 
            This quickly gets complicated and expensive, and can only be achieved 
            through a great amount of vendor lock-in. Crucially, it probably does not get us past the 100 ms barrier anyway.
        </p>
        <p>
            We can render client-side, using JavaScript to create and update the HTML page,
            so that an update on the screen can happen immediately after the user's click.
            But this only works if what the user is doing is not updating a piece of server-side data.
            Otherwise we have to show some kind of loading or saving indicator until the server responds, 
            and then we're back to roundtrip latency.
        </p>
        <p>
            Bottom line, and once again: the basic problem is that the internet is in between the user and their data.
            So what if we moved the data to the user?
        </p>

        <h3>Local-first</h3>

        <p>
            This concept has been around for a while and it is known as a <a href="https://www.inkandswitch.com/essay/local-first/">local-first application</a>.
            To apply it to the web, let's start from the basic design of a client-side rendered web application
            as covered in the previous article:
        </p>
        <img src="https://plainvanillaweb.com/blog/articles/2025-07-16-local-first-architecture/architectures/modern-SPA.webp" alt="architecture diagram of a client-side rendered web application" width="1830" height="1444" loading="lazy">
        <p>
            This design does not need the server for rendering, so it has the theoretical potential to hit 100 ms.
            But because the user's interactions have to fetch data from the remote database and update it as well – 
            a database sitting multiple network hops away –
            in practice we rarely actually hit that low latency.
            We can <em>move the data to the user</em> by doing something like this:
        </p>
        <img src="https://plainvanillaweb.com/blog/articles/2025-07-16-local-first-architecture/architectures/local-first-partial.webp" alt="architecture diagram of a local-first application with server-side sync" width="1806" height="1502" loading="lazy">
        <p>
            The user's data gets duplicated into a local IndexedDB. More than duplicated actually as
            this becomes the only copy of the data that the user will interact with directly.
            The <em>backend-for-frontend</em> and API that used to gatekeep access to this data similarly get moved into the client,
            as part of a service worker. This worker code can be very similar to what the server-side version would be, 
            it can even reuse express (although it probably shouldn't).
            Because the service worker's API for all intents and purposes looks like a server-side API to the frontend codebase,
            that frontend can be built in all the usual ways, 
            except now with the guarantee that every server roundtrip completes in milliseconds.
        </p>
        <p>
            To avoid slow page loads each time the web application is opened
            it also needs to be cached locally as part of the service worker.
            By packaging this as a <em>progressive web app</em> installs become possible onto the user's home screen,
            giving an experience not that unlike installing a native mobile app.
            The application server's job is now reduced to only providing that initial application install,
            and it can become a simple (and free) static web host.
        </p>
        
        <h3>Here comes trouble</h3>
        <p>
            Both the application and the data are now running locally,
            meaning the user doesn't need the network <em>at all</em> to get things done.
            This isn't just local-first, it is offline-first.
            But like all things in software architecture, we are trading one set of problems for another.
        </p>
        <p>
            There still needs to be a way to get data onto other devices, or to other users,
            or simply backed up into the cloud. That means the service worker also gets the job of
            (asynchronously) uploading changes to a server API which will store it in a database,
            as well as pulling server-side changes back down. The server-side version acts as the master copy,
            and the server-side API gets the thankless job of merging client-side changes with it.
        </p>
        <p>
            Not so fast though. Our user might be editing offline for a considerably long time,
            and the data on the server may have been changed in the meanwhile from another device or by another user.
            The job of merging those changes can be ... <em>complicated</em>.
            A good strategy is needed for merging. A possible path is to use CRDT algorithms from a library like 
            <a href="https://github.com/automerge/automerge">automerge</a>, as suggested by the local-first article linked above.
            However, for many cases a simpler bespoke algorithm that is aware of the specific data types being merged probably works well enough,
            as I discovered when making an offline-capable work orders web application that used this strategy.
        </p>
        <p>
            As the local-first application is now directly talking to this API,
            it needs a way to authenticate. This can be a reason to still have a minimal 
            <em>backend-for-frontend</em> on the server. An alternative is to use a separate 
            OpenID Connect identity provider with a PKCE authorization flow to obtain an access token.
            <a href="https://blog.postman.com/what-is-pkce/">PKCE</a> is an authorization flow developed for use by mobile apps but also usable by web apps 
            that enables secretless API authentication.
        </p>
        <p>
            Another major caveat is that the entire codebase needs to be on the client,
            which necessitates keeping it under a tight performance and size budget.
            Careful curation of dependencies is key, and a javascript footprint that runs in the megabytes is verboten.
            Vanilla web development can be a solution here, with its emphasis on using the platform to its limits
            without bringing in dependencies. A lightweight framework like Lit or Preact will do as well.
        </p>
        <p>
            This isn't just a theoretical exercise. The team at <a href="https://superhuman.com/">Superhuman</a> built their better gmail than gmail 
            more or less as described here, using React as the framework, and the thing that sets their web app apart is its blistering speed.
            You can go read how they did it on their blog (<a href="https://blog.superhuman.com/architecting-a-web-app-to-just-work-offline-part-1/">part 1</a>, 
            <a href="https://blog.superhuman.com/building-reliable-apps-on-unreliable-networks/">part 2</a>) or listen to the retelling on the 
            <a href="https://syntax.fm/show/918/extreme-native-perf-on-the-web-with-superhuman">Syntax podcast</a>.
        </p>

        <h3>Loco-first</h3>

        <p>
            But we can push it even further, in theory at least. In the previous iteration of the architecture we still have
            the application-specific database and syncing logic on the server,
            but what if we instead did away with every last piece of server-side application logic?
        </p>
        <img src="https://plainvanillaweb.com/blog/articles/2025-07-16-local-first-architecture/architectures/local-first-full.webp" alt="architecture diagram of a local-first application without server-side logic" width="1768" height="1372" loading="lazy">
        <p>
            The syncing engine now gets moved in the client, and what it uploads to the server are just files.
            That means all we need is a generic cloud drive, like Dropbox or Onedrive.
            These cloud drive services often support cross-origin API access with OpenID Connect authentication using PKCE.
            That means the service worker in the client doesn't need any application servers to upload its data
            to the cloud storage.
        </p>
        <p>
            The onboarding experience becomes a choice screen where the user picks their cloud drive option.
            The application will redirect the user to the Dropbox or Onedrive or &lt;insert vendor here&gt; login page,
            and obtains an access token using PKCE authorization flow that is persisted locally.
            This token is used to connect to the user's cloud drive from inside the service worker.
            The application will bootstrap itself from whatever files are already in the drive,
            and will regularly synchronize with the current contents of the drive using its service worker logic.
        </p>
        <p>
            Instead of a cloud drive, another option is the use of the <a href="https://wicg.github.io/file-system-access/">File System Access API</a> to get a handle to a <em>local folder</em>.
            The user can set up this folder as cloud-synced, or they can back it up and copy it to other devices using a method of their choice.
            This solution allows the app to have complete privacy, as the user's data never leaves their device
            or network. The caveat is <a href="https://caniuse.com/native-filesystem-api">incomplete browser support</a>.
            Come on Safari and Firefox, do your bit, for privacy!
        </p>
        <p>
            In a single user scenario, each of their devices uploads its own copy of the data, either as a history of actions or as the latest state.
            When a device's service worker wants to sync, it checks all of the files of the other devices to see if they have been modified.
            If they are, it downloads updates and merges them into the local IndexedDB.
            This is the same work as the previous architecture iteration did in its server-side syncing API, only now in reverse: instead of every device going to the server 
            and presenting its copy to merge, it is the service worker going to each device's copy and checking if it needs merging.
        </p>
        <p>
            There is no longer a <em>master copy</em> of the data, only one copy per device, all on equal footing,
            with an eventual consistency arising out of the devices merging from each other's copies.
            This is the same philosophy as CRDTs, or of the <em>Operational Transformation</em> algorithm that underpins Google Docs.
            No matter though, when you get deep enough into consistency models (I recommend <a href="https://jepsen.io/consistency">Aphyr's writings</a>
            or <a href="https://www.oreilly.com/library/view/designing-data-intensive-applications/9781491903063/">Martin Kleppmann's book</a>), 
            you'll realize that there is <em>never</em> such as a thing as a reliable master copy in a distributed system, 
            even in cases where there is a central database.
        </p>
        <p>
            A multi-user scenario can be realized by our user subscribing to someone else's shared cloud drive folder,
            where the other user shares their copy of the data as read-only. When Alice shares her folder with Bob,
            Bob shares his with Alice, and they both subscribe to each other's updates, 
            then they can work on a shared document without ever having given each other direct write access.
        </p>
        <p>
            As this application has no servers outside of the lightly loaded static web host, which in 2025 is free to host even at scale,
            the hosting cost drops to zero almost regardless of the number of users. The cloud drive costs are carried by each user individually,
            only responsible for their own share of storage. The only hosting cost to the application's owner would be the domain name.
            The climate footprint is minimal.
        </p>
        <p>
            By eliminating the central database and its adjoining server-side logic it also eliminates the main target for hackers.
            Because compromises can only occur one user at a time they lack a sufficient reward for hacking the application.
            On top of that, the only servers are the static web host and the major cloud drive vendors,
            both practically impossible to hack. This web app would be highly secure and remain secure with barely any maintenance.
        </p>
        <p>
            This architecture would be a cloud vendor's worst nightmare if it ever became popular,
            as they cannot earn a dime from it (aside from the basic cloud drive pennies).
            Thankfully for them, it is impossible to monetize for the company that builds such a web app as well.
            No server == no revenue opportunity. For now this is just a crazy theoretical exercise, 
            far removed from where the leading frontend architecture voices are driving us, 
            but the possibility fascinates me.
        </p>        
    ]]></content>
    </entry>
    <entry>
        <title><![CDATA[The history of web application architecture]]></title>
        <link rel="alternate" type="text/html" href="https://plainvanillaweb.com/blog/articles/2025-07-13-history-architecture/"/>
        <id>https://plainvanillaweb.com/blog/articles/2025-07-13-history-architecture/</id>
        <published>2025-07-13T12:00:00.000Z</published>
        <updated>2025-07-13T12:00:00.000Z</updated>
        <summary><![CDATA[The many different ways of building for the web, and their many frustrations.]]></summary>
        <media:content url="https://plainvanillaweb.com/blog/articles/2025-07-13-history-architecture/image.webp" type="image/webp" medium="image" />
        <author><name><![CDATA[Joeri Sebrechts]]></name></author>
        <content type="html"><![CDATA[
        <p>
            I'm old enough to remember what it was like. I first got online in 1994, but by then I was using computers for a few years already.
            That means I was there for the whole ride, the entire history of web application architecture, 
            from the before times to the present day.
            So this post will be an overview of the various ways to make a web app, past and present, 
            and their relative trade-offs as I experienced them.
        </p>
        <p>
            Just to set expectations right: this will cover architectures targeted primarily at proper applications, 
            of the sort that work with user data, and where most screens have to be made unique based on that user data.
            Web sites where the different visitors are presented with identical pages are a different beast.
            Although many of these architectures overlap with that use case, it will not be the focus here.
        </p>
        <p>
            Also, while I will be mentioning some frameworks, they are equally not the focus.
            Where you see a framework, you can slot in vanilla web development with a bespoke solution.
        </p>
        <p>
            This will be a long one, so grab a snack, take some time, and let's get going.
        </p>

        <h3>Before time began</h3>
        <p>
            Back when people first went online, the ruling architecture was <em>offline-first</em>.
            It looked sort of like this:
        </p>
        <img src="https://plainvanillaweb.com/blog/articles/2025-07-13-history-architecture/architectures/old-school-desktop.webp" alt="architecture diagram of user sending a local file via e-mail">
        <p>
            Our user would have a proper desktop application, written in C or C++ most likely,
            and that would work with local files on their local file system, all perfectly functional when offline.
            When they wanted to "go online" and share their work, they would dial in to the internet,
            start their e-mail client and patiently send an e-mail to their friend or colleague containing 
            a copy of their file as an attachment.
        </p>
        <p>
            This architecture was very simple, and it worked well in the absence of a reliable and fast internet connection.
            This was a good thing because at the time most people <em>never had</em> a reliable and fast internet connection.
            There were problems though. For one, the bootstrapping problem: how do you get everyone to have the application 
            installed so they can open and edit the file they received via e-mail?
            Also, the syncing problem: how are changes kept in sync between multiple devices and users?
            Merging edits from different files that could have <em>weeks</em> of incompatible edits was always 
            somewhere between frustrating and impossible.
        </p>

        <h3>Traditional server-side rendering</h3>
        <p>
            Web applications promised they would solve both problems. At first we built them like this:
        </p>
        <img src="https://plainvanillaweb.com/blog/articles/2025-07-13-history-architecture/architectures/traditional-ssr.webp" alt="architecture diagram of a traditional server-side rendered web application" width="1586" height="1324" loading="lazy">
        <p>
            The first thing we did was move all of the stuff from all of the users into a central database somewhere online.
            Because this database was shared between the users, it became a lot more easy to keep their changes in sync.
            If one user made an edit to something, everyone else would see it on the next refresh.
        </p>
        <p>
            To allow users to actually get at this database we had to give them an application to do it.
            This new-fangled thing called a <em>web application</em> running on a <em>web application server</em> would take http requests
            coming from the user's browser, SQL query the database for the right set of stuff, 
            and send back an entire web page. Every click, every submit, it would generate a whole new page.
        </p>
        <p>
            Deployment of those early web applications was often suspiciously simple:
            someone would connect via FTP to a server, and copy over the files from their local machine.
            There often weren't even any build steps. There was no step 3.
        </p>
        <p>
            On the one hand this architecture was convenient. It solved the bootstrapping problem 
            by only demanding that each user have a web browser and an internet connection.
            It also moved all of the application logic over to the server, keeping it neatly in one place.
            Crucially it kept the browser's task minimal, important in an era where browsers were much less capable
            and PC's were orders of magnitude slower than today. If done well, it could even be used to make
            web applications that still worked with JavaScript disabled. My first mobile web app was like that,
            sneakily using HTML forms with multiple submit actions and hidden input fields
            to present interactive navigation through a CRUD interface.
        </p>
        <p>
            On the other hand, it had many problems, especially early on. HTML wasn't very good, CSS was in its infancy,
            and early JavaScript was mostly useless. It was hard going building <em>anything at all</em> on the early web.
            On top of that, web developers were a new breed, and they had to relearn many of the architecture lessons their desktop developer
            colleagues had already learned through bitter experience. For example, everyone has heard of the adage
            "If you don't choose a framework, you'll end up building a worse one yourself." That is because for the first few years
            building your own terrible framework as you went was the norm, until everyone wisened up and started preaching this wisdom. 
            For sure, my own first experiments in web application development in PHP 3 and 4 were all 
            without the benefit of a proper framework.
        </p>
        <p>
            Web developers also had to learn lessons that their desktop counterparts never had to contend with.
            Moving the application to the server was convenient, but it exposed it to hackers from all across the world,
            and the early web application landscape was riddled with embarrassing hacks.
            Because the threat level on the internet keeps rising this remains a major headache to this day.
        </p>
        <p>
            Another novel problem was having to care a whole lot about connectivity and server uptime.
            Because users literally couldn't do anything at all if they didn't have a connection to a working web server,
            making sure that connection was always there became a pervasive headache.
            Going to a site and seeing an error 500 message was unsurprisingly common in those early years.
        </p>
        <p>
            The biggest problems however were throughput, bandwidth and latency. Because almost every click had to reload the whole page,
            doing anything at all in those early web applications was <em>slow</em>, like <em>really, really slow</em>.
            At the time, servers were slow to render the page, networks slow to transport it, and PC's and browsers slow to render.
            That couldn't stand, so something had to change. It was at this point that we saw a fork in the road,
            and the web developer community split up into two schools of thought that each went their own way.
            Although, as you will see, they are drawing closer again.
        </p>

        <h3>Modern server-side rendering</h3>

        <p>
            One branch of the web development tree doubled down on server-side rendering,
            building further on top of the existing server-side frameworks.
        </p>
        <img src="https://plainvanillaweb.com/blog/articles/2025-07-13-history-architecture/architectures/liveview.webp" alt="architecture diagram of a server-side rendered application with liveview templates" width="1588" height="1324" loading="lazy">
        <p>
            They tackled the problems imposed by throughput and latency by
            moving over to a model of partial page updates, where small bits of user-activated JavaScript
            (originally mostly built with jQuery) would update parts of the page with HTML partials
            that they fetched from the server.
        </p>
        <p>
            The evolution of this architecture are so called <em>LiveViews</em>.
            This is a design first popularized by the Phoenix framework for the obscure Elixir programming language,
            but quickly <a href="https://github.com/liveviews/liveviews">adopted in many places</a>.
        </p>
        <p>
            It uses framework logic to automatically wire up server-side generated templates with bits of JavaScript
            that will automatically call the server to fetch partial page updates when necessary.
            The developer has the convenience of not thinking about client-side scripting, 
            while the users get an interactive user experience similar to a JavaScript-rich frontend.
            Typically the client keeps an open websocket connection to the server,
            so that server-side changes are quickly and automatically streamed into the page as soon as they occur.
        </p>
        <p>
            This architecture is conceptually simple to work with as all the logic remains on the server.
            It also doesn't ask much from the browser, good for slow devices and bandwidth-constrained environments.
            As a consequence it finds a sweet spot in mostly static content-driven web sites.
        </p>
        <p>
            But nothing is without trade-offs. This design hits the server on almost every interaction and has no path to offline functionality.
            Network latency and reliability are its UX killer, and especially on mobile phones – the main way people interact with web apps these days –
            those can still be a challenge. While this can be mitigated somewhat through browser caching, the limitation is always there.
            After all, the more that page content is dictated by realtime user input, the more necessary it becomes to push logic to the client.
            In cases where the network is good however, it can seem like magic even for highly interactive applications, 
            and for that reason it has its diehard fans.
        </p>

        <h3>Client-side rendering</h3>
        <p>
            There was another branch of web development practice, let's say the ones who were fonder
            of clever architecture, who had a crazy thought: what if we moved rendering data to HTML from the server to the browser?
            They built new frameworks, in JavaScript, designed to run in the browser
            so that the application could be shipped as a whole as part of the initial page load, 
            and every navigation would only need to fetch data for the new route.
            In theory this allowed for smaller and less frequent roundtrips to the server,
            and therefore an improvement to the user experience.
            Thanks to a blooming cottage industry of industry insiders advertising its benefits, it became the dominant architecture for new web applications,
            with React as the framework of choice to run inside the browser.
        </p>
        <p>
            This method taken to its modern best practice extreme looks like this:
        </p>
        <img src="https://plainvanillaweb.com/blog/articles/2025-07-13-history-architecture/architectures/modern-SPA.webp" alt="Architecture diagram of a client-side rendered single-page application" width="1830" height="1444" loading="lazy">
        <p>
            It starts out by moving the application, its framework, and its other dependencies over to the browser.
            When the page is loaded the entire bundle gets loaded, and then pages can be rendered as routes inside of the single-page application.
            Every time a new route needs to be rendered the data gets fetched from the server, not the HTML.
        </p>
        <p>
            The web application server's job is now just providing the application bundle as a single HTML page,
            and providing API endpoints for loading JSON data for every route. 
            Because those API endpoints naturally end up mirroring the frontend's routes this part usually gets called the <em>backend-for-frontend</em>.
            This job was so different from the old web server's role that a new generation of frameworks sprung up to be a better fit. 
            Express on node became a very popular choice, as it allowed a great deal of similarity between browser and server codebases,
            although in practice there's usually not much actual code in common.
        </p>
        <p>
            For security reasons – after all, the web application servers are on the increasingly dangerous public internet –
            the best practice became to host backends-for-frontend in a DMZ, a demilitarized zone
            where the assumption has to be that security is temporary and hostile interlopers could arrive at any time.
            In addition, if an organization has multiple frontends (and if they have a mobile app they probably have at least two),
            then this DMZ will contain multiple backends for frontend.
        </p>
        <p>
            Because there is only a single database to share between those different BFFs, 
            and because of the security risks of connecting to the database from the dangerous DMZ,
            a best practice became to keep the backend-for-frontend focused on just the part of serving the frontend,
            and to wrap the database in a separate thing. This separate <em>microservice</em>
            is an application whose sole job is publishing an API that gatekeeps access to the database.
            This API is usually in a separate network segment, shielded by firewalls or API gateways,
            and it is often built in yet another framework better tailored for building APIs, 
            or even in a different programming language like Go or C#.
        </p>
        <p>
            Of course, having only one microservice is kind of a lonely affair, 
            so even organizations of moderate size would often end up having their backends-for-frontend each talking to multiple microservices.
        </p>
        <p>
            That's just too many servers to manage, too many network connections to configure, too many builds to run, 
            so people by and large stopped managing their own servers, either for running builds or for runtime hosting.
            Instead they moved to the cloud, where someone else manages the server, and hosted their backends
            as docker containers or serverless functions deployed by git-powered CI/CD pipelines.
            This made some people fabulously wealthy. After all, 74% of Amazon's profit is made from AWS,
            and over a third of Microsoft's from Azure.
            It is no accident that there is a persistent drumbeat that everyone should move everything to the cloud.
            Those margins aren't going to pad themselves.
        </p>
        <p>
            Incidentally, microservices as database intermediary are also a thing in the world of server-side rendered applications,
            but in my personal observation those teams seem to choose this strategy less often.
            Equally incidentally, the word <em>serverless</em> in the context of serverless functions was and is highly amusing to me, 
            since it requires just as many servers, if not more. (I know why it's called that way, that doesn't make it any less funny.)
        </p>
        <p>
            On paper this client-side rendered architecture has many positive qualities. It is highly modular,
            which makes the work easy to split up across developers or teams. It pushes page rendering logic into
            the browser, creating the potential to have a low latency and high quality user experience.
            The layered nature of the backend and limited scope of the internet-facing backend-for-frontend forms
            a solid defensive moat against cyberattacks. And the cloud-hosted infrastructure is low effort to manage and easy to scale.
            A design like this is every architecture astronomer's dream, and I was for a while very enamored with it myself.
        </p>
        <p>
            In practice though, it just doesn't work very well. It's just too <em>complicated</em>.
            For larger experienced teams in large organizations it can kind of sort of make sense,
            and it is no surprise that big tech is a heavy proponent of this architecture.
            But step away from web-scale for just a second and there's too many parts to build and deploy and keep track of,
            too many technologies to learn, too many hops a data request has to travel through. 
        </p>
        <p>
            The application's logic gets smeared out across three or more independent codebases,
            and a lot of overhead is created in keeping all of those in sync.
            Adding a single data field to a type can suddenly become a whole project. For one application I was working on
            I once counted in how many places a particular type was explicitly defined, and the tally reached lucky number 7.
            It is no accident that right around the time that this architecture peaked the use of monorepo tools 
            to bundle multiple projects into a single repository peaked as well.
        </p>
        <p>
            Go talk to some people just starting out with web development
            and see how lost they get in trying to figure out all of this <em>stuff</em>, 
            learning all the technologies comprising the Rube Goldberg machine that produces a webpage at the end.
            See just how little time they have left to dedicate to learning vanilla HTML, CSS and JS, 
            arguably the key things a beginner should be focusing on.
        </p>
        <p>
            Moreover, the promise that moving the application entirely to the browser would improve the user experience mostly <a href="https://gitnation.com/contents/project-fugu-bringing-hardware-capabilities-to-the-web-safely">did not pan out</a>.
            As applications built with client-side frameworks like React or Angular grew, the bundle to be shipped in a page load ballooned to <em>megabytes</em> in size.
            The slowest quintile of devices and network connections struggled mightily with these heavy JavaScript payloads.
            It was hoped that Moore's law would solve this problem, but the dynamics of how (mobile) device and internet provider markets work
            mean that it hasn't been, and that it won't be any time soon. It's not impossible to build a great user experience 
            with this architecture, but you're starting from behind. Well, at least for public-facing web applications.
        </p>

        <h3>Client-side rendering with server offload</h3>
        <p>
            The designers of client-side frameworks were not wholly insensitive to the frustrations of developers 
            trying to make client-side rendered single-page applications work well on devices and connections 
            that weren't up to the job. They started to offload more and more of the rendering work back to the server.
            In situations where the content of a page is fixed, <em>static site generation</em> can execute
            the client-side framework at build time to pre-render pages to HTML.
            And for situations where content has a dynamic character, <em>server-side rendering</em> was reintroduced 
            back into the mix to offload some of the rendering work back to the server.
        </p>
        <p>
            The current evolution of these trends is the streaming single-page application:
        </p>
        <img src="https://plainvanillaweb.com/blog/articles/2025-07-13-history-architecture/architectures/streaming-SPA.webp" alt="architecture diagram of a streaming single-page application" width="1830" height="1544" loading="lazy">

        <p>
            In this architecture the framework runs the show in both backend-for-frontend and in the browser.
            It decides where the rendering happens, and only pushes the work to the browser that must run there.
            When possible the page is shipped prerendered to the browser and the code for the prerendered parts 
            is not needed in the client bundle.
            Because some parts of the page are more dynamic than others, they can be rendered on-demand in the server 
            and <em>streamed</em> to the browser where they are slotted into the prerendered page.
            The bundle that is shipped to the browser can be kept light-weight because it mostly just needs 
            to respond to user input by streaming the necessary page updates from the server over an open websocket connection.
        </p>
        <p>
            If that sounds suspiciously like the architecture for modern server-side rendering that I described before,
            that is because it basically is. While a Next.JS codebase is likely to have some
            client-rendered components still, the extreme of a best practice Astro codebase would 
            see every last component rendered on the server. 
            In doing that they arrive at something functionally no different from LiveView architecture,
            and with a similar set of trade-offs. These architectures are simpler to work with, but they 
            perform poorly for dynamic applications on low reliability or high latency connections,
            and they cannot work offline.
        </p>
        <p>
            Another major simplication of the architecture is getting rid of the database middleman.
            Microservices and serverless functions are not as hyped as they were, 
            people are happy to build so-called <em>monoliths</em> again, 
            and frameworks are happy to recommend they do so.
            The meta-frameworks now suggest that the API can be merged into the web application frontend, 
            and the framework will know that those parts are only meant to be run on the server.
            This radically simplifies the codebase, we're back to a single codebase for the entire application
            managed by a single framework.
        </p>
        <p>
            However, <a href="https://en.wikipedia.org/wiki/No_such_thing_as_a_free_lunch">TANSTAAFL</a>. This simplification comes at the expense of other things. The Next.JS documentation may claim
            <em>"Since Server Components are rendered on the server, you can safely make database queries using an ORM or database client."</em>
            but that doesn't mean that it's actually safe to allow the part that faces the internet to have a direct line to the database.
            Defense in depth was a good idea, and we're back to trading security for simplicity.
            There were other reasons that monoliths once fell out of favor. It's like we're now forgetting lessons that were already learned.
        </p>

        <h3>Where does that leave us?</h3>

        <p>
            So, which architecture should you pick? I wish I could tell you,
            but you should have understood by now that the answer was always going to be <em>it depends</em>.
            Riffing on the work of Tolstoy: all web architectures are alike in that they are unhappy in their own unique way.
        </p>
        <p>
            In a sense, all of these architectures are also unhappy in the same way:
            there's a whole internet in between the user and their data.
            There's a golden rule in software architecture: you can't beat physics with code.
            We draw the internet on diagrams as a cute little cloud, pretending it is not a physical thing.
            But the internet is wires, and antennas, and satellites, and data centers, and all kinds of physical things and places.
            Sending a signal through all those physical things and places will always be somewhat unreliable and somewhat slow.
            We cannot reliably deliver on the promise of a great user experience as long as we put a cute little cloud 
            in between the user and their stuff.
        </p>
        <p>
            In the next article I'll be exploring an obscure but very different architecture,
            a crazy thought similar to that of client-side rendering:
            what happens when we move the user's data from the server back into the client?
            What is <a href="../2025-07-16-local-first-architecture/">local-first web application architecture</a>?
        </p>
    ]]></content>
    </entry>
    <entry>
        <title><![CDATA[Clean client-side routing]]></title>
        <link rel="alternate" type="text/html" href="https://plainvanillaweb.com/blog/articles/2025-06-25-routing/"/>
        <id>https://plainvanillaweb.com/blog/articles/2025-06-25-routing/</id>
        <published>2025-06-25T12:00:00.000Z</published>
        <updated>2025-06-25T12:00:00.000Z</updated>
        <summary><![CDATA[Finding a nice way of doing single-page app routing without a library.]]></summary>
        <media:content url="https://plainvanillaweb.com/blog/articles/2025-06-25-routing/image.webp" type="image/webp" medium="image" />
        <author><name><![CDATA[Joeri Sebrechts]]></name></author>
        <content type="html"><![CDATA[
        <p>
            The main Plain Vanilla tutorial explains two ways of doing client-side routing.
            Both use old school anchor tags for route navigation.
            First is the traditional multi-page approach described on the Sites page as one HTML file per route,
            great for content sites, not so great for web applications.
            Second is the hash-based routing approach decribed on the Applications page, one custom element per route,
            better for web applications, but not for having clean URLs or having Google index your content.
        </p>
        <p>
            In this article I will describe a third way, single-file and single-page but with clean URLs using the <code>pushState</code> API,
            and still using anchor tags for route navigation.
            The conceit of this technique will be that it needs more code, and the tiniest bit of server cooperation.
        </p>
        <h3>Intercepting anchor clicks</h3>
        <p>
            To get a true single-page experience the first thing we have to do is intercept link tag navigation and redirect them to in-page events.
            Our SPA can then respond to these events by updating its routes.
        </p><p>

        <div><pre><code>export const routerEvents = new EventTarget();

export const interceptNavigation = (root) =&gt; {
    // convert link clicks to navigate events
    root.addEventListener('click', handleLinkClick);
    // convert navigate events to pushState() calls
    routerEvents.addEventListener('navigate', handleNavigate);
}

const handleLinkClick = (e) =&gt; {
    const a = e.target.closest('a');
    if (a &amp;&amp; a.href) {
        e.preventDefault();
        const anchorUrl = new URL(a.href);
        const pageUrl = anchorUrl.pathname + anchorUrl.search + anchorUrl.hash;
        routerEvents.dispatchEvent(new CustomEvent('navigate', { detail: { url: pageUrl, a }}));
    }
}

const handleNavigate = (e) =&gt; {
    history.pushState(null, null, e.detail.url);
}
</code></pre></div>

        </p><p>
            In an example HTML page we can leverage this to implement routing in a <code>&lt;demo-app&gt;&lt;/demo-app&gt;</code> element.
        </p>
        <div><pre><code>import { routerEvents, interceptNavigation } from './view-route.js';

customElements.define('demo-app', class extends HTMLElement {

    #route = '/';

    constructor() {
        super();
        interceptNavigation(document.body);
        routerEvents.addEventListener('navigate', (e) =&gt; {
            this.#route = e.detail.url;
            this.update();
        });
    }

    connectedCallback() {
        this.update();
    }

    update() {
        if (this.#route === '/') {
            this.innerHTML = 'This is the homepage. &lt;a href="/details"&gt;Go to the details page&lt;/a&gt;.';
        } else if (this.#route === '/details') {
            this.innerHTML = 'This is the details page. &lt;a href="/"&gt;Go to the home page&lt;/a&gt;.';
        } else {
            this.innerHTML = `The page ${this.#route} does not exist. &lt;a href="/"&gt;Go to the home page&lt;/a&gt;.`;
        }
        this.innerHTML += `&lt;br&gt;Current route: ${this.#route}`;
    }
});
</code></pre></div>
        <p><a href="https://plainvanillaweb.com/blog/articles/2025-06-25-routing/example1/index.html">example 1</a></p>
        

        <p>
            The first thing we're doing in <code>view-route.js</code> is the <code>interceptNavigation()</code> function.
            It adds an event handler at the top of the DOM that traps bubbling link clicks and turns them into a <code>navigate</code> event instead of the default action of browser page navigation.
            Then it also adds a <code>navigate</code> event listener that will update the browser's URL by calling <a href="https://developer.mozilla.org/en-US/docs/Web/API/History/pushState">pushState</a>.
        </p>
        <p>
            In <code>app.js</code> we can listen to the same <code>navigate</code> event to actually update the routes.
            Suddenly we've implemented a very basic in-page routing, but there are still a bunch of missing pieces.
        </p>

        <h3>There and back again</h3>

        <p>
            For one, browser back and forward buttons don't actually work.
            We can click and see the URL update in the browser, but the page does not respond.
            In order to do this, we need to start listening to <a href="https://developer.mozilla.org/en-US/docs/Web/API/Window/popstate_event">popstate</a> events.
        </p>
        <p>
            However, this risks creating diverging code paths for route navigation, one for the <code>navigate</code> event and one for the <code>popstate</code> event.
            Ideally a single event listener responds to both types of navigation.
            A simplistic way of providing a single event to listen can look like this:
        </p>
        <div><p><em>view-route.js (partial):</em></p><pre><code>const handleNavigate = (e) =&gt; {
    history.pushState(null, null, e.detail.url);
    routerEvents.dispatchEvent(new PopStateEvent('popstate'));
}

// update routes on popstate (browser back/forward)
export const handlePopState = (e) =&gt; {
    routerEvents.dispatchEvent(new PopStateEvent('popstate', { state: e.state }));
}
window.addEventListener('popstate', handlePopState);
</code></pre></div>
        <p>
            Now our views can respond to <code>popstate</code> events and update based on the current route.
            A second question then becomes: what is the current route? The <code>popstate</code> event does not carry that info.
            The <code>window.location</code> value does have that, and it is always updated as we navigate, but because it has the full URL it is cumbersome to parse.
            What is needed is a way of easily parsing it, something like this:
        </p>
        <div><p><em>view-route.js (continued):</em></p><pre><code>// ...

// all routes will be relative to the document's base path
const baseURL = new URL(window.originalHref || document.URL);
const basePath = baseURL.pathname.slice(0, baseURL.pathname.lastIndexOf('/'));

// returns an array of regex matches for matched routes, or null
export const matchesRoute = (path) =&gt; {
    const fullPath = basePath + '(' + path + ')';
    const regex = new RegExp(`^${fullPath.replaceAll('/', '\\/')}`, 'gi');
    const relativeUrl = location.pathname;
    return regex.exec(relativeUrl);
}
</code></pre></div>
        <p>
            The <code>matchesRoute()</code> function accepts a regex to match as the route,
            and will wrap it so it is interpreted relative to the current document's URL,
            making all routes relative to our single page.
            Now we can clean up the application code leveraging these new generic routing features:
        </p>
        <div><pre><code>import { routerEvents, interceptNavigation, matchesRoute } from './view-route.js';

customElements.define('demo-app', class extends HTMLElement {

    #route = '/';

    constructor() {
        super();
        interceptNavigation(document.body);
        routerEvents.addEventListener('popstate', (e) =&gt; {
            const matches =
                matchesRoute('/details') || 
                matchesRoute('/');
            this.#route = matches?.[1];
            this.update();
        });
    }

    connectedCallback() {
        this.update();
    }

    update() {
        if (this.#route === '/') {
            this.innerHTML = 'This is the homepage. &lt;a href="/details"&gt;Go to the details page&lt;/a&gt;.';
        } else if (this.#route === '/details') {
            this.innerHTML = 'This is the details page. &lt;a href="/"&gt;Go to the home page&lt;/a&gt;.';
        } else {
            this.innerHTML = `The page ${this.#route} does not exist. &lt;a href="/"&gt;Go to the home page&lt;/a&gt;.`;
        }
        this.innerHTML += `&lt;br&gt;Current route: ${this.#route}`;
    }
});
</code></pre></div>
        <p><a href="https://plainvanillaweb.com/blog/articles/2025-06-25-routing/example2/index.html">example 2</a></p>
        
        <p>
            Opening that in a separate tab we can see that the absolute URL neatly updates with the routes,
            that browser back/forwards navigation updates the view, and that inside the view the route is
            relative to the document.
        </p>
        <p>
            Because <code>matchesRoute()</code> accepts a regex,
            it can be used to capture route components that are used inside of the view.
            Something like <code>matchesRoute('/details/(?&lt;id&gt;[\\w]+)')</code> would
            put the ID in <code>matches.groups.id</code>. It's simple, but it gets the job done.
        </p>

        <h3>Can you use it in a sentence?</h3>

        <p>
            While this rudimentary way of detecting routes works, adding more routes quickly becomes unwieldy.
            It would be nice to instead have a declarative way of wrapping parts of views inside routes.
            Enter: a custom element to wrap each route in the page's markup.
        </p>
        <div><p><em>view-route.js (partial):</em></p><pre><code>// ...

customElements.define('view-route', class extends HTMLElement {

    #matches = [];

    get isActive() {
        return !!this.#matches?.length;
    }

    get matches() {
        return this.#matches;
    }

    set matches(v) {
        this.#matches = v;
        this.style.display = this.isActive ? 'contents' : 'none';
        if (this.isActive) {
            this.dispatchEvent(new CustomEvent('routechange', { detail: v, bubbles: true }));
        }
    }

    connectedCallback() {
        routerEvents.addEventListener('popstate', this);
        this.update();
    }

    disconnectedCallback() {
        routerEvents.removeEventListener('popstate', this);
    }

    handleEvent(e) {
        this.update();
    }

    static get observedAttributes() {
        return ['path'];
    }

    attributeChangedCallback() {
        this.update();
    }

    update() {
        const path = this.getAttribute('path') || '/';
        this.matches = this.matchesRoute(path) || [];
    }

    matchesRoute(path) {
        // '*' triggers fallback route if no other route on the same DOM level matches
        if (path === '*') {
            const activeRoutes = 
                Array.from(this.parentNode.getElementsByTagName('view-route')).filter(_ =&gt; _.isActive);
            if (!activeRoutes.length) return [location.pathname, '*'];
        // normal routes
        } else {
            return matchesRoute(path);
        }
        return null;
    }
});
</code></pre></div>
        <p>
            Now we can rewrite our app to be a lot more declarative, while preserving the behavior.
        </p>
        <div><pre><code>import { interceptNavigation } from './view-route.js';

customElements.define('demo-app', class extends HTMLElement {

    constructor() {
        super();
        interceptNavigation(document.body);
    }

    connectedCallback() {
        this.innerHTML = `
        &lt;view-route path="/(?:index.html)?$"&gt;
            This is the homepage. &lt;a href="/details"&gt;Go to the details page&lt;/a&gt;, or
            travel a &lt;a href="/unknown"&gt;path of mystery&lt;/a&gt;.
        &lt;/view-route&gt;
        &lt;view-route path="/details"&gt;
            This is the details page. &lt;a href="/"&gt;Go to the home page&lt;/a&gt;.
        &lt;/view-route&gt;
        &lt;view-route path="*"&gt;
            The page does not exist. &lt;a href="/"&gt;Go to the home page&lt;/a&gt;.
        &lt;/view-route&gt;
        `
    }
});
</code></pre></div>
        <p><a href="https://plainvanillaweb.com/blog/articles/2025-06-25-routing/example3/index.html">example 3</a></p>
        

        <h3>404 not found</h3>

        <p>
            While things now look like they work perfectly, the illusion is shattered upon reloading the page when it is on the details route.
            To get rid of the 404 error we need a handler that will redirect to the main index page.
            This is typically something that requires server-side logic, locking us out from simple static hosting like GitHub Pages,
            but thanks to the kindness of internet strangers, <a href="https://github.com/rafgraph/spa-github-pages">there is a solution</a>.
        </p>
        <p>
            It involves creating a <code>404.html</code> file that GitHub will load for any 404 error (the tiny bit of server cooperation).
            In this file the route is encoded as a query parameter, the page redirects to <code>index.html</code>,
            and inside that index page the route is restored.
        </p>
        <div><pre><code>&lt;!DOCTYPE html&gt;
&lt;html lang="en"&gt;
&lt;head&gt;
    &lt;script&gt;
        var pathSegmentsToKeep = window.location.hostname === 'localhost' ? 0 : 1;

        var l = window.location;
        l.replace(
            l.protocol + '//' + l.hostname + (l.port ? ':' + l.port : '') +
            l.pathname.split('/').slice(0, 1 + pathSegmentsToKeep).join('/') + '/?/' +
            l.pathname.slice(1).split('/').slice(pathSegmentsToKeep).join('/').replace(/&amp;/g, '~and~') +
            (l.search ? '&amp;' + l.search.slice(1).replace(/&amp;/g, '~and~') : '') +
            l.hash
        );
    &lt;/script&gt;
&lt;/head&gt;
&lt;/html&gt;</code></pre></div>
        <div><p><em>index.html:</em></p><pre><code>&lt;!doctype html&gt;
&lt;html lang="en"&gt;
&lt;head&gt;
    &lt;!-- ... --&gt;
&lt;/head&gt;
&lt;body&gt;
    &lt;script type="text/javascript"&gt;
        // preserve route
        window.originalHref = window.location.href;
        // decode from parameter passed by 404.html
        (function (l) {
            if (l.search[1] === '/') {
                var decoded = l.search.slice(1).split('&amp;').map(function (s) {
                    return s.replace(/~and~/g, '&amp;')
                }).join('?');
                window.history.replaceState(null, null,
                    l.pathname.slice(0, -1) + decoded + l.hash
                );
            }
        }(window.location))
    &lt;/script&gt;
    
    &lt;!-- ... --&gt;
&lt;/body&gt;
&lt;/html&gt;</code></pre></div>

        <p>
            Adding this last piece to what we already had gets us a complete routing solution for vanilla single page applications
            that are hosted on GitHub Pages. Here's a live example hosted from there:
        </p>
        <p><a href="https://sebrechts.net/view-route/">example 4</a></p>

        <p>
            To full code of <code>view-route.js</code> and of this example <a href="https://github.com/jsebrech/view-route">is on GitHub</a>.
        </p>
    ]]></content>
    </entry>
    <entry>
        <title><![CDATA[Bringing React's <ViewTransition> to vanilla JS]]></title>
        <link rel="alternate" type="text/html" href="https://plainvanillaweb.com/blog/articles/2025-06-12-view-transitions/"/>
        <id>https://plainvanillaweb.com/blog/articles/2025-06-12-view-transitions/</id>
        <published>2025-06-12T12:00:00.000Z</published>
        <updated>2025-06-12T12:00:00.000Z</updated>
        <summary><![CDATA[Bringing React's declarative view transitions API to vanilla as a custom element.]]></summary>
        <media:content url="https://plainvanillaweb.com/blog/articles/2025-06-12-view-transitions/image.webp" type="image/webp" medium="image" />
        <author><name><![CDATA[Joeri Sebrechts]]></name></author>
        <content type="html"><![CDATA[
        <p>
            I like React. I really do. It is the default answer for modern web development, and it is that answer for a reason.
            Generally when React adds a feature it is well thought through, within the React system of thinking.
            My one criticism is that React by its nature overthinks things, that dumber and simpler solutions would often be 
            on the whole ... better. Less magic, more predictable.
        </p>
        <p>
            So when I port framework features to vanilla JS, don't take this as a slight of that framework.
            It is meant as an exploration of what dumber and simpler solutions might look like, when built  
            on the ground floor of the web's platform instead of the lofty altitudes of big frameworks. 
            It is a great way to learn.
        </p>
        <p>
            Which brings me of course to today's topic: view transitions, and how to implement them.
        </p>

        <h3>View Transitions 101</h3>

        <p>
            Let's start with the basics: what is a view transition?
        </p>

        <p><a href="https://plainvanillaweb.com/blog/articles/2025-06-12-view-transitions/example1/index.html">example 1</a></p>

        <p>
            In a supporting browser, what you'll see when you click is a square smoothly transitioning
            between blue and orange on every button click. By supported browser I mean Chrome, Edge or Safari,
            but sadly not yet Firefox, although <a href="https://bugzilla.mozilla.org/show_bug.cgi?id=1823896">they're working on it</a>!
            In Firefox you'll see the change, but applied immediately without the animation.
        </p>
        <p>
            At the code level, it looks something like this:
        </p>

        <div><p><em>example.js:</em></p><pre><code>function transition() {
    const square1 = document.getElementById('square1');
    if (document.startViewTransition) {
        document.startViewTransition(() =&gt; {
            square1.classList.toggle('toggled');
        });
    } else {
        square1.classList.toggle('toggled');
    }
}
</code></pre></div>
        <div><p><em>transitions.css:</em></p><pre><code>#square1 {
    background-color: orange;
}
#square1.toggled {
    background-color: blue;
}</code></pre></div>

        <p>
            How this works is that the browser takes a snapshot of the page when we call <code>document.startViewTransition()</code>,
            takes another snapshot after the callback passed to it is done (or the promise it returns fulfills),
            and then figures out how to smoothly animate between the two snapshots, using a fade by default.
        </p>
        <p>
            A very nice thing is that by putting a <code>view-transition-name</code> style on an element we can 
            make it transition independently from the rest of the page, and we can control that transition through CSS.
        </p>
        <div><p><em>example.js:</em></p><pre><code>function transition() {
    const square1 = document.getElementById('square1');
    const square2 = document.getElementById('square2');
    if (document.startViewTransition) {
        document.startViewTransition(() =&gt; {
            square1.classList.toggle('toggled');
            square2.classList.toggle('toggled');
        });
    } else {
        square1.classList.toggle('toggled');
        square2.classList.toggle('toggled');
    }
}
</code></pre></div>
        <div><p><em>transitions.css:</em></p><pre><code>#square2 {
    background-color: green;
    view-transition-name: slide;
    display: none;
}
#square2.toggled {
    display: inline-block;
}
::view-transition-new(slide):only-child {
    animation: 400ms ease-in both slide-in;
}
@keyframes slide-in {
    from { transform: translateY(-200px); }
    to { transform: translateY(0); }
}</code></pre></div>
        <p>
            Now we can see a second square sliding in on the first click, and fading out on the second.
        </p>
        <p><a href="https://plainvanillaweb.com/blog/articles/2025-06-12-view-transitions/example2/index.html">example 2</a></p>

        <p>
            That's enough view transition basics for now. If you're curious for more, 
            you can learn the rest in the <a href="https://developer.chrome.com/docs/web-platform/view-transitions">chrome developer documentation</a>.
        </p>

        <h3>Here comes trouble</h3>

        <p>
            Up to this point, we've gotten the fair weather version of view transitions, but there are paper cuts.
        </p>
        <ul>
            <li>Firefox doesn't support view transitions at all, so we have to feature-detect.</li>
            <li>There is only one actual current View Transitions standard, level 1, but most of the online tutorials talk about the unfinalized level 2.</li> 
            <li>If there are duplicate values of <code>view-transition-name</code> anywhere on the page, the animations disappear in a puff of duplicate element error smoke.</li>
            <li>As always, there's a thing about shadow DOM, but more on that later.</li>
            <li>Starting a new view transition when one is already running skips to the end of the previous one, bringing the smooth user experience to a jarring end.</li>
            <li>User input is blocked while the view is transitioning, causing frustration when clicks are ignored.</li>
            <li>The <code>document.startViewTransition()</code> function only accepts a single callback that returns a single promise.</li>
        </ul>
        <p>
            It is the last one that really spells trouble. In a larger single-page web application we'll typically
            find a central routing layer that triggers a number of asynchronous updates every time the route changes.
            Wrapping those asynchronous updates into a single promise can be a challenge,
            as is finding the right place to "slot in" a call to <code>document.startViewTransition()</code>.
        </p>
        <p>
            Also, we probably don't even <em>want</em> to wait for all of the asynchronous updates to complete.
            Leaving the application in an interactive state in between two smaller view transitions is better
            than bundling it all together into one ponderous picture perfect transition animation.
        </p>

        <h3>What React did</h3>

        <p>
            React being React they solve those problems through magic, through exceeding cleverness.
            You can read up on <a href="https://react.dev/blog/2025/04/23/react-labs-view-transitions-activity-and-more#view-transitions">their approach to view transitions</a>, 
            but distilling it down it becomes this:
        </p>
        <ul>
            <li>Anything that should take part separately in a view transition is wrapped in a <code>&lt;ViewTransition&gt;</code> component.</li>
            <li>React will choose unique <code>view-transition-name</code> style values, which DOM elements to set them on, and when to set them.
                This can be controlled through the <code>&lt;ViewTransition&gt;</code> <code>name</code> and <code>key</code> props.</li>
            <li>Any updates that should become part of a view transition are wrapped in a <code>startTransition()</code> call.</li>
            <li>React automatically figures out when to call <code>document.startViewTransition()</code>, and what updates to put inside the callback.
                It also cleverly avoids starting new transitions when one is already running, so <code>startTransition()</code> can be called from multiple places safely.
                Oh, and by the way, it feature detects, obviously.
            </li>
        </ul>
        <p>
            When you do all of that, you get <a href="https://codesandbox.io/p/sandbox/njn4yc">magic</a>.
        </p>
        <img src="https://plainvanillaweb.com/blog/articles/2025-06-12-view-transitions/react-demo.gif" alt="A React view transition demo" loading="lazy" width="240">
        <p>
            Good luck figuring out <a href="https://react.dev/reference/react/ViewTransition#how-does-viewtransition-work">how it works</a>, 
            or how to troubleshoot when the magic loses its shine.
            But that is the bar, that is the lofty goal of user experience to reach with a dumber and simpler reimagining as vanilla JS.
            So let's get cooking.
        </p>

        <h3>A fresh start</h3>

        <p>
            Our starting point is a barebones implementation of a <code>startTransition()</code>
            function to replace what React's <code>startTransition()</code> does.
            It will fall back to non-animated transitions if our browser doesn't support <code>document.startViewTransition</code>.
        </p>

        <div><pre><code>export const startTransition = (updateCallback) =&gt; {
    if (document.startViewTransition) {
        document.startViewTransition(updateCallback);
    } else {
        const done = Promise.try(updateCallback);
        return {
            updateCallbackDone: done,
            ready: done,
            finished: done,
            skipTransition: () =&gt; {}
        };
    }
}
</code></pre></div>
        <div><p><em>example.js:</em></p><pre><code>import { startTransition } from './view-transition.js';

export function transition() {
    startTransition(() =&gt; {
        document.getElementById('square1').classList.toggle('toggled');
        document.getElementById('square2').classList.toggle('toggled');
    });
}
</code></pre></div>

        <p><a href="https://plainvanillaweb.com/blog/articles/2025-06-12-view-transitions/example3/index.html">example 3</a></p>

        <p>
            While that takes care of feature-detecting, we can still run into timing issues.
            For example, let's say that instead of toggling we were switching routes,
            and the second route needs to load data prior to animating in.
        </p>
        <p>
            So with HTML like this:
        </p>

        <pre><code>
    &lt;p&gt;&lt;button&gt;Navigate&lt;/button&gt;&lt;/p&gt;
    &lt;div id="route1" class="route"&gt;&lt;/div&gt;
    &lt;div id="route2" class="route"&gt;&lt;/div&gt;
        </code></pre>

        <p>
            We might intuitively choose to do something like this:
        </p>

        <div><p><em>example.js:</em></p><pre><code>import { startTransition } from './view-transition.js';

let currentRoute = '';

export function navigate() {
    currentRoute = currentRoute === 'route2' ? 'route1' : 'route2';
    updateRoute1();
    updateRoute2();
}

function updateRoute1() {
    startTransition(() =&gt; {
        if (currentRoute === 'route1') {
            document.getElementById('route1').classList.add('active');
        } else {
            document.getElementById('route1').classList.remove('active');
        }
    });
}

function updateRoute2() {
    startTransition(() =&gt; {
        const route2 = document.getElementById('route2');
        if (currentRoute === 'route2') {
            route2.classList.add('active', 'loading');
            route2.textContent = '...';
            load().then((data) =&gt; startTransition(() =&gt; {
                route2.textContent = data;
                route2.classList.remove('loading');
            }));
        } else {
            document.getElementById('route2').classList.remove('active');
        }
    });
}

function load() {
    return new Promise((resolve) =&gt; {
        setTimeout(() =&gt; {
            resolve('Hi!');
        }, 250);
    });
}
</code></pre></div>
        <p><a href="https://plainvanillaweb.com/blog/articles/2025-06-12-view-transitions/example4/index.html">example 4</a></p>

        <p>
            But, as you see when trying it out, it doesn't work. Because the <code>startTransition()</code>
            calls end up overlapping each other, the animation is interrupted, and we get a jarring experience.
            While this toy example can be made to work by tuning delays, in the real world those same delays are network-based, so there's no timing-based solution.
            We also can't solve this by bundling everything into one single big view transition, because that would imply
            blocking user input while a network request completes, which would be a bad user experience.
        </p>
        <p>
            React solves all of this in the typical React way. It will smartly choose how to batch work
            into successive calls to <code>document.startViewTransition()</code>. It will take into account where something loads lazily,
            as in the previous example, and batch the work of animating in the content for the fallback in a separate view transition.
        </p>
        
        <h3>Taking a queue</h3>

        <p>
            Distilling that approach to its essence, the really useful part of React's solution is the queueing and batching of work. 
            Any call to <code>startTransition()</code> that occurs while a view transition is running should be queued until after the transition completes,
            and nested calls should have all their updates batched together.
        </p>

        <div><p><em>view-transition.js:</em></p><pre><code>// the currently animating view transition
let currentTransition = null;
// the next transition to run (after currentTransition completes)
let nextTransition = null;

/** start a view transition or queue it for later if one is already animating */
export const startTransition = (updateCallback) =&gt; {
    if (!updateCallback) updateCallback = () =&gt; {};
    // a transition is active
    if (currentTransition &amp;&amp; !currentTransition.isFinished) {
        // it is running callbacks, but not yet animating
        if (!currentTransition.isReady) {
            currentTransition.addCallback(updateCallback);
            return currentTransition;
        // it is already animating, queue callback in the next transition
        } else {
            if (!nextTransition) {
                nextTransition = new QueueingViewTransition();
            }
            return nextTransition.addCallback(updateCallback);
        }
    // if no transition is active, start animating the new transition
    } else {
        currentTransition = new QueueingViewTransition();
        currentTransition.addCallback(updateCallback);
        currentTransition.run();
        // after it's done, execute any queued transition
        const doNext = () =&gt; {
            if (nextTransition) {
                currentTransition = nextTransition;
                nextTransition = null;
                currentTransition.run();
                currentTransition.finished.finally(doNext);
            } else {
                currentTransition = null;
            }
        }
        currentTransition.finished.finally(doNext);
        return currentTransition;
    }
}

// ...</code></pre></div>

        <p>
            The <code>QueueingViewTransition</code> implementation is a straightforward batching of callbacks,
            and a single call to <code>document.startViewTransition()</code> that executes them in order.
            It is not included in the text of this article for brevity's sake, but linked at the bottom instead.
        </p>
        <p>
            Applying that queueing solution on top of the previous example's unchanged code, 
            we suddenly see the magic of clean view transitions between dynamically loading routes.
        </p>

        <p><a href="https://plainvanillaweb.com/blog/articles/2025-06-12-view-transitions/example5/index.html">example 5</a></p>

        <h3>Back to the top</h3>

        <p>
             So as I was saying at the top, I like porting framework features to vanilla JS as a way of learning and exploring dumber and simpler solutions.
             Which brings me to the playground for that learning, a full port of React's tour-de-force <code>&lt;ViewTransition&gt;</code> example to vanilla web code.
        </p>

        <p><a href="https://plainvanillaweb.com/blog/articles/2025-06-12-view-transitions/example6/index.html">example 6</a></p>

        <p>
            The full code of this example is <a href="https://github.com/jsebrech/view-transition-element">on GitHub</a>.
            Arguably the 300 lines of code in the <code>lib/</code> folder of that example constitute a mini-framework,
            but fascinating to me is that you can get so much mileage out of such a small amount of library code,
            with the resulting single-page application being more or less the same number of lines as the React original.
        </p>
        <p>
            That example also shows how to do a purely client-side router with clean URLs using <code>pushState()</code>.
            This blog post has however gone too long already, so I'll leave that for another time.
        </p>

        <h3>One more thing</h3>

        <p>
            Oh yeah, I promised to talk about the thing with shadow DOM, and I promised a custom element.
            Here is the thing with shadow DOM: when <code>document.startViewTransition()</code> is called from the light DOM,
            it cannot see elements inside the shadow DOM that need to transition independently, 
            unless those elements are exposed as DOM parts and a <code>view-transition-name</code> style is set on them in the light DOM.
        </p>
        <p>
            If the solution to that intrigues you, it's in the GitHub example repo as well as a &lt;view-transition&gt; custom element.
            If that sounds like a bunch of mumbo jumbo instead, join the club.
            Just one more reason to avoid shadow DOM.
        </p>
    ]]></content>
    </entry>
    <entry>
        <title><![CDATA[Making a new form control]]></title>
        <link rel="alternate" type="text/html" href="https://plainvanillaweb.com/blog/articles/2025-05-09-form-control/"/>
        <id>https://plainvanillaweb.com/blog/articles/2025-05-09-form-control/</id>
        <published>2025-05-09T12:00:00.000Z</published>
        <updated>2025-05-09T12:00:00.000Z</updated>
        <summary><![CDATA[Building a form control as a custom element.]]></summary>
        <media:content url="https://plainvanillaweb.com/blog/articles/2025-05-09-form-control/image.webp" type="image/webp" medium="image" />
        <author><name><![CDATA[Joeri Sebrechts]]></name></author>
        <content type="html"><![CDATA[
        <p>
            There are some things that a web developer <em>knows</em> they shouldn't attempt.
            Making clever use of contenteditable. Building custom form controls. Making complicated custom elements without a framework.
            But do we really know what we think we know? Why not try to do all three, just for fun? Could it really be that bad?
        </p>
        <p><em>Narrator: it would indeed be that bad.</em></p>
        <p>
            This article is building on the previous one on proper <a href="../2025-04-21-attribute-property-duality/">attribute/property relations</a> in custom elements.
            Read that first if you haven't yet. In this piece we're taking it a step further to build a custom element that handles input.
            The mission is simple: implement a basic version of <code>&lt;input type="text" /&gt;</code> but with <code>display: inline</code> layout.
        </p>

        <h3>A simple element</h3>
        
        <p>
            Let's start by just throwing something against the wall and playing around with it.
        </p>
        <div><pre><code>customElements.define('input-inline', class extends HTMLElement {
    
    get value() {
        return this.getAttribute('value') ?? '';
    }
    set value(value) {
        this.setAttribute('value', String(value));
    }

    get name() {
        return this.getAttribute('name') ?? '';
    }
    set name(v) {
        this.setAttribute('name', String(v));
    }
    
    connectedCallback() {
        this.#update();
    }

    static observedAttributes = ['value'];
    attributeChangedCallback() {
        this.#update();
    }

    #update() {
        this.style.display = 'inline';
        if (this.textContent !== this.value) {
            this.textContent = this.value;
        }
        this.contentEditable = true;
    }
});</code></pre></div>
        <p>
            And here's how we use it:<br>
        </p>
        <div><pre><code>&lt;form&gt;
    &lt;p&gt;
        My favorite colors are &lt;input-inline name="color1" value="green"&gt;&lt;/input-inline&gt; 
        and &lt;input-inline name="color2" value="purple"&gt;&lt;/input-inline&gt;.
    &lt;/p&gt;
    &lt;button type="submit"&gt;Submit&lt;/button&gt;
&lt;/form&gt;</code></pre></div>
        <p><a href="https://plainvanillaweb.com/blog/articles/2025-05-09-form-control/demo1/index.html">demo1</a></p>

        <p>
            This is simple, clean, and horribly broken. For one, the form cannot see these controls at all and submits the empty object.
        </p>

        <h3>Form-associated elements</h3>

        <p>
            To fix that, we have to make a <a href="https://html.spec.whatwg.org/dev/custom-elements.html#custom-elements-face-example">form-associated custom element</a>.
            This is done through the magic of the <code>formAssociated</code> property and <a href="https://developer.mozilla.org/en-US/docs/Web/API/ElementInternals">ElementInternals</a>.
        </p>

        <div><p><em>input-inline.js:</em></p><pre><code>customElements.define('input-inline', class extends HTMLElement {
    
    #internals;

    /* ... */

    constructor() {
        super();
        this.#internals = this.attachInternals();
        this.#internals.role = 'textbox';
    }
    
    /* ... */

    #update() {
        /* ... */
        this.#internals.setFormValue(this.value);
    }

    static formAssociated = true;
});</code></pre></div>
        <p><a href="https://plainvanillaweb.com/blog/articles/2025-05-09-form-control/demo2/index.html">demo2</a></p>

        <p>
            <code>ElementInternals</code> offers a control surface for setting the behavior of our custom element as part of a form.
            The <code>this.#internals.role = 'textbox'</code> assignment sets a default role that can be overridden by the element's user through the <code>role</code> attribute or property, just like for built-in form controls.
            By calling <code>this.#internals.setFormValue</code> every time the control's value changes the form will know what value to submit.
            But ... while the form does submit the values for our controls now, it does not see the changes we make. That's because we aren't responding to input yet.
        </p>

        <h3>Looking for input</h3>

        <p>
            Ostensibly responding to input is just adding a few event listeners in <code>connectedCallback</code> and removing them again in <code>disconnectedCallback</code>.
            But doing it that way quickly gets verbose. An easy alternative is to instead rely on some of the built-in event logic magic,
            namely that events bubble and that <a href="https://gregdaynes.com/note/2024/07/29/web-components.html">objects can be listeners too</a>.
        </p>

        <div><p><em>input-inline.js:</em></p><pre><code>customElements.define('input-inline', class extends HTMLElement {
    
    #shouldFireChange = false;
    
    /* ... */

    constructor() {
        /* ... */
        this.addEventListener('input', this);
        this.addEventListener('keydown', this);
        this.addEventListener('paste', this);
        this.addEventListener('focusout', this);
    }

    handleEvent(e) {
        switch (e.type) {
            // respond to user input (typing, drag-and-drop, paste)
            case 'input':
                this.value = cleanTextContent(this.textContent);
                this.#shouldFireChange = true;
                break;
            // enter key should submit form instead of adding a new line
            case 'keydown':
                if (e.key === 'Enter') {
                    e.preventDefault();
                    this.#internals.form?.requestSubmit();
                }
                break;
            // prevent pasting rich text (firefox), or newlines (all browsers)
            case 'paste':
                e.preventDefault();
                const text = e.clipboardData.getData('text/plain')
                    // replace newlines and tabs with spaces
                    .replace(/[\n\r\t]+/g, ' ')
                    // limit length of pasted text to something reasonable
                    .substring(0, 1000);
                // shadowRoot.getSelection is non-standard, fallback to document in firefox
                // https://stackoverflow.com/a/70523247
                let selection = this.getRootNode()?.getSelection?.() || document.getSelection();
                let range = selection.getRangeAt(0);
                range.deleteContents();
                range.insertNode(document.createTextNode(text));
                // manually trigger input event to restore default behavior
                this.dispatchEvent(new Event('input', { bubbles: true, composed: true }));
                break;
            // fire change event on blur
            case 'focusout':
                if (this.#shouldFireChange) {
                    this.#shouldFireChange = false;
                    this.dispatchEvent(new Event('change', { bubbles: true, composed: true }));
                }
                break;
        }
    }
    
    /* ... */
});

function cleanTextContent(text) {
    return (text ?? '')
        // replace newlines and tabs with spaces
        .replace(/[\n\r\t]+/g, ' ');
}
</code></pre></div>
        <p><a href="https://plainvanillaweb.com/blog/articles/2025-05-09-form-control/demo3/index.html">demo3</a></p>

        <p>
            I prefer this pattern because it simplifies the code a lot compared to having separate handler functions.
            Attaching event listeners in the constructor instead of attaching and detaching them in the lifecycle callbacks is another simplification. 
            It may seem like blasphemy to never clean up the event listeners, but DOM event listeners
            are weakly bound and garbage collection of the element can still occur with them attached. So this is fine.
        </p>
        <p>
            In the event handler logic there's some verbosity to deal with the fallout of working with contenteditable.
            As this code is not the focus of this article, I won't dally on it except to remark that contenteditable is still just as annoying as you thought it was.
        </p>
        <p>
            With these changes our element will now also emit <code>input</code> and <code>change</code> events just like a built-in HTML form control.
            But, you may have noticed another issue has cropped up. The standard form reset button does not actually reset the form.
        </p>

        <h3>Read the instructions</h3>

        <p>
            You see, when we said <code>static formAssociated = true</code> we entered into a contract to faithfully implement the expected behavior of a form control.
            That means we have a bunch of extra work to do.
        </p>

        <div><p><em>input-inline.js:</em></p><pre><code>customElements.define('input-inline', class extends HTMLElement {
    
    /* ... */

    #formDisabled = false;
    #value;

    set value(v) {
        if (this.#value !== String(v)) {
            this.#value = String(v);
            this.#update();    
        }
    }
    get value() {
        return this.#value ?? this.defaultValue;
    }

    get defaultValue() {
        return this.getAttribute('value') ?? '';
    }
    set defaultValue(value) {
        this.setAttribute('value', String(value));
    }

    set disabled(v) {
        if (v) {
            this.setAttribute('disabled', 'true');
        } else {
            this.removeAttribute('disabled');
        }
    }
    get disabled() {
        return this.hasAttribute('disabled');
    }

    set readOnly(v) {
        if (v) {
            this.setAttribute('readonly', 'true');
        } else {
            this.removeAttribute('readonly');
        }
    }
    get readOnly() {
        return this.hasAttribute('readonly');
    }

    /* ... */

    static observedAttributes = ['value', 'disabled', 'readonly'];
    attributeChangedCallback() {
        this.#update();
    }

    #update() {
        this.style.display = 'inline';
        this.textContent = this.value;
        this.#internals.setFormValue(this.value);

        const isDisabled = this.#formDisabled || this.disabled;
        this.#internals.ariaDisabled = isDisabled;
        this.#internals.ariaReadOnly = this.readOnly;
        this.contentEditable = !this.readOnly &amp;&amp; !isDisabled &amp;&amp; 'plaintext-only';
        this.tabIndex = isDisabled ? -1 : 0;
    }

    static formAssociated = true;

    formResetCallback() {
        this.#value = undefined;
        this.#update();
    }
    
    formDisabledCallback(disabled) {
        this.#formDisabled = disabled;
        this.#update();
    }
    
    formStateRestoreCallback(state) {
        this.#value = state ?? undefined;
        this.#update();
    }
});

/* ... */</code></pre></div>
        <p><a href="https://plainvanillaweb.com/blog/articles/2025-05-09-form-control/demo4/index.html">demo4</a></p>

        <p>
            There's a LOT going on there. It's too much to explain, so let me sum up.
        </p>
        <ul>
            <li>The <code>value</code> attribute now corresponds to a <code>defaultValue</code> property, which is the value shown until changed and also the value that the form will reset the field to.</li>
            <li>The <code>value</code> property contains only the modified value and does not correspond to an attribute.</li>
            <li>The control can be marked disabled or read-only through attribute or property.</li>
            <li>The form callbacks are implemented, so the control can be reset to its default value, will restore its last value after back-navigation, and will disable itself when it is in a disabled fieldset.</li>
        </ul>

        <h3>With some style</h3>

        <p>
            Up to this point we've been using some stand-in styling.
            However, it would be nice to have some default styling that can be bundled with our custom form control.
            Something like this:
        </p>

        <div><pre><code>/* default styling has lowest priority */
@layer {
    :root {
        --input-inline-border-color: light-dark(rgb(118, 118, 118), rgb(161, 161, 161));
        --input-inline-border-color-hover: light-dark(rgb(78, 78, 78), rgb(200, 200, 200));
        --input-inline-border-color-disabled: rgba(150, 150, 150, 0.5);
        --input-inline-text-color: light-dark(fieldtext, rgb(240, 240, 240));
        --input-inline-text-color-disabled: light-dark(rgb(84, 84, 84), rgb(170, 170, 170));
        --input-inline-bg-color: inherit;
        --input-inline-bg-color-disabled: inherit;
        --input-inline-min-width: 4ch;
    }

    input-inline {
        display: inline;
        background-color: var(--input-inline-bg-color);
        color: var(--input-inline-text-color);
        border: 1px dotted var(--input-inline-border-color);
        padding: 2px 3px;
        margin-bottom: -2px;
        border-radius: 3px;
        /* minimum width */
        padding-right: max(3px, calc(var(--input-inline-min-width) - var(--current-length)));

        &amp;:hover {
            border-color: var(--input-inline-border-color-hover);
        }
    
        &amp;:disabled {
            border-color: var(--input-inline-border-color-disabled);
            background-color: var(--input-inline-bg-color-disabled);
            color: var(--input-inline-text-color-disabled);
            -webkit-user-select: none;
            user-select: none;
        }
    
        &amp;:focus-visible {
            border-color: transparent;
            outline-offset: 0;
            outline: 2px solid royalblue; /* firefox */
            outline-color: -webkit-focus-ring-color; /* the rest */
        }
    }

    @media screen and (-webkit-min-device-pixel-ratio:0) {
        input-inline:empty::before {
            /* fixes issue where empty input-inline shifts left in chromium browsers */
            content: " ";
        }
    }

}
</code></pre></div>
        <p><a href="https://plainvanillaweb.com/blog/articles/2025-05-09-form-control/demo5/index.html">demo5</a></p>

        <p>
            The styles are isolated by scoping them to the name of our custom element, 
            and the use of @layer puts them at the lowest priority, so that any user style will override the default style,
            just like for the built-in form controls. The use of variables offers an additional way to quickly restyle the control.
        </p>
        <p>
            In the styling we also see the importance of properly thinking out disabled and focused state behavior.
            The upside and downside of building a custom form control is that we get to implement all the behavior that's normally built-in to the browser.
        </p>
        <p>
            We're now past the 150 lines mark, just to get to the low bar of implementing the browser's mandatory form control behavior.
            So, are we done? Well, not quite. There's still one thing that form controls do, and although it's optional it's also kind of required.
        </p>

        <h3>Validation</h3>

        <p>
            Built-in form controls come with a validity API. To get an idea of what it means to implement it 
            in a custom form control, let's add one validation attribute: <code>required</code>.
            It doesn't seem like it should take a lot of work, right?
        </p>

        <div><p><em>input-inline.js:</em></p><pre><code>let VALUE_MISSING_MESSAGE = 'Please fill out this field.';
(() =&gt; {
    const input = document.createElement('input');
    input.required = true;
    input.reportValidity();
    VALUE_MISSING_MESSAGE = input.validationMessage;
})();

const isSafari = /^((?!chrome|android).)*safari/i.test(navigator.userAgent);

customElements.define('input-inline', class extends HTMLElement {
    
    /* ... */

    #customValidityMessage = '';

    /* ... */

    set required(v) {
        if (v) {
            this.setAttribute('required', 'true');
        } else {
            this.removeAttribute('required');
        }
    }
    get required() {
        return this.hasAttribute('required');
    }

    /* ... */

    static observedAttributes = ['value', 'disabled', 'readonly', 'required'];
    attributeChangedCallback() {
        this.#update();
    }

    #update() {
        /* ... */

        this.#internals.ariaRequired = this.required;
        this.#updateValidity();
    }

    /* ... */

    #updateValidity() {
        const state = {};
        let message = '';

        // custom validity message overrides all else
        if (this.#customValidityMessage) {
            state.customError = true;
            message = this.#customValidityMessage;
        } else {
            if (this.required &amp;&amp; !this.value) {
                state.valueMissing = true;
                message = VALUE_MISSING_MESSAGE;
            }
    
            // add other checks here if needed (e.g., pattern, minLength)
        }

        // safari needs a focusable validation anchor to show the validation message on form submit
        // and it must be a descendant of the input
        let anchor = undefined;
        if (isSafari) {
            anchor = this.querySelector('span[aria-hidden]');
            if (!anchor) {
                anchor = document.createElement('span');
                anchor.ariaHidden = true;
                anchor.tabIndex = 0;
                this.append(anchor);
            }
        }

        this.#internals.setValidity(state, message, anchor);
    }

    checkValidity() {
        this.#updateValidity();
        return this.#internals.checkValidity();
    }

    reportValidity() {
        this.#updateValidity();
        return this.#internals.reportValidity();
    }

    setCustomValidity(message) {
        this.#customValidityMessage = message ?? '';
        this.#updateValidity();
    }

    get validity() {
        return this.#internals.validity;
    }

    get validationMessage() {
        return this.#internals.validationMessage;
    }

    get willValidate() {
        return this.#internals.willValidate;
    }
});

/* ... */</code></pre></div>
        <p><a href="https://plainvanillaweb.com/blog/articles/2025-05-09-form-control/demo6/index.html">demo6</a></p>
        <p>
            The code for the example is exactly like it would be for built-in controls:
        </p>
        <div><pre><code>&lt;form&gt;
    &lt;p&gt;
        My favorite color is &lt;input-inline name="color1" value="green" required&gt;&lt;/input-inline&gt;.
    &lt;/p&gt;
    &lt;button type="submit"&gt;Submit&lt;/button&gt;
    &lt;button type="reset"&gt;Reset&lt;/button&gt;
&lt;/form&gt;</code></pre></div>

        <p>
            The <code>ElementInternals</code> interface is doing a lot of the work here, but we still have to proxy its methods and properties.
            You can tell however that by this point we're deep in the weeds of custom elements, because of the rough edges.
        </p>
        <ul>
            <li>The example is using the <code>input-inline:invalid</code> style instead of <code>:user-invalid</code> because
            <a href="https://github.com/whatwg/html/issues/9639">:user-invalid is not supported</a> on custom elements yet.</li>
            <li>An ugly hack is needed to get the properly localized message for a required field that matches that of built-in controls.</li>
            <li>Safari flat-out won't show validation messages on non-shadowed form-associated custom elements if we don't give it an anchor to set them to, requiring another ugly hack.</li>
        </ul>

        <h3>In conclusion</h3>

        <p>
            We've established by now that it is indeed feasible to build a custom form control and have it take part in regular HTML forms,
            but also that it is a path surrounded by peril as well as laborious to travel.
            Whether it is worth doing is in the eye of the beholder.
        </p>
        <p>
            Along that path we also learned some lessons on how to handle input in custom elements, and have proven yet again that <code>contenteditable</code>,
            while less painful than it once was, is an attribute that can only be used in anger.
        </p>
        <p>
            Regardless, the full source code of the <code>input-inline</code> form control <a href="https://github.com/jsebrech/input-inline">is on GitHub</a>.
        </p>
    ]]></content>
    </entry>
    <entry>
        <title><![CDATA[The attribute/property duality]]></title>
        <link rel="alternate" type="text/html" href="https://plainvanillaweb.com/blog/articles/2025-04-21-attribute-property-duality/"/>
        <id>https://plainvanillaweb.com/blog/articles/2025-04-21-attribute-property-duality/</id>
        <published>2025-04-21T12:00:00.000Z</published>
        <updated>2025-04-21T12:00:00.000Z</updated>
        <summary><![CDATA[How to work with attributes and properties in custom elements.]]></summary>
        <media:content url="https://plainvanillaweb.com/blog/articles/2025-04-21-attribute-property-duality/image.webp" type="image/webp" medium="image" />
        <author><name><![CDATA[Joeri Sebrechts]]></name></author>
        <content type="html"><![CDATA[
        <p>
            Web components, a.k.a. custom elements, are HTML elements
            that participate in HTML markup. As such they can have attributes:
        </p>
        <p><code>&lt;my-hello value="world"&gt;&lt;/my-hello&gt;</code></p>
        <p>
            But, they are also JavaScript objects, and as such they can have object properties.
        </p>
        <p><code>let myHello = document.querySelector('my-hello'); myHello.value = 'foo';</code></p>
        <p>
            And here's the tricky part about that: <em>these are not the same thing!</em>
            In fact, custom element attributes and properties by default have <em>zero</em> relationship between them,
            even when they share a name. Here's a live proof of this fact:
        </p>

        <div><pre><code>customElements.define('my-hello', class extends HTMLElement {
    connectedCallback() {
        this.textContent = `Hello, ${ this.value || 'null' }!`;
    }
});
</code></pre></div>
        <p><a href="https://plainvanillaweb.com/blog/articles/2025-04-21-attribute-property-duality/demo1.html">Demo: no connection between attribute and property</a></p>

        <p>
            Now, to be fair, we can get at the attribute value just fine from JavaScript:
        </p>

        <div><pre><code>customElements.define('my-hello', class extends HTMLElement {
    connectedCallback() {
        this.textContent = `Hello, ${ this.getAttribute('value') || 'null' }!`;
    }
});
</code></pre></div>
        <p><a href="https://plainvanillaweb.com/blog/articles/2025-04-21-attribute-property-duality/demo2.html">Demo: displaying the attribute</a></p>

        <p>
            But what if we would also like it to have a <code>value</code> <em>property</em>?
            What should the relationship between attribute and property be like?
        </p>
        <ul>
            <li>Does updating the attribute always update the property?</li>
            <li>Does updating the property always update the attribute?</li>
            <li>When updates can go either way, does the property read and update the value of the attribute, or do both attribute and property wrap around a private field on the custom element's class?</li>
            <li>When updates can go either way, how to avoid loops where the property updates the attribute, which updates the property, which...</li>
            <li>When is it fine to have just an attribute without a property, or a property without an attribute?</li>
        </ul>

        <p>
            In framework-based code, we typically don't get a say in these things.
            Frameworks generally like to pretend that attributes and properties are the same thing,
            and they automatically create code to make sure this is the case.
            In vanilla custom elements however, not only do we get to decide these things, we <em>must</em> decide them.
        </p>

        <h3>Going native</h3>

        <p>
            Seasoned developers will intuitively grasp what the sensible relationship between attributes and properties should be.
            This is because built-in HTML elements all implement similar kinds of relationships between their attributes and their properties.
            To explore that in depth, I recommend reading <a href="https://blog.ltgt.net/web-component-properties/">Making Web Component properties behave closer to the platform</a>.
            Without fully restating that article, here's a quick recap:
        </p>
        <ul>
            <li>Properties can exist independent of an attribute, but an attribute will typically have a related property.</li>
            <li>If changing the attribute updates the property, then updating the property will update the attribute.</li>
            <li>Properties <em>reflect</em> either an internal value of an element, or the value of the corresponding attribute.</li>
            <li>Assigning a value of an invalid type will coerce the value to the right type, instead of rejecting the change.</li>
            <li>Change events are only dispatched for changes by user input, not from programmatic changes to attribute or property.</li>
        </ul>

        <p>An easy way to get much of this behavior is to make a property wrap around an attribute:</p>

        <div><pre><code>customElements.define('my-hello', class extends HTMLElement {
    get value() {
        return this.getAttribute('value');
    }
    set value(v) {
        this.setAttribute('value', String(v));
    }
    
    static observedAttributes = ['value'];
    attributeChangedCallback() {
        this.textContent = `Hello, ${ this.value || 'null' }!`;
    }
});
</code></pre></div>
        <p><a href="https://plainvanillaweb.com/blog/articles/2025-04-21-attribute-property-duality/demo3.html">Demo: property wraps attribute</a></p>

        <p>
            Notice how updating the property will update the attribute in the HTML representation,
            and how the property's assigned value is coerced into the attribute's string type.
            Attributes are always strings.
        </p>
        
        <h3>Into the weeds</h3>

        <p>
            Up to this point, things are looking straightforward. But this is web development,
            things are never as straightforward as they seem.
            For instance, what boolean attribute value should make a corresponding boolean property become true?
            The surprising but <a href="https://developer.mozilla.org/en-US/docs/Glossary/Boolean/HTML">standard behavior</a> on built-in elements is that 
            any attribute value will be interpreted as true, and only the absence of the attribute will be interpreted as false.
        </p>
        <p>
            Time for another iteration of our element:
        </p>

        <div><pre><code>customElements.define('my-hello', class extends HTMLElement {
    get value() {
        return this.getAttribute('value');
    }
    set value(v) {
        this.setAttribute('value', String(v));
    }

    get glam() {
        return this.hasAttribute('glam');
    }
    set glam(v) {
        if (v) {
            this.setAttribute('glam', 'true');
        } else {
            this.removeAttribute('glam');
        }
    }
    
    static observedAttributes = ['value', 'glam'];
    attributeChangedCallback() {
        this.textContent = 
            `Hello, ${ this.value || 'null' }!` +
            (this.glam ? '!!@#!' : '');
    }
});
</code></pre></div>
        <p><a href="https://plainvanillaweb.com/blog/articles/2025-04-21-attribute-property-duality/demo4.html">Demo: adding a boolean property</a></p>

        <p>
            Which leaves us with the last bit of tricky trivia:
            it's possible for the custom element's class to be instantiated and attached to the element
            <em>after</em> the property is assigned. In that case the property's setter is never called,
            and the attribute is not updated.
        </p>
        
        <div><pre><code>// html:
&lt;my-hello value="world"&gt;&lt;/my-hello&gt;
// js:
const myHello = document.querySelector('my-hello');
myHello.value = 42; // setter not called before define
customElements.define('my-hello', /* ... */);
console.log(myHello.getAttribute('value')); // -&gt; "world"
</code></pre></div>

        <p>
            This can be avoided by reassigning any previously set properties when the element is connected:
        </p>

        <div><pre><code>customElements.define('my-hello', class extends HTMLElement {
    get value() {
        return this.getAttribute('value');
    }
    set value(v) {
        this.setAttribute('value', String(v));
    }

    get glam() {
        return this.hasAttribute('glam');
    }
    set glam(v) {
        if (v) {
            this.setAttribute('glam', 'true');
        } else {
            this.removeAttribute('glam');
        }
    }
    
    static observedAttributes = ['value', 'glam'];
    attributeChangedCallback() {
        this.textContent = 
            `Hello, ${ this.value || 'null' }!` +
            (this.glam ? '!!@#!' : '');
    }

    connectedCallback() {
        this.#upgradeProperty('value');
        this.#upgradeProperty('glam');
    }

    #upgradeProperty(prop) {
        if (this.hasOwnProperty(prop)) {
            let value = this[prop];
            delete this[prop];
            this[prop] = value;
        }
    }
});
</code></pre></div>

        <h3>In conclusion</h3>

        <p>
            If that seems like a lot of work to do a very simple thing, that is because it is.
            The good news is: we don't have to always do this work.
        </p>
        <p>
            When we're using web components as framework components in a codebase that we control,
            we don't have to follow any of these unwritten rules and can keep the web component code as simple as we like.
            However, when using web components as custom elements to be used in HTML markup 
            then we do well to follow these best practices to avoid surprises, 
            especially when making web components that may be used by others. YMMV.
        </p>
        <p>
            In <a href="../2025-05-09-form-control/">the next article</a>, I'll be looking into custom elements that accept input, and how that adds twists to the plot.
        </p>

    ]]></content>
    </entry>
    <entry>
        <title><![CDATA[New year's resolve]]></title>
        <link rel="alternate" type="text/html" href="https://plainvanillaweb.com/blog/articles/2025-01-01-new-years-resolve/"/>
        <id>https://plainvanillaweb.com/blog/articles/2025-01-01-new-years-resolve/</id>
        <published>2025-01-01T12:00:00.000Z</published>
        <updated>2025-01-01T12:00:00.000Z</updated>
        <summary><![CDATA[import.meta.resolve and other ways to avoid bundling]]></summary>
        <media:content url="https://plainvanillaweb.com/blog/articles/2025-01-01-new-years-resolve/image.webp" type="image/webp" medium="image" />
        <author><name><![CDATA[Joeri Sebrechts]]></name></author>
        <content type="html"><![CDATA[
        <p>
            Today I was looking at what I want to write about in the coming year,
            and while checking out custom element micro-frameworks came across <code>import.meta.resolve</code>
            in the documentation for the <a href="https://github.com/jhuddle/ponys">Ponys</a> micro-framework. 
            That one simple trick is part of the essential toolbox that allows skipping build-time bundling,
            unlocking the vanilla web development achievement in the browser.
        </p>
        <p>
            We need this toolbox because the build-time bundler does a lot of work for us:
        </p>
        <ul>
            <li><em>Combining JS and CSS files</em> to avoid slow page loads.</li>
            <li><em>Resolving paths to the JS and CSS dependencies</em> so we can have clean import statements.</li>
            <li><em>Optimizing the bundled code</em>, by stripping out whitespace, and removing unused imports thanks to a tree shaking algorithm.</li>
        </ul>
        <p>
            It is not immediately apparent how to get these benefits without using a bundler.
        </p>

        <h3>Combining JS and CSS files</h3>
        <p>
            A typical framework-based web project contains hundreds or thousands of files.
            Having all those files loaded separately on a page load would be intolerably slow,
            hence the need for a bundler to reduce the file count. Even by stripping away third party dependencies
            we can still end up with dozens or hundreds of files constituting a vanilla web project.
        </p>
        <p>
            When inspecting a page load in the browser's developer tools, we would then expect to see a lot of this:
        </p>
        <img src="http1.png" alt="a waterfall of network requests in browser devtools over http1" loading="lazy">
        <p>
            The browser would download 6 files at a time and the later requests would block until those files downloaded.
            This limitation of HTTP/1 let to not just the solution of bundlers to reduce file count, but because the limitation of 6 parallel downloads
            was per domain it also led to the popularity of CDN networks which allowed <em>cheating</em> and downloading 12 files at once instead of 6.
        </p> 
        <p>
            However. It's 2025. What you're likely to see in this modern era is more like this:
        </p>
        <img src="http2.png" alt="parallel network requests in browser devtools over http2" loading="lazy">
        <p>
            Because almost all web servers have shifted over to HTTP/2, which no longer has this limitation of only having 6 files in flight at a time,
            we now see that all the files that are requested in parallel get downloaded in parallel.
            There's still a small caveat on lossy connections called head-of-line-blocking, <a href="https://http3-explained.haxx.se/en/why-quic/why-tcphol">fixed in HTTP/3</a>,
            which is presently starting to roll out to web servers across the internet.
        </p>
        <p>
            But the long and short of it is this: requesting a lot of files all at once just isn't that big of a problem anymore.
            We don't need to bundle up the files in a vanilla web project until the file counts get ridiculous.
        </p>

        <h3>Resolving paths</h3>

        <p>
            Another thing that bundlers do is resolving relative paths pointing to imported JS and CSS files.
            See, for example, the elegance of CSS modules for importing styles into a react component from a relative path:
        </p>
        <div><p><em>layout.tsx (React):</em></p><pre><code>import styles from './styles.module.css'
 
export default function Layout({
  children,
}: {
  children: React.ReactNode
}) {
  return &lt;section className={styles.dashboard}&gt;{children}&lt;/section&gt;
}</code></pre></div>
        <p>
            However. It's 2025. And our browsers now have a modern vanilla toolbox for importing.
            When we bootstrap our JS with the magic incantation <code>&lt;script src="index.js" type="module"&gt;&lt;/script&gt;</code>
            we unlock the magic ability to import JS files using <a href="https://developer.mozilla.org/en-US/docs/Web/JavaScript/Guide/Modules#importing_features_into_your_script">ES module</a> import notation:
        </p>
        <div><p><em>index.js:</em></p><pre><code>import { registerAvatarComponent } from './components/avatar.js';
const app = () =&gt; {
    registerAvatarComponent();
}
document.addEventListener('DOMContentLoaded', app);
</code></pre></div>
        <p>
            Inside of such files we also get access to <code>import.meta.url</code>, the URL of the current JS file,
            and <code>import.meta.resolve()</code>, a function that resolves a path relative to the current file,
            even a path to a CSS file:
        </p>
        <div><pre><code>class Layout extends HTMLElement {
    constructor() {
        super();
        this.attachShadow({ mode: 'open' });
        this.shadowRoot.innerHTML = `
            &lt;link rel="stylesheet" href="${import.meta.resolve('styles.css')}"&gt;
            &lt;section class="dashboard"&gt;&lt;slot&gt;&lt;/slot&gt;&lt;/section&gt;
        `;
    }
}

export const registerLayoutComponent = 
    () =&gt; customElements.define('x-layout', Layout);
</code></pre></div>
        <p>
            While not quite the same as what the bundler does, it still enables accessing any file by its relative path,
            and that in turn allows <a href="https://medium.com/@devwares/best-folder-structure-for-modern-web-application-3894e1238bd">organizing projects in whatever way we want</a>, for example in a feature-based folder organization.
            All without needing a build step.
        </p>
        <p>
            This ability to do relative imports can be super-charged by <a href="https://developer.mozilla.org/en-US/docs/Web/HTML/Element/script/type/importmap">import maps</a>,
            which decouple the name of what is imported from the path of the file it is imported from,
            again all without involving a build step.
        </p>

        <h3>Optimizing bundled code</h3>

        <p>
            Another thing bundlers can do is optimizing the bundled code, by splitting the payload into things loaded initially,
            and things loaded later on lazily. And also by minifying it, stripping away unnecessary whitespace and comments so it will load faster.
        </p>
        <p>
            However. It's 2025. We can transparently enable gzip or brotli compression on the server,
            and as it turns out that gets <a href="https://css-tricks.com/the-difference-between-minification-and-gzipping/">almost all the benefit of minifying</a>. 
            While minifying is nice, gzipping is what we really want, and we can get that without a build step.
        </p>
        <p>
            And lazy loading, that works fine using <a href="https://developer.mozilla.org/en-US/docs/Web/JavaScript/Reference/Operators/import">dynamic import</a>, and with a bit due diligence we can put some of the code behind such an import statement.
            I wrote before how React's <a href="../2024-09-09-sweet-suspense/">lazy and suspense can be ported</a> easily to vanilla web components.
        </p>

        <h3>Happy new year!</h3>

        <p>
            Great news! It's 2025, and the browser landscape is looking better than ever. It gives us enough tools that for many web projects
            we can drop the bundler and do just fine. You wouldn't believe it based on what the mainstream frameworks are doing though.
            Maybe 2025 is the year we finally see a wide recognition of just how powerful the browser platform has gotten,
            and a return to old school simplicity in web development practice, away from all those complicated build steps. 
            It's my new year's resolve to do my part in spreading the word.
        </p>
    ]]></content>
    </entry>
    <entry>
        <title><![CDATA[Caching vanilla sites]]></title>
        <link rel="alternate" type="text/html" href="https://plainvanillaweb.com/blog/articles/2024-12-16-caching-vanilla-sites/"/>
        <id>https://plainvanillaweb.com/blog/articles/2024-12-16-caching-vanilla-sites/</id>
        <published>2024-12-16T12:00:00.000Z</published>
        <updated>2024-12-16T12:00:00.000Z</updated>
        <summary><![CDATA[Strategies for cache invalidation on vanilla web sites.]]></summary>
        <media:content url="https://plainvanillaweb.com/blog/articles/2024-12-16-caching-vanilla-sites/image.webp" type="image/webp" medium="image" />
        <author><name><![CDATA[Joeri Sebrechts]]></name></author>
        <content type="html"><![CDATA[
        <p>
            If you go to a typical website built with a framework, you'll see a lot of this:
        </p>
        <img src="https://plainvanillaweb.com/blog/articles/2024-12-16-caching-vanilla-sites/vercel.webp" width="865" alt="browser devtools showing network requests for vercel.com" loading="lazy">
        <p>
            Those long cryptic filenames are not meant to discourage casual snooping.
            They're meant to ensure the filename is changed every time a single byte in that file changes,
            because the site is using <em>far-future expire headers</em>, 
            a technique where the browser is told to cache files indefinitely, until the end of time.
            On successive page loads those resources will then always be served from cache.
            The only drawback is having to change the filename each time the file's contents change, 
            but a framework's build steps typically take care of that.
        </p>
        <p>
            For vanilla web sites, this strategy doesn't work. By abandoning a build step there is no way to automatically generate filenames,
            and unless nothing makes you happier than renaming all files manually every time you deploy a new version,
            we have to look towards other strategies.
        </p>

        <h3>How caching works</h3>

        <p>
            Browser cache behavior is complicated, and a deep dive into the topic deserves <a href="https://web.dev/articles/http-cache">its own article</a>.
            However, very simply put, what you'll see is mostly these response headers:
        </p>
        <dl>
            <dt>Cache-Control</dt>
            <dd>
                <p>
                    The cache control response header determines whether the browser should cache the response, and how long it should serve the response from cache.
                </p>
                <p><code>Cache-Control: public, max-age: 604800</code></p>
                <p>
                    This will cache the resource and only check if there's a new version after one week.
                </p>
            </dd>
            <dt>Age</dt>
            <dd>
                <p>
                    The <code>max-age</code> directive does not measure age from the time that the response is received,
                    but from the time that the response was originally served:
                </p>
                <p><code>Age: 10</code></p>
                <p>
                    This response header indicates the response was served on the origin server 10 seconds ago.
                </p>
            </dd>
            <dt>Etag</dt>
            <dd>
                <p>
                    The <code>Etag</code> header is a unique hash of the resource's contents, an identifier for that version of the resource.
                </p>
                <p><code>ETag: "33a64df551425fcc55e4d42a148795d9f25f89d4"</code></p>
                <p>
                    When the browser requests that resource again from the server, knowing the Etag it can pass an <code>If-None-Match</code>
                    header with the Etag's value. If the resource has not changed it will still have the same Etag value,
                    and the server will respond with <code>304 Not Modified</code>. 
                </p>
                <p><code>If-None-Match: "33a64df551425fcc55e4d42a148795d9f25f89d4"</code></p>
            </dd>
            <dt>Last-Modified</dt>
            <dd>
                <p>
                    The <code>Last-Modified</code> header works similarly to Etag, except instead of sending a hash of the contents,
                    it sends a timestamp of when the resource was last changed. 
                    Like Etag's <code>If-None-Match</code> it is matched by the <code>If-Modified-Since</code> header when requesting the resource from the server again.
                </p>
            </dd>
        </dl>

        <p>
            With that basic review of caching headers, let's look at some strategies for making good use of them in vanilla web projects.
        </p>

        <h3>Keeping it simple: GitHub Pages</h3>

        <p>
            The simplest strategy is what GitHub Pages does: cache files for 10 minutes.
            Every file that's downloaded has <code>Cache-Control: max-age</code> headers that make it expire 10 minutes into the future.
            After that if the file is loaded again it will be requested from the network.
            The browser will add <code>If-None-Match</code> or <code>If-Modified-Since</code> headers
            to allow the server to avoid sending the file if it hasn't been changed, saving bytes but not a roundtrip.
        </p>
        <p>
            If you want to see it in action, just open the browser devtools and reload this page.
        </p>
        <img src="https://plainvanillaweb.com/blog/articles/2024-12-16-caching-vanilla-sites/plainvanilla.webp" width="660" loading="lazy" alt="browser devtools showing network requests for plainvanillaweb.com">  
        <p>
            Visitors never get a page that is more than 10 minutes out of date,
            and as they navigate around the site they mostly get fast cache-served responses.
            However, on repeat visits they will get a slow first-load experience.
            Also, if the server updates in the middle of a page load then different resources may end up mismatched and belong to a different version of the site, causing unpredictable bugs.
            Well, for 10 minutes at least.
        </p>

        <h3>Extending cache durations</h3>
        <p>
            While the 10 minute cache policy is ok for HTML content and small JS and CSS files,
            it can be improved by increasing cache times on large resources like libraries and images.
            By using a caching proxy that allows setting rules on specific types or folders of files we can increase the cache duration.
            For sites <a href="https://blog.cloudflare.com/secure-and-fast-github-pages-with-cloudflare/">proxied through Cloudflare</a>, 
            their <a href="https://developers.cloudflare.com/cache/concepts/customize-cache/">cache customization settings</a> 
            can be used to set these resource-specific policies.
        </p>
        <p>
            By setting longer cache durations on some resources, we can ensure they're served from local cache more often.
            However, what to do if the resource changes? In those cases we need to modify the fetched URL of the resource every place that it is referred to.
            For example, by appending a unique query parameter:
        </p>
        <p>
            <code>&lt;img src="image.jpg?v=2" alt="My cached image" /&gt;</code>
        </p>
        <p>
            The awkward aspect of having to change the referred URL in every place that a changed file is used
            makes extending cache durations inconvenient for files that are changed often or are referred in many places.
        </p>
        <p>
            Also, applying such policies to JavaScript or CSS becomes a minefield,
            because a mismatched combination of JS or CSS files could end up in the browser cache indefinitely,
            breaking the website for the user until URL's are changed or their browser cache is cleared.
            For that reason, I don't think it's prudent to do this for anything but files that never change or that have some kind of version marker in their URL.
        </p>

        <h3>Complete control with service workers</h3>

        <p>
            A static web site can take complete control over its cache behavior by <a href="https://web.dev/learn/pwa/service-workers">using a service worker</a>.
            The service worker intercepts every network request and then decides whether to serve it from a local cache or from the network.
            For example, here's a service worker that will cache all resources indefinitely, until its version is changed:
        </p>
        <div><pre><code>let cacheName = 'cache-worker-v1';
// these are automatically cached when the site is first loaded
let initialAssets = [
    './',
    'index.html',
    'index.js',
    'index.css',
    'manifest.json',
    'android-chrome-512x512.png',
    'favicon.ico',
    'apple-touch-icon.png',
    'styles/reset.css',
    // the rest will be auto-discovered
];

// initial bundle (on first load)
self.addEventListener('install', (event) =&gt; {
    event.waitUntil(
        caches.open(cacheName).then((cache) =&gt; {
            return cache.addAll(initialAssets);
        })
    );
});

// clear out stale caches after service worker update
self.addEventListener('activate', (event) =&gt; {
    event.waitUntil(
        caches.keys().then((cacheNames) =&gt; {
            return Promise.all(
                cacheNames.map((cacheName) =&gt; {
                    if (cacheName !== self.cacheName) {
                        return caches.delete(cacheName);
                    }
                })
            );
        })
    );
});

// default to fetching from cache, fallback to network
self.addEventListener('fetch', (event) =&gt; {
    const url = new URL(event.request.url);

    // other origins bypass the cache
    if (url.origin !== location.origin) {
        networkOnly(event);
    // default to fetching from cache, and updating asynchronously
    } else {
        staleWhileRevalidate(event);
    }
});

const networkOnly = (event) =&gt; {
    event.respondWith(fetch(event.request));
}

// fetch events are serviced from cache if possible, but also updated behind the scenes
const staleWhileRevalidate = (event) =&gt; {
    event.respondWith(
        caches.match(event.request).then(cachedResponse =&gt; {
            const networkUpdate = 
                fetch(event.request).then(networkResponse =&gt; {
                    caches.open(cacheName).then(
                        cache =&gt; cache.put(event.request, networkResponse));
                    return networkResponse.clone();
                }).catch(_ =&gt; /*ignore because we're probably offline*/_);
            return cachedResponse || networkUpdate;
        })
    );
}</code></pre></div>
        <p>
            This recreates the <em>far-future expiration</em> strategy but does it client-side, inside the service worker.
            Because only the version at the top of the <code>sw.js</code> file needs to be updated when the site's contents change,
            this becomes practical to do without adding a build step. However, because the service worker intercepts network requests
            to change their behavior there is a risk that bugs could lead to a broken site, so this strategy is only for the careful and well-versed.
            (And no, the above service worker code hasn't been baked in production, so be careful when copying it to your own site.)
        </p>
        
        <h3>Wrapping up</h3>
        <p>
            Setting sane cache policies meant to optimize page load performance is one of the things typically in the domain
            of full-fat frameworks or application servers. But, abandoning build steps and server-side logic does not necessarily 
            have to mean having poor caching performance. There are multiple strategies with varying amounts of cache control,
            and there is probably a suitable strategy for any plain vanilla site.
        </p>
        <p>
            Last but not least, an even better way to speed up page loading is to keep the web page itself light.
            Using a plain vanilla approach to pages with zero dependencies baked into the page weight
            already puts you in pole position for good page load performance, before caching even enters the picture.
        </p>
    ]]></content>
    </entry>
    <entry>
        <title><![CDATA[Editing Plain Vanilla]]></title>
        <link rel="alternate" type="text/html" href="https://plainvanillaweb.com/blog/articles/2024-10-20-editing-plain-vanilla/"/>
        <id>https://plainvanillaweb.com/blog/articles/2024-10-20-editing-plain-vanilla/</id>
        <published>2024-10-20T12:00:00.000Z</published>
        <updated>2024-10-20T12:00:00.000Z</updated>
        <summary><![CDATA[How to set up VS Code for a vanilla web project.]]></summary>
        <media:content url="https://plainvanillaweb.com/blog/articles/2024-10-20-editing-plain-vanilla/image.webp" type="image/webp" medium="image" />
        <author><name><![CDATA[Joeri Sebrechts]]></name></author>
        <content type="html"><![CDATA[
        <p>
            I'm typing this up in Visual Studio Code, after realizing I should probably explain how I use it to make this site.
            But the whole idea behind Plain Vanilla is no build, no framework, no tools.
            And VS Code is definitely a tool. So what gives?
        </p>
        <p>
            There's a difference between tools that sit in between the code and a deployed site, and tools that only act in support of editing or deploying.
            The first category, like npm or typescript, impose continued maintenance on the project because they form a direct dependency.
            The second category, like VS Code or git, are easily replaced without impacting the project's ability to be edited.
            There's a tension between the ability to get things done faster, and the burden created by additional dependencies.
            For this project I draw the line in accepting the second category while rejecting the first.
        </p>
        <h3>Setting up a profile</h3>
        <p>
            I use VS Code for framework-based work projects as well as vanilla web development.
            To keep those two realms neatly separated I've <a href="https://code.visualstudio.com/docs/editor/profiles">set up a separate Vanilla profile</a>. 
            In that profile is a much leaner suite of extensions, configured for only vanilla web development.
        </p>
        <ul>
            <li><strong>ESLint</strong>, to automatically lint the JS code while editing</li>
            <li><strong>webhint</strong>, to lint the HTML and CSS code, and detect accessibility issues</li>
            <li><strong>html-in-template-string</strong>, to syntax highlight HTML template strings</li>
            <li><strong>Todo Tree</strong>, to keep track of TODO's while doing larger changes</li>
            <li><strong>Live Preview</strong>, to get a live preview of the page that I'm working on</li>
            <li><strong>VS Code Counter</strong>, for quick comparative line counts when porting framework code to vanilla</li>
            <li><strong>Intellicode</strong>, for simple code completion</li>
            <li><strong>Codeium</strong>, for AI-assisted code completion, works great for web component boilerplate</li>
        </ul>
        <p>
            Modern web development can be very overburdened by tools, sometimes all but requiring the latest Macbook Pro with decadent amounts of RAM
            just to edit a basic project. The combination of a no build plain vanilla codebase with a lean VS Code profile guarantees quick editing,
            even on my oldest and slowest laptops.
        </p>
        <h3>Linting</h3>
        <p>
            Nobody's perfect, myself included, so something needs to be scanning the code for goofs.
            The first linting tool that's set up is ESLint. The VS Code extension regrettably does not come bundled with an eslint installation,
            so this has to be installed explicitly. By doing it once globally this can be reused across vanilla web projects.
        </p>
        <p><code>npm install -g eslint @eslint/js globals</code></p>
        <p>
            Because I use nvm to manage node versions the global eslint install was not automatically detectable.
            This required setting a NODE_PATH in <code>.zshrc</code> that VS Code then picked up.
        </p>
        <p><code>export NODE_PATH=$(npm root -g)</code></p>
        <p>
            In addition, in order to lint successfully it needs a configuration file, located in the project's root.
        </p>
        <div><p><em>/eslint.config.cjs:</em></p><pre><code>/* eslint-disable no-undef */
const globals = require("globals");
const js = require("@eslint/js");

module.exports = [
    js.configs.recommended, 
    {
        languageOptions: {
            globals: {
                ...globals.browser,
                ...globals.mocha
            },
            ecmaVersion: 2022,
            sourceType: "module",
        }
    },
    {
        ignores: [
            "public/blog/articles/",
            "**/lib/",
            "**/react/",
        ]
    }
];</code></pre></div>
        <p>
            Setting the <code>ecmaVersion</code> to 2022 ensures that I don't accidentally use newer and unsupported Javascript features,
            like in this example trying to use ES2024's <a href="https://2ality.com/2024/06/ecmascript-2024.html#regular-expression-flag-%2Fv">v flag</a> in regular expressions.
            This version could be set to whatever browser compatibility a project requires.
        </p>
        <img src="https://plainvanillaweb.com/blog/articles/2024-10-20-editing-plain-vanilla/eslinterror.png" alt="ESLint error for ECMAScript 2024 feature" loading="lazy" width="561">
        <p>
            The <code>ignores</code> blocks excludes external libraries to placate my OCD that wants to see zero errors or warnings reported by eslint project-wide.
            The article folders are excluded for a similar reason, because they contain a lot of incomplete and deliberately invalid example JS files.
        </p>
        <p>
            The webhint extension is installed to do automatic linting on HTML and CSS.
            Luckily it out of the box comes bundled with a webhint installation and applies the default <code>development</code> ruleset.
            A nice thing about this extension is that it reports accessibility issues.
        </p>
        <img src="https://plainvanillaweb.com/blog/articles/2024-10-20-editing-plain-vanilla/webhinterror.png" alt="Webhint error for accessibility" loading="lazy" width="842">
        <p>
            Only a few tweaks were made to the webhint configuration to again get to that all-important zero warnings count.
        </p>
        <div><p><em>/.hintrc:</em></p><pre><code>{
  "extends": [
    "development"
  ],
  "hints": {
    "compat-api/html": [
      "default",
      {
        "ignore": [
          "iframe[loading]"
        ]
      }
    ],
    "no-inline-styles": "off"
  }
}</code></pre></div>

        <h3>html-in-template-string</h3>
        <p>
            I've mentioned it before in the <a href="../2024-08-25-vanilla-entity-encoding/">entity encoding article</a>,
            but this neat little extension formats HTML inside tagged template strings in web component JS code.
        </p>
        <img src="https://plainvanillaweb.com/blog/articles/2024-10-20-editing-plain-vanilla/syntax-highlighting.webp" loading="lazy" alt="Syntax highlighting in template strings" width="849">

        <h3>Live Preview</h3>
        <p>
            The center piece for a smooth editing workflow is the Live Preview extension.
            I can right-click on any HTML file in the project and select "Show Preview" to get a live preview of the page.
            This preview automatically refreshes when files are saved. Because vanilla web pages always load instantly
            this provides the hot-reloading workflow from framework projects, except even faster and with zero setup.
            The only gotcha is that all paths in the site have to be relative paths so the previewed page can resolve them.
        </p>
        <img src="https://plainvanillaweb.com/blog/articles/2024-10-20-editing-plain-vanilla/live-preview.webp" alt="Live Preview of this article while editing" loading="lazy">
        <p>
            The preview's URL can be pasted into a "real browser" to debug tricky javascript issues
            and do compatibility testing. Very occasionally I'll need to spin up a "real server", 
            but most of the code in my vanilla projects is written with only a Live Preview tab open.
        </p>
        <p>
            Previewing is also how I get a realtime view of unit tests while working on components or infrastructure code,
            by opening the tests web page and selecting the right test suite to hot reload while editing.
        </p>

        <h3>Bonus: working offline</h3>
        <p>
            Because I live at the beach and work in the big city I regularly need to take long train rides with spotty internet connection.
            Like many developers I cannot keep web API's in my head and have to look them up regularly while coding.
            To have a complete offline vanilla web development setup with me at all times I use <a href="">devdocs.io</a>.
            All my projects folders are set up to sync automatically with <a href="https://syncthing.net/">Syncthing</a>, 
            so whatever I was doing on the desktop can usually be smoothly continued offline on the laptop 
            without having to do any prep work to make that possible.
        </p>
        <img src="https://plainvanillaweb.com/blog/articles/2024-10-20-editing-plain-vanilla/devdocs.webp" alt="devdocs.io screenshot" loading="lazy">

        <p>
            There, that's my lean vanilla web development setup.
            What should I add to this, or do differently? Feel free to let me know.
        </p>
    ]]></content>
    </entry>
    <entry>
        <title><![CDATA[Needs more context]]></title>
        <link rel="alternate" type="text/html" href="https://plainvanillaweb.com/blog/articles/2024-10-07-needs-more-context/"/>
        <id>https://plainvanillaweb.com/blog/articles/2024-10-07-needs-more-context/</id>
        <published>2024-10-07T12:00:00.000Z</published>
        <updated>2024-10-07T12:00:00.000Z</updated>
        <summary><![CDATA[A better way to do context for web components.]]></summary>
        <media:content url="https://plainvanillaweb.com/blog/articles/2024-10-07-needs-more-context/image.webp" type="image/webp" medium="image" />
        <author><name><![CDATA[Joeri Sebrechts]]></name></author>
        <content type="html"><![CDATA[
        <p>
            In the earlier article <a href="../2024-09-28-unreasonable-effectiveness-of-vanilla-js/">the unreasonable effectiveness of vanilla JS</a>
            I explained a vanilla web version of the React tutorial example <em>Scaling up with Reducer and Context</em>.
            That example used a technique for <em>context</em> based on <code>Element.closest()</code>.
            While that way of obtaining a context is very simple, which definitely has its merits,
            it also has some downsides:
        </p>
        <ul>
            <li>It cannot be used from inside a shadow DOM to find a context that lives outside of it without <a href="https://stackoverflow.com/q/54520554/20980">clumsy workarounds</a>.</li>
            <li>It requires a custom element to be the context.</li>
            <li>There has to be separate mechanism to subscribe to context updates.</li>
        </ul>
        <p>
            There is in fact, or so I learned recently, a better and more standard way to solve this
            known as the <a href="https://github.com/webcomponents-cg/community-protocols/blob/main/proposals/context.md">context protocol</a>. 
            It's not a browser feature, but a protocol for how to implement a context in web components.
        </p>
        <p>
            This is how it works: the consumer starts by dispatching a <code>context-request</code> event.
        </p>
        <div><pre><code>class ContextRequestEvent extends Event {
    constructor(context, callback, subscribe) {
        super('context-request', {
            bubbles: true,
            composed: true,
        });
        this.context = context;
        this.callback = callback;
        this.subscribe = subscribe;
    }
}

customElements.define('my-component', class extends HTMLElement {
    connectedCallback() {
        this.dispatchEvent(
            new ContextRequestEvent('theme', (theme) =&gt; {
                // ...
            })
        );
    }
});
</code></pre></div>
        <p>
            The event will travel up the DOM tree (bubbles = true), piercing any shadow DOM boundaries (composed = true),
            until it reaches a listener that responds to it. This listener is attached to the DOM by a context provider.
            The context provider uses the <code>e.context</code> property to detect whether it should respond,
            then calls <code>e.callback</code> with the appropriate context value.
            Finally it calls <code>e.stopPropagation()</code> so the event will stop bubbling up the DOM tree.
        </p>
        <p>
            This whole song and dance is guaranteed to happen synchronously, which enables this elegant pattern:
        </p>
        <div><pre><code>customElements.define('my-component', class extends HTMLElement {
    connectedCallback() {
        let theme = 'light'; // default value
        this.dispatchEvent(
            new ContextRequestEvent('theme', t =&gt; theme = t)
        );
        // do something with theme
    }
});
</code></pre></div>
        <p>
            If no provider is registered the event's callback is never called and the default value will be used instead.
        </p>
        <p>
            Instead of doing a one-off request for a context's value it's also possible to subscribe to updates
            by setting its subscribe property to true.
            Every time the context's value changes the callback will be called again.
            To ensure proper cleanup the subscribing element has to unsubscribe on disconnect.
        </p>
        <div><pre><code>customElements.define('my-component', class extends HTMLElement {
    #unsubscribe;
    connectedCallback() {
        this.dispatchEvent(
            new ContextRequestEvent('theme', (theme, unsubscribe) =&gt; {
                this.#unsubscribe = unsubscribe;
                // do something with theme
            }, true)
        );
    }
    disconnectedCallback() {
        this.#unsubscribe?.();
    }
});
</code></pre></div>
        <p>
            It is recommended, but not required, to listen for and call unsubscribe functions in one-off requests,
            just in case a provider is overzealously creating subscriptions.
            However, this is not necessary when using only spec-compliant providers.
        </p>
        <div><pre><code>customElements.define('my-component', class extends HTMLElement {
    connectedCallback() {
        let theme = 'light';
        this.dispatchEvent(
            new ContextRequestEvent('theme', (t, unsubscribe) =&gt; {
                theme = t;
                unsubscribe?.();
            })
        );
        // do something with theme
    }
});
</code></pre></div>
        <p>
            Providers are somewhat more involved to implement.
            There are several spec-compliant libraries that implement them,
            like <a href="https://lit.dev/docs/data/context/">@lit/context</a> 
            and <a href="https://blikblum.github.io/wc-context/">wc-context</a>.
            A very minimal implementation is this one:
        </p>
        <div><pre><code>export class ContextProvider extends EventTarget {
    #value;
    get value() { return this.#value }
    set value(v) { this.#value = v; this.dispatchEvent(new Event('change')); }

    #context;
    get context() { return this.#context }

    constructor(target, context, initialValue = undefined) {
        super();
        this.#context = context;
        this.#value = initialValue;
        this.handle = this.handle.bind(this);
        if (target) this.attach(target);
    }
    
    attach(target) {
        target.addEventListener('context-request', this.handle);
    }

    detach(target) {
        target.removeEventListener('context-request', this.handle);
    }

    /**
     * Handle a context-request event
     * @param {ContextRequestEvent} e 
     */
    handle(e) {
        if (e.context === this.context) {
            if (e.subscribe) {
                const unsubscribe = () =&gt; this.removeEventListener('change', update);
                const update = () =&gt; e.callback(this.value, unsubscribe);
                this.addEventListener('change', update);
                update();
            } else {
                e.callback(this.value);
            }
            e.stopPropagation();
        }
    }
}
</code></pre></div>
        <p>
            This minimal provider can then be used in a custom element like this:
        </p>
        <div><pre><code>customElements.define('theme-context', class extends HTMLElement {
    themeProvider = new ContextProvider(this, 'theme', 'light');
    toggleProvider = new ContextProvider(this, 'theme-toggle', () =&gt; {
        this.themeProvider.value = this.themeProvider.value === 'light' ? 'dark' : 'light';
    });
    connectedCallback() {
        this.style.display = 'contents';
    }
});
</code></pre></div>
        <p>
            Which would be used on a page like this, with <code>&lt;my-subscriber&gt;</code> requesting 
            the theme by dispatching a <code>context-request</code> event.
        </p>
        <div><pre><code>&lt;theme-context&gt;
    &lt;div&gt;
        &lt;my-subscriber&gt;&lt;/my-subscriber&gt;
    &lt;/div&gt;
&lt;/theme-context&gt;
</code></pre></div>
        <p>
            Notice in the above example that the <code>theme-toggle</code> context is providing a function.
            This unlocks a capability for dependency injection where API's to control page behavior
            are provided by a context to any subscribing custom element.
        </p>
        <p>
            Don't let this example mislead you however. A provider doesn't actually need a dedicated custom element,
            and can be attached to any DOM node, even the body element itself.
            This means a context can be provided or consumed from anywhere on the page.
        </p>
        <div><pre><code>// loaded with &lt;script type="module" src="theme-provider.js"&gt;&lt;/script&gt;

import { ContextProvider } from "./context-provider.js";

const themeProvider = new ContextProvider(document.body, 'theme', 'light');
const toggleProvider = new ContextProvider(document.body, 'theme-toggle', () =&gt; {
    themeProvider.value = themeProvider.value === 'light' ? 'dark' : 'light';
});
</code></pre></div>
        <p>
            And because there can be more than one event listener on a page,
            there can be more than one provider providing the same context.
            The first one to handle the event will win.
        </p>
        <p>
            Here's an example that illustrates a combination of a global provider attached to the body (top panel),
            and a local provider using a <code>&lt;theme-context&gt;</code> (bottom panel).
            Every time the <code>&lt;theme-toggle&gt;</code> is reparented it resubscribes to the theme from the nearest provider.
        </p>
        <p><a href="https://plainvanillaweb.com/blog/articles/2024-10-07-needs-more-context/combined/index.html">combined example</a></p>
        <div><p><em>index.js:</em></p><pre><code>import { ContextRequestEvent } from "./context-request.js";
import "./theme-provider.js"; // global provider on body
import "./theme-context.js"; // element with local provider

customElements.define('theme-demo', class extends HTMLElement {
    connectedCallback() {
        this.innerHTML = `
            &lt;theme-panel id="first"&gt;
                &lt;theme-toggle&gt;&lt;/theme-toggle&gt;
            &lt;/theme-panel&gt;
            &lt;theme-context&gt;
                &lt;theme-panel id="second"&gt;
                &lt;/theme-panel&gt;
            &lt;/theme-context&gt;
            &lt;button&gt;Reparent toggle&lt;/button&gt;
        `;
        this.querySelector('button').onclick = reparent;
    }
});

customElements.define('theme-panel', class extends HTMLElement {
    #unsubscribe;

    connectedCallback() {
        this.dispatchEvent(new ContextRequestEvent('theme', (theme, unsubscribe) =&gt; {
            this.className = 'panel-' + theme;
            this.#unsubscribe = unsubscribe;
        }, true));
    }

    disconnectedCallback() {
        this.#unsubscribe?.();
    }
});

customElements.define('theme-toggle', class extends HTMLElement {
    #unsubscribe;

    connectedCallback() {
        this.innerHTML = '&lt;button&gt;Toggle&lt;/button&gt;';
        this.dispatchEvent(new ContextRequestEvent('theme-toggle', (toggle) =&gt; {
            this.querySelector('button').onclick = toggle;
        }));
        this.dispatchEvent(new ContextRequestEvent('theme', (theme, unsubscribe) =&gt; {
            this.querySelector('button').className = 'button-' + theme;
            this.#unsubscribe = unsubscribe;
        }, true));
    }

    disconnectedCallback() {
        this.#unsubscribe?.();
    }
});

function reparent() {
    const toggle = document.querySelector('theme-toggle');
    const first = document.querySelector('theme-panel#first');
    const second = document.querySelector('theme-panel#second');
    if (toggle.parentNode === second) {
        first.append(toggle);
    } else {
        second.append(toggle);
    }
}</code></pre></div>

        <p>
            The full implementation of this protocol can be found in the <a href="https://github.com/jsebrech/tiny-context">tiny-context repo</a> on Github.
        </p>
    ]]></content>
    </entry>
    <entry>
        <title><![CDATA[Lived experience]]></title>
        <link rel="alternate" type="text/html" href="https://plainvanillaweb.com/blog/articles/2024-09-30-lived-experience/"/>
        <id>https://plainvanillaweb.com/blog/articles/2024-09-30-lived-experience/</id>
        <published>2024-09-30T12:00:00.000Z</published>
        <updated>2024-09-30T12:00:00.000Z</updated>
        <summary><![CDATA[Thoughts on the past and future of frameworks, web components and web development.]]></summary>
        <media:content url="https://plainvanillaweb.com/blog/articles/2024-09-30-lived-experience/image.webp" type="image/webp" medium="image" />
        <author><name><![CDATA[Joeri Sebrechts]]></name></author>
        <content type="html"><![CDATA[
        <p>
            Ryan Carniato shared a hot take a few days ago, <a href="https://dev.to/ryansolid/web-components-are-not-the-future-48bh">Web Components Are Not the Future</a>.
            As hot takes tend to do, it got some responses, like Nolan Lawson's piece <a href="https://nolanlawson.com/2024/09/28/web-components-are-okay/">Web components are okay</a>,
            or Cory LaViska's <a href="https://www.abeautifulsite.net/posts/web-components-are-not-the-future-they-re-the-present/">Web Components Are Not the Future — They're the Present</a>.
            They do an excellent job of directly engaging Ryan's arguments, so I'm not going to do that here.
            Instead I want to talk about my lived experience of web development, and where I hope it is headed in the future.
            Take it in the spirit it is intended, one of optimism and possibility.
        </p>

        <h3>A galaxy far, far away</h3>
        <p>
            So I've been making web sites since a long time ago, since before CSS and HTML4.
            I say this not to humblebrag, but to explain that I was here for all of it.
            Every time when the definition of <em>modern web development</em> changed I would update my priors, following along.
        </p>
        <p>
            For the longest time making web pages do anything except show text and images was an exercise in frustration.
            Browsers were severely lacking in features, were wildly incompatible with web standards and each other,
            and the tools that web developers needed to bring them to order were missing or lacking.
            I built my share of vanilla JS components back in the IE6 days, and it made me dream of a better way.
            When frameworks first started coming on the scene with that better way, adding missing features, abstracting away incompatibility,
            and providing better tooling, I was ready for them. I was all-in.
        </p>
        <p>
            I bought into ExtJS, loved it for a time, and then got a hundred thousand line codebase stuck on ExtJS 3 because version 4 changed things
            so much that porting was too costly. I then bought into Backbone, loved that too, but had to move on when its principal developer did.
            I joined a team that bought into AngularJS and got stuck painted into a corner when the Angular team went in a totally different direction for v2.
            I helped rewrite a bunch of frontends in Angular v2 and React, 
            and found myself sucked into constant forced maintenance when their architecture and ecosystems churned.
        </p>
        <p>
            Did I make bad choices? Even in hindsight I would say I picked the right choices for the time.
            Time just moved on.
        </p>

        <h3>The cost of change</h3>
        <p>
            This lived experience taught me a strong awareness of rates of change in dependencies, and the costs they impose.
            I imagine a web page as a thin old man sitting astride a tall pile of dependencies, each changing at their own pace.
            Some dependencies are stable for decades, like HTML's core set of elements, or CSS 2's set of layout primitives. 
            They're so stable that we don't even consider them dependencies, they're just <em>the web</em>.
        </p>
        <p>
            Other dependencies change every few years, like module systems, or new transpiled languages, 
            or the preferred build and bundling tool of the day, or what framework is in vogue.
            Then there are the dependencies that change yearly, like major framework and OS releases.
            Finally there are the dependencies that change constantly, like the many packages that contribute
            to a typical web application built with a popular framework.
        </p>
        <p>
            As a web developer who loves their user, taking on those dependencies creates a Solomon's choice.
            Either you keep up with the churn, and spend a not insignificant amount of your day working and reworking code
            that already works, instead of working on the things your user cares about. 
            Or, you stick it out for as long as you can on old versions, applying ever more workarounds to get 
            old framework releases and their outdated build and CLI tools to work in new OS and ecosystem environments,
            slowly boiling a frog that will at some point force a deep rewrite, again at the expense of the user.
        </p>
        <p>
            Which is not to say the frameworks don't add value. They absolutely do, and they keep getting better. 
            Writing new code on a new framework is a steadily rising tide of developer experience. 
            But let us not pretend these benefits don't come at a cost.
            Wherever there is a codebase too complicated to understand and maintain yourself, wherever there is a set of build tools 
            that must be kept compatible with changes in operating systems and ecosystems,
            there is a shelf life. Sooner or later the makers of every framework and of every tool will move on,
            even if it's just to a new long-term supported release, and the web developers that they served will have to move with them.
        </p>
        <p>
            I hold this truth to be self-evident: the larger the abstraction layer a web developer uses on top of web standards,
            the shorter the shelf life of their codebase becomes, and the more they will feel the churn.
        </p>

        <h3>The rising tide</h3>
        <p>
            Why do modern web projects built with modern frameworks depend on so much <em>stuff</em>?
            At first there was no other option. Interacting with the DOM was painful, 
            and web frameworks rightly made choices to keep component systems outside the DOM, minimizing and abstracting away those interactions
            in increasingly clever DOM reconciliation strategies. Supporting the brittle browsers and slow devices of the day required many workarounds and polyfills,
            and web frameworks rightly added intricate tools to build, bundle and minify the user's code.
        </p>
        <p>
            They needed a way to bring dependencies into those build systems, and sanely settled on the convention of node modules
            and the NPM ecosystem. It got easy to add more dependencies, and just as water always finds the easy way down,
            dependencies found the easy way in. As the abstraction layer grew the load time cost imposed by it grew right along,
            and so we got server-side rendering, client-side hydration, lazy loading, and many other load time reduction strategies.
        </p>
        <p>
            DOM-diffing, synthetic event systems, functional components, JSX, reactive data layers, server-side rendering and streaming, bundlers, tree shaking, 
            transpilers and compilers, and all the other complications that you won't find in web standards but you will find in every major web framework —
            they are the things invented to make the modern web possible, but they are not the web. The web is what ships to the browser.
            And all of those things are downstream from the decision to abstract away the browser,
            a decision once made in good faith and for good reasons. A decision which now needs revisiting.
        </p>
        <p>
            Browsers were not standing still. They saw what web developers were doing in userland to compensate 
            for the deficiencies in browser API's, and they kept improving and growing the platform, a rising tide slowly catching up to what frameworks did.
            When Microsoft bid IE <a href="https://blogs.windows.com/windowsexperience/2022/06/15/internet-explorer-11-has-retired-and-is-officially-out-of-support-what-you-need-to-know/">a well-deserved farewell</a> on June 15, 2022 a tipping point was reached.
            For the first time the browser platform was so capable that it felt to me like it didn't need so much abstracting away anymore.
            It wasn't a great platform, not as cleanly designed or complete as the API's of the popular frameworks,
            but it was <em>Good Enough™</em> as a foundation, and that was all that mattered.
        </p>

        <h3>Holding my breath</h3>

        <p>
            I was very excited for what would happen in the framework ecosystem. There was a golden opportunity for frameworks 
            to tear down their abstraction layers, make something far simpler, far more closely aligned with the base web platform. 
            They could have a component system built on top of web components,
            leveraging browser events and built-in DOM API's. All the frameworks could become cross-compatible, 
            easily plugging into each other's data layers and components while preserving what makes them unique.
            The page weights would shrink by an order of magnitude with so much infrastructure code removed,
            and that in combination with the move to HTTP/3 could make build tools optional.
            It would do less, so inevitably be worse in some ways, but sometimes <a href="https://en.wikipedia.org/wiki/Worse_is_better">worse is better</a>.
        </p>
        <p>
            I gave a talk about how good the browser's platform had gotten, 
            showing off <a href="https://github.com/jsebrech/create-react-app-zero">a version of Create React App</a> that didn't need any build tools
            and was extremely light-weight, and the developer audience was just as excited as I was.
            And I held my breath waiting on framework churn to for once go in the other direction, towards simplicity...
        </p>
        <p>
            But nothing happened. In fact, the major frameworks kept building up their abstraction layers instead of building down.
            We got React Server Components and React Compiler, exceedingly clever, utterly incomprehensible, 
            workarounds for self-imposed problems caused by overengineering.
            Web developers don't seem to mind, but they struggle quietly with how to keep up with these tools and deliver good user experiences. 
            The bigger the abstraction layer gets, the more they feel the churn.
        </p>
        <p>
            The irony is not lost on me that now the framework authors also feel the churn in their dependencies,
            struggling to adapt to web components as foundational technology. React 19 is supposed to finally support web components
            in a way that isn't incredibly painful, or so they say, we'll see. I confess to feeling some satisfaction
            in their struggle. The shoe is on the other foot. Welcome to modern web development.
        </p>
        
        <h3>The road ahead</h3>

        <p>
            What the frameworks are doing, that's fine for them, and they can keep doing it. 
            But I'm done with all that unless someone is paying me to do it.
            They're on a fundamentally different path from where I want web development to go, from how I want to make web pages.
            The web is what ships to the browser. Reducing the distance between what the developer writes and what ships to the browser
            is valuable and necessary. This blog and this site are my own stake in the ground for this idea, 
            showing just how much you can get done without any framework code or build tools at all. 
            But let's be honest: web components are not a framework, no matter how hard I tried to explain them as one.
        </p>

        <blockquote>
            <p>Comparing web components to React is like comparing a good bicycle with a cybertruck.</p>
            <p>They do very different things, and they're used by different people with very, very different mindsets.</p>
        </blockquote>
        <cite><a href="https://adactio.com/notes/21455">Jeremy Keith</a></cite>

        <p>
            I want a motorbike, not a cybertruck. I still want frameworks, only much lighter. 
            Frameworks less than 10 KB in size, that are a thin layer on top of web standards
            but still solve the problems that frameworks solve. I call this idea the <em>interoperable web framework</em>:
        </p>
        <ul>
            <li>Its components are just web components.</li>
            <li>Its events are just DOM events.</li>
            <li>Its templates are just HTML templates.</li>
            <li>It doesn't need to own the DOM that its components take part in.</li>
            <li>Its data and event binding works on all HTML elements, built-in or custom, made with the framework or with something else.</li>
            <li>It can be easily mixed together on a page with other interoperable web frameworks, with older versions of itself, or with vanilla code.</li>
            <li>It doesn't need its own build tools.</li>
        </ul>
        <p>
            I just feel it on my bones such a thing can be built now. Maybe I'm wrong and Ryan Carniato is right.
            After all, he knows a lot more about frameworks than I do. But the more vanilla code that I write the more certain that I feel on this.
            Some existing solutions like Lit are close, but none are precisely what I am looking for. 
            I would love to see a community of vanilla developers come together to figure out what that could look like,
            running experiments and iterating on the results. For now I will just keep holding my breath, waiting for the tide to come in.
        </p>
    ]]></content>
    </entry>
    <entry>
        <title><![CDATA[The unreasonable effectiveness of vanilla JS]]></title>
        <link rel="alternate" type="text/html" href="https://plainvanillaweb.com/blog/articles/2024-09-28-unreasonable-effectiveness-of-vanilla-js/"/>
        <id>https://plainvanillaweb.com/blog/articles/2024-09-28-unreasonable-effectiveness-of-vanilla-js/</id>
        <published>2024-09-28T12:00:00.000Z</published>
        <updated>2024-09-28T12:00:00.000Z</updated>
        <summary><![CDATA[A case study in porting intricate React code to vanilla.]]></summary>
        <media:content url="https://plainvanillaweb.com/blog/articles/2024-09-28-unreasonable-effectiveness-of-vanilla-js/image.webp" type="image/webp" medium="image" />
        <author><name><![CDATA[Joeri Sebrechts]]></name></author>
        <content type="html"><![CDATA[
        <p>
            I have a confession to make. At the end of the Plain Vanilla tutorial's <a href="../../../pages/applications.html">Applications page</a>
            a challenge was posed to the reader: port <a href="https://react.dev">react.dev</a>'s final example 
            <a href="https://react.dev/learn/scaling-up-with-reducer-and-context">Scaling Up with Reducer and Context</a> to vanilla web code.
            Here's the confession: until today I had never actually ported over that example myself.
        </p>
        <p>
            That example demonstrates a cornucopia of React's featureset.
            Richly interactive UI showing a tasks application, making use of a context to lift the task state up,
            and a reducer that the UI's controls dispatch to. React's DOM-diffing algorithm gets a real workout 
            because each task in the list can be edited independently from and concurrently with the other tasks. 
            It is an intricate and impressive demonstration. Here it is in its interactive glory:
        </p>
        <p><a href="https://plainvanillaweb.com/blog/articles/2024-09-28-unreasonable-effectiveness-of-vanilla-js/complete/index.html">complete example</a></p>
        <p>
            But I lied. That interactive example is actually the vanilla version and it is identical.
            If you want to verify that it is in fact identical, check out the <a href="https://codesandbox.io/p/sandbox/react-dev-wy7lfd">original React example</a>.
            And with that out of the way, let's break apart the vanilla code.
        </p>

        <h3>Project setup</h3>

        <p>The React version has these code files that we will need to port:</p>
        <ul>
            <li><strong>public/index.html</strong></li>
            <li><strong>src/styles.css</strong></li>
            <li><strong>src/index.js</strong>: imports the styles, bootstraps React and renders the App component</li>
            <li><strong>src/App.js</strong>: renders the context's TasksProvider containing the AddTask and TaskList components</li>
            <li><strong>src/AddTask.js</strong>: renders the simple form at the top to add a new task</li>
            <li><strong>src/TaskList.js</strong>: renders the list of tasks</li>
        </ul>
        <p>
            To make things fun, I chose the same set of files with the same filenames for the vanilla version.
            Here's <strong>index.html</strong>:
        </p>
        <div><p><em>index.html:</em></p><pre><code>&lt;!DOCTYPE html&gt;
&lt;html lang="en"&gt;
&lt;head&gt;
    &lt;meta charset="UTF-8"&gt;
    &lt;meta name="viewport" content="width=device-width, initial-scale=1.0"&gt;
    &lt;title&gt;Document&lt;/title&gt;
    &lt;link rel="stylesheet" href="styles.css"&gt;
&lt;/head&gt;
&lt;body&gt;
    &lt;div id="root"&gt;&lt;/div&gt;
    &lt;script type="module" src="index.js"&gt;&lt;/script&gt;
&lt;/body&gt;
&lt;/html&gt;</code></pre></div>
        <p>
            The only real difference is that it links to <strong>index.js</strong> and <strong>styles.css</strong>.
            The stylesheet was copied verbatim, but for the curious here's a link to <a href="./complete/styles.css">styles.css</a>.
        </p>
        
        <h3>Get to the code</h3>

        <p>
            <strong>index.js</strong> is where it starts to get interesting.
            Compare the React version to the vanilla version:
        </p>
        <div><p><em>index.js (React):</em></p><pre><code>import React, { StrictMode } from "react";
import { createRoot } from "react-dom/client";
import "./styles.css";

import App from "./App";

const root = createRoot(document.getElementById("root"));
root.render(
  &lt;StrictMode&gt;
    &lt;App /&gt;
  &lt;/StrictMode&gt;
);</code></pre></div>
        <div><p><em>index.js (Vanilla):</em></p><pre><code>import './App.js';
import './AddTask.js';
import './TaskList.js';
import './TasksContext.js';

const render = () =&gt; {
    const root = document.getElementById('root');
    root.append(document.createElement('tasks-app'));
}

document.addEventListener('DOMContentLoaded', render);
</code></pre></div>
        <p>
            Bootstrapping is different but also similar. All of the web components are imported first to load them,
            and then the <code>&lt;tasks-app&gt;</code> component is rendered to the page.
        </p>
        <p>
            The <strong>App.js</strong> code also bears more than a striking resemblance:
        </p>
        <div><p><em>App.js (React):</em></p><pre><code>import AddTask from './AddTask.js';
import TaskList from './TaskList.js';
import { TasksProvider } from './TasksContext.js';

export default function TaskApp() {
  return (
    &lt;TasksProvider&gt;
      &lt;h1&gt;Day off in Kyoto&lt;/h1&gt;
      &lt;AddTask /&gt;
      &lt;TaskList /&gt;
    &lt;/TasksProvider&gt;
  );
}
</code></pre></div>
        <div><p><em>App.js (Vanilla):</em></p><pre><code>customElements.define('tasks-app', class extends HTMLElement {
    connectedCallback() {
        this.innerHTML = `
            &lt;tasks-context&gt;
                &lt;h1&gt;Day off in Kyoto&lt;/h1&gt;
                &lt;task-add&gt;&lt;/task-add&gt;
                &lt;task-list&gt;&lt;/task-list&gt;
            &lt;/tasks-context&gt;
        `;
    }
});
</code></pre></div>

        <p>
            What I like about the code so far is that it <em>feels</em> React-like. I generally find programming against React's API pleasing,
            but I don't like the tooling, page weight and overall complexity baggage that it comes with.
        </p>

        <h3>Adding context</h3>

        <p>
            The broad outline of how to bring a React-like context to a vanilla web application is
            already explained in the <a href="https://plainvanillaweb.com/pages/applications.html#managing-state">passing data deeply section</a> 
            of the main Plain Vanilla tutorial, so I won't cover that again here.
            What adds spice in this specific case is that the React context uses a reducer,
            a function that accepts the old tasks and an action to apply to them, and returns the new tasks to show throughout the application.
        </p>
        <p>
            Thankfully, the React example's reducer function and initial state were already vanilla JS code,
            so those come along for the ride unchanged and ultimately the vanilla context is a very straightforward custom element:
        </p>

        <div><p><em>TasksContext.js (Vanilla):</em></p><pre><code>customElements.define('tasks-context', class extends HTMLElement {
    #tasks = structuredClone(initialTasks);
    get tasks() { return this.#tasks; }
    set tasks(tasks) {
        this.#tasks = tasks;
        this.dispatchEvent(new Event('change'));
    }

    dispatch(action) {
        this.tasks = tasksReducer(this.tasks, action);
    }

    connectedCallback() {
        this.style.display = 'contents';
    }
});

function tasksReducer(tasks, action) {
    switch (action.type) {
        case 'added': {
            return [...tasks, {
                id: action.id,
                text: action.text,
                done: false
            }];
        }
        case 'changed': {
            return tasks.map(t =&gt; {
                if (t.id === action.task.id) {
                    return action.task;
                } else {
                    return t;
                }
            });
        }
        case 'deleted': {
            return tasks.filter(t =&gt; t.id !== action.id);
        }
        default: {
            throw Error('Unknown action: ' + action.type);
        }
    }
}

const initialTasks = [
    { id: 0, text: 'Philosopher’s Path', done: true },
    { id: 1, text: 'Visit the temple', done: false },
    { id: 2, text: 'Drink matcha', done: false }
];
</code></pre></div>

        <p>
            The actual context component is very bare bones, as it only needs to store the tasks,
            emit change events for the other components to subscribe to, and provide a dispatch method 
            for those components to call that will use the reducer function to update the tasks.
        </p>

        <h3>Adding tasks</h3>

        <p>
            The AddTask component ends up offering more of a challenge. It's a stateful component with event listeners that dispatches to the reducer:
        </p>
        <div><p><em>AddTask.js (React):</em></p><pre><code>import { useState } from 'react';
import { useTasksDispatch } from './TasksContext.js';

export default function AddTask() {
  const [text, setText] = useState('');
  const dispatch = useTasksDispatch();
  return (
    &lt;&gt;
      &lt;input
        placeholder="Add task"
        value={text}
        onChange={e =&gt; setText(e.target.value)}
      /&gt;
      &lt;button onClick={() =&gt; {
        setText('');
        dispatch({
          type: 'added',
          id: nextId++,
          text: text,
        }); 
      }}&gt;Add&lt;/button&gt;
    &lt;/&gt;
  );
}

let nextId = 3;
</code></pre></div>
        <p>
            The main wrinkle this adds for the vanilla web component is that the event listener on the button element
            cannot be put inline with the markup. Luckily the handling of the input is much simplified
            because we can rely on it keeping its state automatically, a convenience owed to not using a virtual DOM.
            Thanks to the groundwork in the context component the actual dispatching of the action is easy:
        </p>
        <div><p><em>AddTask.js (Vanilla):</em></p><pre><code>customElements.define('task-add', class extends HTMLElement {
    connectedCallback() {
        this.innerHTML = `
            &lt;input type="text" placeholder="Add task" /&gt;
            &lt;button&gt;Add&lt;/button&gt;
        `;
        this.querySelector('button').onclick = () =&gt; {
            const input = this.querySelector('input');
            this.closest('tasks-context').dispatch({
                type: 'added',
                id: nextId++,
                text: input.value
            });
            input.value = '';
        };
    }
})

let nextId = 3;
</code></pre></div>
        <p>
            Fascinating to me is that <strong>index.js</strong>, <strong>App.js</strong>, <strong>TasksContext.js</strong> and <strong>AddTask.js</strong>
            are all fewer lines of code in the vanilla version than their React counterpart while remaining functionally equivalent. 
        </p>

        <h3>Hard mode</h3>
        <p>
            The TaskList component is where React starts really pulling its weight.
            The React version is clean and straightforward and juggles a lot of state with a constantly updating task list UI.
        </p>
        <div><p><em>TaskList.js (React):</em></p><pre><code>import { useState } from 'react';
import { useTasks, useTasksDispatch } from './TasksContext.js';

export default function TaskList() {
  const tasks = useTasks();
  return (
    &lt;ul&gt;
      {tasks.map(task =&gt; (
        &lt;li key={task.id}&gt;
          &lt;Task task={task} /&gt;
        &lt;/li&gt;
      ))}
    &lt;/ul&gt;
  );
}

function Task({ task }) {
  const [isEditing, setIsEditing] = useState(false);
  const dispatch = useTasksDispatch();
  let taskContent;
  if (isEditing) {
    taskContent = (
      &lt;&gt;
        &lt;input
          value={task.text}
          onChange={e =&gt; {
            dispatch({
              type: 'changed',
              task: {
                ...task,
                text: e.target.value
              }
            });
          }} /&gt;
        &lt;button onClick={() =&gt; setIsEditing(false)}&gt;
          Save
        &lt;/button&gt;
      &lt;/&gt;
    );
  } else {
    taskContent = (
      &lt;&gt;
        {task.text}
        &lt;button onClick={() =&gt; setIsEditing(true)}&gt;
          Edit
        &lt;/button&gt;
      &lt;/&gt;
    );
  }
  return (
    &lt;label&gt;
      &lt;input
        type="checkbox"
        checked={task.done}
        onChange={e =&gt; {
          dispatch({
            type: 'changed',
            task: {
              ...task,
              done: e.target.checked
            }
          });
        }}
      /&gt;
      {taskContent}
      &lt;button onClick={() =&gt; {
        dispatch({
          type: 'deleted',
          id: task.id
        });
      }}&gt;
        Delete
      &lt;/button&gt;
    &lt;/label&gt;
  );
}
</code></pre></div>

        <p>
            This proved to be a real challenge to port. The vanilla version ended up being a lot more verbose
            because it has to do all the same DOM-reconciliation in explicit logic managed by the <strong>update()</strong> methods
            of <code>&lt;task-list&gt;</code> and <code>&lt;task-item&gt;</code>.
        </p>
        <div><p><em>TaskList.js (Vanilla):</em></p><pre><code>customElements.define('task-list', class extends HTMLElement {
    get context() { return this.closest('tasks-context'); }
    
    connectedCallback() {
        this.context.addEventListener('change', () =&gt; this.update());
        this.append(document.createElement('ul'));
        this.update();
    }

    update() {
        const ul = this.querySelector('ul');
        let before = ul.firstChild;
        this.context.tasks.forEach(task =&gt; {
            let li = ul.querySelector(`:scope &gt; [data-key="${task.id}"]`);
            if (!li) {
                li = document.createElement('li');
                li.dataset.key = task.id;
                li.append(document.createElement('task-item'));
            }
            li.firstChild.task = task;
            // move to the right position in the list if not there yet
            if (li !== before) ul.insertBefore(li, before);
            before = li.nextSibling;
        });
        // remove unknown nodes
        while (before) {
            const remove = before;
            before = before.nextSibling;
            ul.removeChild(remove);
        }
    }
});

customElements.define('task-item', class extends HTMLElement {
    #isEditing = false;
    #task;
    set task(task) { this.#task = task; this.update(); }
    get context() { return this.closest('tasks-context'); }

    connectedCallback() {
        if (this.querySelector('label')) return;
        this.innerHTML = `
            &lt;label&gt;
                &lt;input type="checkbox" /&gt;
                &lt;input type="text" /&gt;
                &lt;span&gt;&lt;/span&gt;
                &lt;button id="edit"&gt;Edit&lt;/button&gt;
                &lt;button id="save"&gt;Save&lt;/button&gt;
                &lt;button id="delete"&gt;Delete&lt;/button&gt;
            &lt;/label&gt;
        `;
        this.querySelector('input[type=checkbox]').onchange = e =&gt; {
            this.context.dispatch({
                type: 'changed',
                task: {
                    ...this.#task,
                    done: e.target.checked
                }
            });
        };
        this.querySelector('input[type=text]').onchange = e =&gt; {
            this.context.dispatch({
                type: 'changed',
                task: {
                    ...this.#task,
                    text: e.target.value
                }
            });
        };
        this.querySelector('button#edit').onclick = () =&gt; {
            this.#isEditing = true;
            this.update();
        };
        this.querySelector('button#save').onclick = () =&gt; {
            this.#isEditing = false;
            this.update();
        };
        this.querySelector('button#delete').onclick = () =&gt; {
            this.context.dispatch({
                type: 'deleted',
                id: this.#task.id
            });
        };
        this.context.addEventListener('change', () =&gt; this.update());
        this.update();
    }

    update() {
        if (this.isConnected &amp;&amp; this.#task) {
            this.querySelector('input[type=checkbox]').checked = this.#task.done;
            const inputEdit = this.querySelector('input[type=text]');
            inputEdit.style.display = this.#isEditing ? 'inline' : 'none';
            inputEdit.value = this.#task.text;
            const span = this.querySelector('span');
            span.style.display = this.#isEditing ? 'none' : 'inline';
            span.textContent = this.#task.text;
            this.querySelector('button#edit').style.display = this.#isEditing ? 'none' : 'inline';
            this.querySelector('button#save').style.display = this.#isEditing ? 'inline' : 'none';
        }
    }
});
</code></pre></div>
        <p>
            Some interesting take-aways:
        </p>
        <ul>
            <li>
                The <code>&lt;task-list&gt;</code> component's <strong>update()</strong> method implements a poor man's version of React reconciliation,
                merging the current state of the <strong>tasks</strong> array into the child nodes of the <code>&lt;ul&gt;</code>.
                In order to do this, it has to store a key on each list item, just like React requires, and here it becomes obvious why that is.
                Without the key we can't find the existing <code>&lt;li&gt;</code> nodes that match up to task items,
                and so would have to recreate the entire list. By adding the key it becomes possible to update the list in-place,
                modifying task items instead of recreating them so that they can keep their on-going edit state.
            </li>
            <li>
                That reconciliation code is very generic however, and it is easy to imagine a fully generic <strong>repeat()</strong>
                function that converts an array of data to markup on the page. In fact, the Lit framework <a href="https://lit.dev/docs/templates/lists/#the-repeat-directive">contains exactly that</a>.
                For brevity's sake this code doesn't go quite that far.
            </li>
            <li>
                The <code>&lt;task-item&gt;</code> component cannot do what the React code does: create different markup depending on the current state.
                Instead it creates the union of the markup across the various states, and then in the <strong>update()</strong>
                shows the right subset of elements based on the current state.
            </li>
        </ul>
        <p>
            That wraps up the entire code. You can find the <a href="https://github.com/jsebrech/vanilla-context-and-reducer">ported example on Github</a>.
        </p>

        <h3>Some thoughts</h3>
        
        <p>
            A peculiar result of this porting challenge is that the vanilla version ends up being roughly 
            the same number of lines of code as the React version. The React code is still overall less verbose (all those querySelectors, oy!),
            but it has its own share of boilerplate that disappears in the vanilla version.
            This isn't a diss against React, it's more of a compliment to how capable browsers have gotten that vanilla web components
            can carry us so far.
        </p>
        <p>
            If I could have waved a magic wand, what would have made the vanilla version simpler?
        </p>
        <ul>
            <li>
                All of those <strong>querySelector</strong> calls get annoying. The alternatives are building the markup easily with innerHTML
                and then fishing out references to the created elements using querySelector, or building the elements one by one verbosely using createElement,
                but then easily having a reference to them. Either of those ends up very verbose. 
                An alternative templating approach that makes it easy to create elements <em>and</em> get a reference to them would be very welcome.
            </li>
            <li>
                As long as we're dreaming, I'm jealous of how easy it is to add the event listeners in JSX.
                A real expression language in HTML templates that supports data and event binding and data-conditional markup would be very neat
                and would take away most of the reason to still find a framework's templating language more convenient.
                Web components are a perfectly fine alternative to React components, they just lack an easy built-in templating mechanism.
            </li>
            <li>
                Browsers could get a little smarter about how they handle DOM updates during event handling.
                In the logic that sorts the <code>&lt;li&gt;</code> to the right order in the list, 
                the <em>if</em> condition before insertBefore proved necessary because the browser
                didn't notice that the element was already placed where it needed to be inserted,
                and click events would get lost as a consequence.
                I've even noticed that assigning a textContent to a button mid-click will make Safari
                lose track of that button's click event. All of that can be worked around with clever reconciliation logic,
                but that's code that belongs in the browser, not in JavaScript.
            </li>
        </ul>
        <p>
            All in all though, I'm really impressed with vanilla JS. I call it unreasonably effective because it is
            jarring just how capable the built-in abilities of browsers are, and just how many web developers despite that 
            still default to web frameworks for every new project. Maybe one day...
        </p>
    ]]></content>
    </entry>
    <entry>
        <title><![CDATA[The life and times of a web component]]></title>
        <link rel="alternate" type="text/html" href="https://plainvanillaweb.com/blog/articles/2024-09-16-life-and-times-of-a-custom-element/"/>
        <id>https://plainvanillaweb.com/blog/articles/2024-09-16-life-and-times-of-a-custom-element/</id>
        <published>2024-09-16T12:00:00.000Z</published>
        <updated>2024-09-16T12:00:00.000Z</updated>
        <summary><![CDATA[The entire lifecycle of a web component, from original creation to when a shadow crosses.]]></summary>
        <media:content url="https://plainvanillaweb.com/blog/articles/2024-09-16-life-and-times-of-a-custom-element/image.webp" type="image/webp" medium="image" />
        <author><name><![CDATA[Joeri Sebrechts]]></name></author>
        <content type="html"><![CDATA[
        <p>
            When first taught about the wave-particle duality of light most people's brains does a double take.
            How can light be two different categories of things at the same time, both a wave and a particle? That's just weird.
            The same thing happens with web components, confusing people when they first try to learn them and run into their Document-JavaScript duality.
            The component systems in frameworks are typically JavaScript-first, only using the DOM as an outlet for their visual appearance.
            Web components however — or custom elements to be precise — can start out in either JavaScript or the document, and are married to neither.
        </p>

        <h3>Just the DOM please</h3>

        <p>
            Do you want to see the minimal JavaScript code needed to set up an <code>&lt;x-example&gt;</code> custom element?
            Here it is:
        </p>
        <p>&nbsp;</p>
        <p>
            No, that's not a typo. Custom elements can be used just fine without any JavaScript.
            Consider this example of an <code>&lt;x-tooltip&gt;</code> custom element that is HTML and CSS only:
        </p>
        <p><a href="https://plainvanillaweb.com/blog/articles/2024-09-16-life-and-times-of-a-custom-element/undefined/example.html">undefined/example.html</a></p>
        <div><p><em>example.html:</em></p><pre><code>&lt;!doctype html&gt;
&lt;html&gt;
    &lt;head&gt;
        &lt;meta name="viewport" content="width=device-width, initial-scale=1, minimum-scale=1" /&gt;
        &lt;link rel="stylesheet" href="example.css"&gt;
        &lt;title&gt;undefined custom element&lt;/title&gt;
    &lt;/head&gt;
    &lt;body&gt;
        &lt;button&gt;
            Hover me
            &lt;x-tooltip inert role="tooltip"&gt;Thanks for hovering!&lt;/x-tooltip&gt;
        &lt;/button&gt;
    &lt;/body&gt;
&lt;/html&gt;</code></pre></div>
        <p>
            <small>For the curious, here is the <a href="undefined/example.css">example.css</a>, but it is not important here.</small>
        </p>
        <p>
            Such elements are called <em>undefined custom elements</em>.
            Before custom elements are defined in the window by calling <code>customElements.define()</code> they always start out in this state.
            There is no need to actually define the custom element if it can be solved in a pure CSS way.
            In fact, many "pure CSS" components found online can be solved by such custom elements,
            by styling the element itself and its <code>::before</code> and <code>::after</code> pseudo-elements.
        </p>

        <h3>A question of definition</h3>

        <p>
            The CSS-only representation of the custom element can be progressively enhanced by connecting it up to a JavaScript counterpart,
            a custom element class. This is a class that inherits from <code>HTMLElement</code> and allows the custom element
            to implement its own logic.
        </p>
        <p><a href="https://plainvanillaweb.com/blog/articles/2024-09-16-life-and-times-of-a-custom-element/defined/example.html">defined/example.html</a></p>
        <div><p><em>example.html:</em></p><pre><code>&lt;!doctype html&gt;
&lt;html&gt;
    &lt;head&gt;
        &lt;meta name="viewport" content="width=device-width, initial-scale=1, minimum-scale=1" /&gt;
        &lt;title&gt;defining the custom element&lt;/title&gt;
        &lt;style&gt;
            body { font-family: system-ui, sans-serif; margin: 1em; }
            x-example {
                background-color: lavender;
            }
            x-example:not(:defined)::after {
                content: '{defined: false}'
            }
            x-example:defined::after {
                content: '{defined: true, status: ' attr(status) '}'
            }
        &lt;/style&gt;
    &lt;/head&gt;
    &lt;body&gt;
        &lt;p&gt;Custom element: &lt;x-example&gt;&lt;/x-example&gt;&lt;/p&gt;
        &lt;button onclick="define()"&gt;Define&lt;/button&gt;
        &lt;button onclick="location.reload()"&gt;Reload&lt;/button&gt;

        &lt;script&gt;
            function define() {
                customElements.define('x-example', class extends HTMLElement {
                    constructor() {
                        super();
                    }
                    connectedCallback() {
                        this.setAttribute('status', 'ready');
                    }
                });
            }
        &lt;/script&gt;
    &lt;/body&gt;
&lt;/html&gt;</code></pre></div>
        <p>
            What happens to the elements already in the markup at the moment <code>customElements.define()</code>
            is called is an <em>element upgrade</em>. The browser will take all custom elements already in the document,
            and create an instance of the matching custom element class that it connects them to.
            This class enables the element to control its own part of the DOM, but also allows it to react to what happens in the DOM.
        </p>
        <p>
            Element upgrades occur for existing custom elements in the document when <code>customElements.define()</code> is called,
            and for all new custom elements with that tag name created afterwards (e.g. using <code>document.createElement('x-example')</code>).
            It does not occur automatically for detached custom elements (not part of the document) that were created before the element was defined.
            Those can be upgraded retroactively by calling <code>customElements.upgrade()</code>.
        </p>

        <p>
            So far, this is the part of the lifecycle we've seen:
        </p>
        <pre>&lt;undefined&gt; 
    -&gt; define() -&gt; &lt;defined&gt;
    -&gt; automatic upgrade() 
                -&gt; constructor() 
                -&gt; &lt;constructed&gt;
        </pre>

        <p>
            The constructor as shown in the example above is optional, but if it is specified then it has a <a href="https://html.spec.whatwg.org/multipage/custom-elements.html#custom-element-conformance">number of gotcha's</a>:
        </p>
        <dl>
            <dt>It must start with a call to <code>super()</code>.</dt>
            <dt>It should not make DOM changes yet, as the element is not yet guaranteed to be connected to the DOM.</dt>
            <dd>
                This includes reading or modifying its own DOM properties, like its attributes.
                The tricky part is that in the constructor the element might already be in the DOM,
                so setting attributes might work. Or it might give an error. It's best to avoid DOM interaction altogether in the constructor.
            </dd>
            <dt>It should initialize its state, like class properties</dt>
            <dd>
                But work done in the constructor should be minimized and maximally postponed until <code>connectedCallback</code>.
            </dd>
        </dl>

        <h3>Making connections</h3>

        <p>
            After being constructed, if the element was already in the document, its <code>connectedCallback()</code> handler is called.
            This handler is normally called only when the element is inserted into the document, but for elements that are already in the document when they are defined it ends up being called as well.
            In this handler DOM changes can be made, and in the example above the <code>status</code> attribute is set to demonstrate this.
        </p>
        <p>
            The <em>connectedCallback()</em> handler is part of what is known in the HTML standard as <a href="https://html.spec.whatwg.org/multipage/custom-elements.html#custom-element-reactions">custom element reactions</a>:
            These reactions allow the element to respond to various changes to the DOM:
        </p>
        <ul>
            <li><code>connectedCallback()</code> is called when the element is inserted into the document, even if it was only moved from a different place in the same document.</li>
            <li><code>disconnectedCallback()</code> is called when the element is removed from the document.</li>
            <li><code>adoptedCallback()</code> is called when the element is moved to a new document. (You are unlikely to need this in practice.)</li>
            <li><code>attributeChangedCallback()</code> is called when an attribute is changed, but only for the attributes listed in its <code>observedAttributes</code> property.</li>
        </ul>
        <p>
            There are also special reactions for <a href="https://dev.to/stuffbreaker/custom-forms-with-web-components-and-elementinternals-4jaj">form-associated custom elements</a>, 
            but those are a rabbit hole beyond the purview of this blog post.
        </p>
        <p>
            There are more gotcha's to these reactions:
        </p>
        <dl>
            <dt><code>connectedCallback()</code> and <code>disconnectedCallback()</code> can be called multiple times</dt>
            <dd>
                This can occur when the element is moved around in the document.
                These handlers should be written in such a way that it is harmless to run them multiple times,
                e.g. by doing an early exit when it is detected that <em>connectedCallback()</em> was already run.
            </dd>
            <dt><code>attributeChangedCallback()</code> can be called before <code>connectedCallback()</code></dt>
            <dd>
                For all attributes already set when the element in the document is upgraded,
                the <em>attributeChangedCallback()</em> handler will be called first,
                and only after this <em>connectedCallback()</em> is called.
                The unpleasant consequence is that any <em>attributeChangedCallback</em> that tries to update DOM structures
                created in <em>connectedCallback</em> can produce errors.
            </dd>
            <dt><code>attributeChangedCallback()</code> is only called for attribute changes, not property changes.</dt>
            <dd>
                Attribute changes can be done in Javascript by calling <code>element.setAttribute('name', 'value')</code>.
                DOM attributes and class properties can have the same name, but are not automatically linked.
                Generally for this reason it is better to avoid having attributes and properties with the same name.
            </dd>
        </dl>

        <p>
            The lifecycle covered up to this point for elements that start out in the initial document:
        </p>
        <pre>&lt;undefined&gt; 
    -&gt; define() -&gt; &lt;defined&gt;
    -&gt; automatic upgrade() 
                -&gt; [element].constructor()
                -&gt; [element].attributeChangedCallback()
                -&gt; [element].connectedCallback() 
                -&gt; &lt;connected&gt;
        </pre>

        <h3>Flip the script</h3>

        <p>
            So far we've covered one half of the Document-JavaScript duality, for custom elements starting out in the document,
            and only after that becoming defined and gaining a JavaScript counterpart.
            It is however also possible to reverse the flow, and start out from JavaScript.
        </p>
        <p>
            This is the minimal code to create a custom element in JavaScript: <code>document.createElement('x-example')</code>.
            The element does not need to be defined in order to run this code, although it can be, and the resulting node can be inserted into the document
            as if it was part of the original HTML markup.
        </p>
        <p>
            If it is inserted, and after insertion the element becomes defined, then it will behave as described above.
            Things are however different if the element remains detached:
        </p>
        <dl>
            <dt>The detached element will not be automatically upgraded when it is defined.</dt>
            <dd>
                The constructor or reactions will not be called. It will be automatically upgraded when it is inserted into the document.
                It can also be upgraded explicitly by calling <code>customElements.upgrade()</code>.
            </dd>
            <dt>If the detached element is already defined when it is created, it will be upgraded automatically.</dt>
            <dd>The <em>constructor()</em> and <em>attributeChangedCallback()</em> will be called. Because it is not yet part of the document <em>connectedCallback()</em> won't be.</dd>
        </dl>
        <p>
            By now no doubt you are a bit confused. Here's an interactive playground that lets you test
            what happens to elements as they go through their lifecycle, both for those in the initial document and those created dynamically.
        </p>
        <p><a href="https://plainvanillaweb.com/blog/articles/2024-09-16-life-and-times-of-a-custom-element/defined2/example.html">defined2/example.html</a></p>

        <p>Here are some interesting things to try out:</p>
        <ul>
            <li><em>Create</em>, then <em>Define</em>, and you will see that the created element is not upgraded automatically because it is detached from the document.</li>
            <li><em>Create</em>, then <em>Connect</em>, then <em>Define</em>, and you will see that the element is upgraded automatically because it is in the document.</li>
            <li><em>Define</em>, then <em>Create</em>, and you will see that the element is upgraded as soon as it is created (<em>constructed</em> appears in the reactions).</li>
        </ul>
        <p>
            I tried writing a flowchart of all possible paths through the lifecycle that can be seen in this example,
            but it got so unwieldy that I think it's better to just play around with the example until a solid grasp develops.
        </p>

        <h3>In the shadows</h3>

        <p>
            Adding shadow DOM creates yet another wrinkle in the lifecycle.
            At any point in the element's JavaScript half, including in its constructor, a shadow DOM can be attached to the element by calling <code>attachShadow()</code>.
            Because the shadow DOM is immediately available for DOM operations, that makes it possible to do those DOM operations in the constructor.
        </p>
        <p>
            In this next interactive example you can see what happens when the shadow DOM becomes attached.
            The <em>x-shadowed</em> element will immediately attach a shadow DOM in its constructor,
            which happens when the element is upgraded automatically after defining.
            The <em>x-shadowed-later</em> element postpones adding a shadow DOM until a link is clicked,
            so the element first starts out as a non-shadowed custom element, and adds a shadow DOM later.
        </p>

        <p><a href="https://plainvanillaweb.com/blog/articles/2024-09-16-life-and-times-of-a-custom-element/shadowed/example.html">shadowed/example.html</a></p>
        <div><p><em>example.html:</em></p><pre><code>&lt;!doctype html&gt;
&lt;html&gt;
    &lt;head&gt;
        &lt;meta name="viewport" content="width=device-width, initial-scale=1, minimum-scale=1" /&gt;
        &lt;title&gt;shadowed custom element&lt;/title&gt;
        &lt;style&gt;
            body { font-family: system-ui, sans-serif; margin: 1em; }
            x-shadowed, x-shadowed-later { background-color: lightgray; }
        &lt;/style&gt;
    &lt;/head&gt;
    &lt;body&gt;
        &lt;p&gt;&amp;lt;x-shadowed&amp;gt;: &lt;x-shadowed&gt;undefined, not shadowed&lt;/x-shadowed&gt;&lt;/p&gt;
        &lt;p&gt;&amp;lt;x-shadowed-later&amp;gt;: &lt;x-shadowed-later&gt;undefined, not shadowed&lt;/x-shadowed-later&gt;&lt;/p&gt;
        &lt;button id="define" onclick="define()"&gt;Define&lt;/button&gt;
        &lt;button onclick="location.reload()"&gt;Reload&lt;/button&gt;

        &lt;script&gt;
        function define() {
            customElements.define('x-shadowed', class extends HTMLElement {
                constructor() {
                    super();
                    this.attachShadow({mode: 'open'});
                    this.shadowRoot.innerHTML = `
                        &lt;span style="background-color: lightgreen"&gt;
                            shadowed
                        &lt;/span&gt;
                    `;
                }
            });
            customElements.define('x-shadowed-later', class extends HTMLElement {
                connectedCallback() {
                    this.innerHTML = 'constructed, &lt;a href="#"&gt;click to shadow&lt;/a&gt;';
                    this.querySelector('a').onclick = (e) =&gt; { e.preventDefault(); this.addShadow() };
                }
                addShadow() {
                    this.attachShadow({mode: 'open'});
                    this.shadowRoot.innerHTML = `
                        &lt;span style="background-color: lightgreen"&gt;
                            shadowed
                        &lt;/span&gt;
                    `;
                }
            });
            document.querySelector('button#define').setAttribute('disabled', true);
        }
        &lt;/script&gt;
    &lt;/body&gt;
&lt;/html&gt;</code></pre></div>

        <p>
            While adding a shadow DOM can be done at any point, it is a one-way operation.
            Once added the shadow DOM will replace the element's original contents, and this cannot be undone.
        </p>

        <h3>Keeping an eye out</h3>

        <p>
            So far we've mostly been dealing with initial setup of the custom element,
            but a major part of the lifecycle is responding to changes as they occur.
            Here are some of the major ways that custom elements can respond to DOM changes:
        </p>
        <ul>
            <li><em>connectedCallback</em> and <em>disconnectedCallback</em> to handle DOM insert and remove of the element itself.</li>
            <li><em>attributeChangedCallback</em> to handle attribute changes of the element.</li>
            <li>For shadowed custom elements, the <a href="https://developer.mozilla.org/en-US/docs/Web/API/HTMLSlotElement/slotchange_event">slotchange</a> event can be used to detect when children are added and removed in a <code>&lt;slot&gt;</code>.</li>
            <li>Saving the best for last, <a href="https://developer.mozilla.org/en-US/docs/Web/API/MutationObserver">MutationObserver</a> can be used to monitor DOM subtree changes, as well as attribute changes.</li>
        </ul>
        <p>
            <em>MutationObserver</em> in particular is worth exploring, because it is a swiss army knife for monitoring the DOM.
            Here's an example of a counter that automatically updates when new child elements are added:
        </p>
        <p><a href="https://plainvanillaweb.com/blog/articles/2024-09-16-life-and-times-of-a-custom-element/observer/example.html">observer/example.html</a></p>
        <div><p><em>example.html:</em></p><pre><code>&lt;!doctype html&gt;
&lt;html&gt; 
    &lt;head&gt;
        &lt;meta name="viewport" content="width=device-width, initial-scale=1, minimum-scale=1" /&gt;
        &lt;title&gt;custom element with observer&lt;/title&gt;
        &lt;style&gt;
            body { font-family: system-ui, sans-serif; margin: 1em; }
            x-wall { display: block; margin-bottom: 1em; }
        &lt;/style&gt;
    &lt;/head&gt;
    &lt;body&gt;
        &lt;x-wall&gt;&lt;x-bottle&gt;&lt;/x-bottle&gt;&lt;/x-wall&gt;
        &lt;button onclick="add()"&gt;Add one more&lt;/button&gt;
        &lt;button onclick="location.reload()"&gt;Reload&lt;/button&gt;

        &lt;script&gt;
        customElements.define('x-wall', class extends HTMLElement {
            connectedCallback() {
                if (this.line) return; // prevent double initialization
                this.line = document.createElement('p');
                this.insertBefore(this.line, this.firstChild);
                new MutationObserver(() =&gt; this.update()).observe(this, { childList: true });
                this.update();
            }
            update() {
                const count = this.querySelectorAll('x-bottle').length;
                this.line.textContent = 
                    `${count} ${count === 1 ? 'bottle' : 'bottles'} of beer on the wall`;
            }
        });
        customElements.define('x-bottle', class extends HTMLElement {
            connectedCallback() { this.textContent = '🍺'; }
        });
        function add() {
            document.querySelector('x-wall').append(
                document.createElement('x-bottle'));
        }
        &lt;/script&gt;
    &lt;/body&gt;
&lt;/html&gt;</code></pre></div>

        <p>
            There is still more to tell, but already I can feel eyes glazing over and brains turning to mush,
            so I will keep the rest for another day.
        </p>

        <hr>

        <p>
            Phew, that was a much longer story than I originally set out to write, but custom elements have surprising intricacy.
            I hope you found it useful, and if not at least you got to see some code and click some buttons.
            It's all about the clicking of the buttons.
        </p>
    ]]></content>
    </entry>
    <entry>
        <title><![CDATA[Sweet Suspense]]></title>
        <link rel="alternate" type="text/html" href="https://plainvanillaweb.com/blog/articles/2024-09-09-sweet-suspense/"/>
        <id>https://plainvanillaweb.com/blog/articles/2024-09-09-sweet-suspense/</id>
        <published>2024-09-09T12:00:00.000Z</published>
        <updated>2024-09-09T12:00:00.000Z</updated>
        <summary><![CDATA[React-style lazy loading of web components.]]></summary>
        <media:content url="https://plainvanillaweb.com/blog/articles/2024-09-09-sweet-suspense/image.webp" type="image/webp" medium="image" />
        <author><name><![CDATA[Joeri Sebrechts]]></name></author>
        <content type="html"><![CDATA[
        <p>
            I was reading Addy Osmani and Hassan Djirdeh's book <a href="https://largeapps.dev/">Building Large Scale Web Apps</a>.
            (Which, by the way, I can definitely recommend.) In it they cover all the ways to make a React app sing at scale.
            The chapter on <em>Modularity</em> was especially interesting to me, because JavaScript modules
            are a common approach to modularity in both React and vanilla web code.
        </p>
        <p>
            In that chapter on <em>Modularity</em> there was one particular topic that caught my eye,
            and it was the use of <code>lazy()</code> and <code>Suspense</code>, paired with an <code>ErrorBoundary</code>.
            These are the primitives that React gives us to asynchronously load UI components and their data on-demand while showing a fallback UI,
            and replace the UI with an error message when something goes wrong.
            If you're not familiar, here's a good <a href="https://refine.dev/blog/react-lazy-loading/#catching-loading-errors">overview page</a>.
        </p>
        <p>
            It was at that time that I was visited by the imp of the perverse, which posed to me a simple challenge:
            <em>can you bring React's lazy loading primitives to vanilla web components?</em>
            To be clear, there are <a href="https://css-tricks.com/an-approach-to-lazy-loading-custom-elements/">many</a> 
            <a href="https://github.com/codewithkyle/lazy-loader">ways</a> to 
            <a href="https://www.webcomponents.org/element/st-lazy">load</a> web components 
            <a href="https://lamplightdev.com/blog/2020/03/20/lazy-loading-web-components-with-intersection-observer/">lazily</a>. 
            This is well-trodden territory. What wasn't out there was a straight port of lazy, suspense and error boundary. 
            The idea would not let me go. So here goes nothing.
        </p>

        <h3>Lazy</h3>

        <p>
            The idea and execution of React's lazy is simple. Whenever you want to use a component in your code,
            but you don't want to actually fetch its code yet until it needs to be rendered, wrap it using the <code>lazy()</code> function:<br>
            <code>const MarkdownPreview = lazy(() =&gt; import('./MarkdownPreview.js'));</code><br>
        </p>
        <p>
            React will automatically "suspend" rendering when it first bumps into this lazy component until the component has loaded, and then continue automatically.
        </p>
        <p>
            This works in React because the markup of a component only looks like HTML, 
            but is actually JavaScript in disguise, better known as <em>JSX</em>.
            With web components however, the markup that the component is used in is actually HTML,
            where there is no <code>import()</code> and no calling of functions.
            That means our vanilla <em>lazy</em> cannot be a JavaScript function, but instead it must be an HTML custom element:<br>
            <code>&lt;x-lazy&gt;&lt;x-hello-world&gt;&lt;/x-hello-world&gt;&lt;/x-lazy&gt;</code>
        </p>

        <p>
            The basic setup is simple, when the lazy component is added to the DOM,
            we'll scan for children that have a '-' in the name and therefore are custom elements,
            see if they're not yet defined, and load and define them if so.
            By using <code>display: contents</code> we can avoid having the <code>&lt;x-lazy&gt;</code> impact layout.
        </p>
        <div><p><em>lazy.js:</em></p><pre><code>customElements.define('x-lazy', class extends HTMLElement {
    connectedCallback() {
        this.style.display = 'contents';
        this.#loadLazy();
    }

    #loadLazy() {
        const elements = 
            [...this.children].filter(_ =&gt; _.localName.includes('-'));
        const unregistered = 
            elements.filter(_ =&gt; !customElements.get(_.localName));
        unregistered.forEach(_ =&gt; this.#loadElement(_));
    }

    #loadElement(element) {
        // TODO: load the custom element
    }
});
</code></pre></div>

        <p>
            To actually load the element, we'll have to first find the JS file to import, and then run its register function.
            By having the function that calls <code>customElements.define</code> as the default export by convention the problem is reduced to finding the path to the JS file.
            The following code uses a heuristic that assumes components are in a <code>./components/</code> subfolder of the current document
            and follow a consistent file naming scheme:
        </p>
        <div><p><em>lazy.js (continued):</em></p><pre><code>    #loadElement(element) {
        // strip leading x- off the name
        const cleanName = element.localName.replace(/^x-/, '').toLowerCase();
        // assume component is in its own folder
        const url = `./components/${cleanName}/${cleanName}.js`;
        // dynamically import, then register if not yet registered
        return import(new URL(url, document.location)).then(module =&gt; 
            !customElements.get(element.localName) &amp;&amp; module &amp;&amp; module.default());
    }</code></pre></div>

        <p>
            One could get a lot more creative however, and for example use an 
            <a href="https://developer.mozilla.org/en-US/docs/Web/HTML/Element/script/type/importmap">import map</a> 
            to map module names to files. This I leave as an exercise for the reader.
        </p>

        <h3>Suspense</h3>

        <p>
            While the lazy component is loading, we can't show it yet. This is true for custom elements just as much as for React.
            That means we need a wrapper component that will show a fallback UI as long as any components in its subtree are loading,
            the <code>&lt;x-suspense&gt;</code> component. This starts out as a tale of two slots. When the suspense element is loading it shows the fallback, otherwise the content.
        </p>

        <div><p><em>example.html:</em></p><pre><code>&lt;x-suspense&gt;
    &lt;p slot="fallback"&gt;Loading...&lt;/p&gt;
    &lt;x-lazy&gt;&lt;x-hello-world&gt;&lt;/x-hello-world&gt;&lt;/x-lazy&gt;
&lt;/x-suspense&gt;</code></pre></div>
        <div><p><em>suspense.js:</em></p><pre><code>export class Suspense extends HTMLElement {
    #fallbackSlot;
    #contentSlot;

    set loading(isLoading) {
        if (!this.#fallbackSlot) return;
        this.#fallbackSlot.style.display = isLoading ? 'contents' : 'none';
        this.#contentSlot.style.display = !isLoading ? 'contents' : 'none';
    }

    constructor() {
        super();
        this.attachShadow({ mode: 'open' });

        this.#fallbackSlot = document.createElement('slot');
        this.#fallbackSlot.style.display = 'none';
        this.#fallbackSlot.name = 'fallback';
        this.#contentSlot = document.createElement('slot');
        this.shadowRoot.append(this.#fallbackSlot, this.#contentSlot);
    }

    connectedCallback() {
        this.style.display = 'contents';
    }
}
customElements.define('x-suspense', Suspense);</code></pre></div>

        <p>
            The trick now is, how to we get <code>loading = true</code> to happen?
            In Plain Vanilla's applications page I showed how a React context can be simulated using the <code>element.closest()</code> API.
            We can use the same mechanism to create a generic API that will let our suspense wait on a promise to complete.
        </p>

        <div><p><em>suspense.js (continued):</em></p><pre><code>    static waitFor(sender, ...promises) {
        const suspense = sender.closest('x-suspense');
        if (suspense) suspense.addPromises(...promises);
    }

    addPromises(...promises) {
        if (!promises.length) return;
        this.loading = true;
        // combine into previous promises if there are any
        const newPromise = this.#waitingForPromise = 
            Promise.allSettled([...promises, this.#waitingForPromise]);
        // wait for all promises to complete
        newPromise.then(_ =&gt; {
            // if no newer promises were added, we're done
            if (newPromise === this.#waitingForPromise) {
                this.loading = false;
            }
        });
    }</code></pre></div>

        <p>
            <code>Suspense.waitFor</code> will call the nearest ancestor <code>&lt;x-suspense&gt;</code>
            to a given element, and give it a set of promises that it should wait on.
            This API can then be called from our <code>&lt;x-lazy&gt;</code> component.
            Note that <code>#loadElement</code> returns a promise that completes when the custom element is loaded or fails to load.
        </p>
        <div><p><em>lazy.js (continued):</em></p><pre><code>    #loadLazy() {
        const elements = 
            [...this.children].filter(_ =&gt; _.localName.includes('-'));
        const unregistered = 
            elements.filter(_ =&gt; !customElements.get(_.localName));
        if (unregistered.length) {
            Suspense.waitFor(this, 
                ...unregistered.map(_ =&gt; this.#loadElement(_))
            );
        }
    }</code></pre></div>
        <p>
            The nice thing about the promise-based approach is that we can give it any promise, just like we would with React's suspense.
            For example, when loading data in a custom element that is in the suspense's subtree, we can call the exact same API:<br>
            <code>Suspense.waitFor(this, fetch(url).then(...))</code>
        </p>

        <h3>Error boundary</h3>

        <p>
            Up to this point, we've been assuming everything always works. This is <del>Sparta</del>software, it will never "always work".
            What we need is a graceful way to intercept failed promises that are monitored by the suspense,
            and show an error message instead. That is the role that React's error boundary plays.
        </p>
        <p>
            The approach is similar to suspense:
        </p>
        <div><p><em>example.html:</em></p><pre><code>&lt;x-error-boundary&gt;
    &lt;p slot="error"&gt;Something went wrong&lt;/p&gt;
    &lt;x-suspense&gt;
        &lt;p slot="fallback"&gt;Loading...&lt;/p&gt;
        &lt;x-lazy&gt;&lt;x-hello-world&gt;&lt;/x-hello-world&gt;&lt;/x-lazy&gt;
    &lt;/x-suspense&gt;
&lt;/x-error-boundary&gt;</code></pre></div>
        <p>
            And the code is also quite similar to suspense:
        </p>
        <div><pre><code>export class ErrorBoundary extends HTMLElement {

    static showError(sender, error) {
        if (!error) throw new Error('ErrorBoundary.showError: expected two arguments but got one');
        const boundary = sender.closest('x-error-boundary');
        if (boundary) {
            boundary.error = error;
        } else {
            console.error('unable to find x-error-boundary to show error');
            console.error(error);
        }
    }

    #error;
    #errorSlot;
    #contentSlot;

    get error() {
        return this.#error;
    }

    set error(error) {
        if (!this.#errorSlot) return;
        this.#error = error;
        this.#errorSlot.style.display = error ? 'contents' : 'none';
        this.#contentSlot.style.display = !error ? 'contents' : 'none';
        if (error) {
            this.#errorSlot.assignedElements().forEach(element =&gt; {
                if (Object.hasOwn(element, 'error')) {
                    element.error = error;
                } else {
                    element.setAttribute('error', error?.message || error);
                }
            });
            this.dispatchEvent(new CustomEvent('error', { detail: error }));
        }
    }

    constructor() {
        super();
        this.attachShadow({ mode: 'open' });

        this.#errorSlot = document.createElement('slot');
        this.#errorSlot.style.display = 'none';
        this.#errorSlot.name = 'error';
        // default error message
        this.#errorSlot.textContent = 'Something went wrong.';
        this.#contentSlot = document.createElement('slot');
        this.shadowRoot.append(this.#errorSlot, this.#contentSlot);
    }

    reset() {
        this.error = null;
    }

    connectedCallback() {
        this.style.display = 'contents';
    }
}
customElements.define('x-error-boundary', ErrorBoundary);
</code></pre></div>

        <p>
            Similar to suspense, this has an API <code>ErrorBoundary.showError()</code> that can be called
            from anywhere inside the error boundary's subtree to show an error that occurs.
            The suspense component is then modified to call this API when it bumps into a rejected promise.
            To hide the error, the <code>reset()</code> method can be called on the error boundary element.
        </p>
        <p>
            Finally, the <code>error</code> setter will set the error as a property or attribute
            on all children in the error slot, which enables customizing the error message's behavior based on the error object's properties
            by creating a custom <code>&lt;x-error-message&gt;</code> component.
        </p>

        <h3>Conclusion</h3>

        <p>
            Finally, we can bring all of this together in a single example,
            that combines lazy, suspense, error boundary, a customized error message, and a lazy-loaded hello-world component.
        </p>

        <div><p><em>example/index.js:</em></p><pre><code>import { registerLazy } from './components/lazy.js';
import { registerSuspense } from './components/suspense.js';
import { registerErrorBoundary } from './components/error-boundary.js';
import { registerErrorMessage } from './components/error-message.js';

customElements.define('x-demo', class extends HTMLElement {

    constructor() {
        super();
        registerLazy();
        registerSuspense();
        registerErrorBoundary();
        registerErrorMessage();
    }

    connectedCallback() {
        this.innerHTML = `
            &lt;p&gt;Lazy loading demo&lt;/p&gt;
            &lt;button id="lazy-load"&gt;Load lazy&lt;/button&gt;
            &lt;button id="error-reset" disabled&gt;Reset error&lt;/button&gt;
            &lt;div id="lazy-load-div"&gt;
                &lt;p&gt;Click to load..&lt;/p&gt;
            &lt;/div&gt;
        `;
        const resetBtn = this.querySelector('button#error-reset')
        resetBtn.onclick = () =&gt; {
            this.querySelector('x-error-boundary').reset();
            resetBtn.setAttribute('disabled', true);
        };
        const loadBtn = this.querySelector('button#lazy-load');
        loadBtn.onclick = () =&gt; {
            this.querySelector('div#lazy-load-div').innerHTML = `
                &lt;x-error-boundary&gt;
                    &lt;x-error-message slot="error"&gt;&lt;/x-error-message&gt;
                    &lt;x-suspense&gt;
                        &lt;p slot="fallback"&gt;Loading...&lt;/p&gt;
                        &lt;p&gt;&lt;x-lazy&gt;&lt;x-hello-world&gt;&lt;/x-hello-world&gt;&lt;/x-lazy&gt;&lt;/p&gt;
                    &lt;/x-suspense&gt;
                &lt;/x-error-boundary&gt;
            `
            this.querySelector('x-error-boundary').addEventListener('error', _ =&gt; {
                resetBtn.removeAttribute('disabled');
            });
            loadBtn.setAttribute('disabled', true);
        };
    }

});
</code></pre></div>
        <p><a href="https://plainvanillaweb.com/blog/articles/2024-09-09-sweet-suspense/example/index.html">complete example</a></p>

        <p>
            For the complete example's code, as well as the lazy, suspense and error-boundary components,
            check out the <a href="https://github.com/jsebrech/sweet-suspense">sweet-suspense repo on Github</a>.
        </p>
    ]]></content>
    </entry>
    <entry>
        <title><![CDATA[How fast are web components?]]></title>
        <link rel="alternate" type="text/html" href="https://plainvanillaweb.com/blog/articles/2024-09-06-how-fast-are-web-components/"/>
        <id>https://plainvanillaweb.com/blog/articles/2024-09-06-how-fast-are-web-components/</id>
        <published>2024-09-06T12:00:00.000Z</published>
        <updated>2024-09-15T12:00:00.000Z</updated>
        <summary><![CDATA[Benchmarking the relative performance of different web component techniques.]]></summary>
        <media:content url="https://plainvanillaweb.com/blog/articles/2024-09-06-how-fast-are-web-components/image.webp" type="image/webp" medium="image" />
        <author><name><![CDATA[Joeri Sebrechts]]></name></author>
        <content type="html"><![CDATA[
        <aside>
            <h3>Author's note</h3>
            <p>
                This article initially had somewhat different results and conclusions,
                but deficiencies in the original benchmark were pointed out and addressed.
                Where the conclusions were changed from the original article, this is pointed out in the text.
            </p>
        </aside>

        <p>
            It is often said that web components are slow.
            This was also my experience when I first tried building web components a few years ago.
            At the time I was using the Stencil framework, because I didn't feel confident that they could be built well without a framework.
            Performance when putting hundreds of them on a page was so bad that I ended up going back to React.
        </p>
        <p>
            But as I've gotten deeper into vanilla web development I started to realize that maybe I was just using it wrong.
            Perhaps web components can be fast, if built in a light-weight way.
            This article is an attempt to settle the question "How fast are web components?".
        </p>

        <h3>The lay of the land</h3>

        <p>
            What kinds of questions did I want answered?
        </p>
        <ul>
            <li>How many web components can you render on the page in a millisecond?</li>
            <li>Does the technique used to built the web component matter, which technique is fastest?</li>
            <li>How do web component frameworks compare? I used Lit as the framework of choice as it is well-respected.</li>
            <li>How does React compare?</li>
            <li>What happens when you combine React with web components?</li>
        </ul>

        <p>
            To figure out the answer I made a benchmark as a vanilla web page (of course),
            that renders thousands of very simple components containing only <code>&lt;span&gt;.&lt;/span&gt;</code>
            and measured the elapsed time. This benchmark was then run on multiple devices and multiple browsers
            to figure out performance characteristics. The ultimate goal of this test is to figure out the absolute best performance
            that can be extracted from the most minimal web component.
        </p>

        <p>To get a performance range I used two devices for testing:</p>
        <ul>
            <li>A <em>Macbook Air M1</em> running MacOS, to stand in as the "fast" device, comparable to a new high end iPhone.</li>
            <li>An <em>Asus Chi T300 Core M</em> from 2015 running Linux Mint Cinnamon, to stand in as the "slow" device, comparable to an older low end Android.</li>
        </ul>
        <p>Between these devices is a 7x CPU performance gap.</p>

        <h3>The test</h3>

        <p>
            The test is simple: render thousands of components using a specific technique, 
            call <code>requestAnimationFrame()</code> repeatedly until they actually render,
            then measure elapsed time. This produces a <em>components per millisecond</em> number.
        </p>
        <p>The techniques being compared:</p>
        <ul>
            <li><strong>innerHTML:</strong> each web component renders its content by assigning to <code>this.innerHTML</code></li>
            <li><strong>append:</strong> each web component creates the span using <code>document.createElement</code> and then appends it to itself</li>
            <li><strong>append (buffered):</strong> same as the append method, except all web components are first buffered to a document fragment which is then appended to the DOM</li>
            <li><strong>shadow + innerHTML:</strong> the same as innerHTML, except each component has a shadow DOM</li>
            <li><strong>shadow + append:</strong> the same as append, except each component has a shadow DOM</li>
            <li><strong>template + append:</strong> each web component renders its content by cloning a template and appending it</li>
            <li><strong>textcontent:</strong> each web component directly sets its textContent property, instead of adding a span (making the component itself be the span)
            </li><li><strong>direct:</strong> appends spans instead of custom elements, to be able to measure custom element overhead</li>
            <li><strong>lit:</strong> each web component is rendered using the lit framework, in the way that its documentation recommends</li>
            <li><strong>react pure:</strong> rendering in React as a standard React component, to have a baseline for comparison to mainstream web development</li>
            <li><strong>react + wc:</strong> each React component wraps the append-style web component</li>
            <li><strong>(norender):</strong> same as other strategies, except the component is only created but not added to the DOM, to separate out component construction cost</li>
        </ul>
        <p>
            This test was run on M1 in Brave, Chrome, Edge, Firefox and Safari. And on Chi in Chrome and Firefox.
            It was run for 10 iterations and a geometric mean was taken of the results.
        </p>

        <h3>The results</h3>

        <p>First, let's compare techniques. The number here is components per millisecond, so <strong>higher is better</strong>.</p>
        
        <p><strong>Author's note:</strong> the numbers from the previous version of this article are <del>crossed out</del>.</p>
        <table>
            <thead>
                <tr><th colspan="2">Chrome on M1</th></tr>
                <tr><th>technique</th><th>components/ms</th></tr>
            </thead>
            <tbody>
                <tr><td>innerHTML</td><td><del>143</del> 135</td></tr>
                <tr><td>append</td><td><del>233</del> 239</td></tr>
                <tr><td>append (buffered)</td><td><del>228</del> 239</td></tr>
                <tr><td>shadow + innerHTML</td><td><del>132</del> 127</td></tr>
                <tr><td>shadow + append</td><td><del>183</del> 203</td></tr>
                <tr><td>template + append</td><td><del>181</del> 198</td></tr>
                <tr><td>textcontent</td><td>345</td></tr>
                <tr><td>direct</td><td>461</td></tr>
                <tr><td>lit</td><td><del>133</del> 137</td></tr>
                <tr><td>react pure</td><td><del>275</del> 338</td></tr>
                <tr><td>react + wc</td><td><del>172</del> 212</td></tr>
                <tr><td>append (norender)</td><td>1393</td></tr>
                <tr><td>shadow (norender)</td><td>814</td></tr>
                <tr><td>direct (norender)</td><td>4277</td></tr>
                <tr><td>lit (norender)</td><td>880</td></tr>
            </tbody>
        </table>

        <table>
            <thead>
                <tr><th colspan="2">Chrome on Chi, best of three</th></tr>
                <tr><th>technique</th><th>components/ms</th></tr>
            </thead>
            <tbody>
                <tr><td>innerHTML</td><td><del>25</del> 29</td></tr>
                <tr><td>append</td><td><del>55</del> 55</td></tr>
                <tr><td>append (buffered)</td><td><del>56</del> 59</td></tr>
                <tr><td>shadow + innerHTML</td><td><del>24</del> 26</td></tr>
                <tr><td>shadow + append</td><td><del>36</del> 47</td></tr>
                <tr><td>template + append</td><td><del>45</del> 46</td></tr>
                <tr><td>textcontent</td><td>81</td></tr>
                <tr><td>direct</td><td>116</td></tr>
                <tr><td>lit</td><td><del>30</del> 33</td></tr>
                <tr><td>react pure</td><td><del>77</del> 87</td></tr>
                <tr><td>react + wc</td><td><del>45</del> 52</td></tr>
                <tr><td>append (norender)</td><td>434</td></tr>
                <tr><td>shadow (norender)</td><td>231</td></tr>
                <tr><td>direct (norender)</td><td>1290</td></tr>
                <tr><td>lit (norender)</td><td>239</td></tr>
            </tbody>
        </table>

        <p>
            One relief right off the bat is that even the slowest implementation on the slow device renders 100.000 components in 4 seconds.
            React is roughly in the same performance class as well-written web components.
            That means for a typical web app performance is not a reason to avoid web components.
        </p>
        <aside>
            <h3>Author's note</h3>
            <p>
                The previous version of this article said React was faster than web components,
                but this only the case if we make the web components render a span. Unlike a React component a web component
                is itself part of the DOM, and so is itself the equivalent of a span. The <em>textcontent</em> strategy exploits this advantage
                to functionally do the same as the React code, and it matches its performance.
            </p>
        </aside>

        <p>
            As far as web component technique goes, the performance delta between the fastest and the slowest technique is around 2x,
            so again for a typical web app that difference will not matter. Things that slow down web components
            are shadow DOM and innerHTML. Appending directly created elements or cloned templates and avoiding shadow DOM is the right strategy
            for a well-performing web component that needs to end up on the page thousands of times.
        </p>

        <p>
            On the slow device the Lit framework is a weak performer, probably due to its use of shadow DOM and JS-heavy approaches.
            Meanwhile, pure React is the best performer, because while it does more work in creating the virtual DOM and diffing it to the real DOM,
            it benefits from not having to initialize the web component class instances.
            Consequently, when wrapping web components inside React components we see React's performance advantage disappear, and that it adds a performance tax.
            In the grand scheme of things however, the differences between React and optimized web components remains small.
        </p>

        <p>
            The fast device is up to 5x faster than the slow device in Chrome, depending on the technique used,
            so it is really worth testing applications on slow devices to get an idea of the range of performance.
        </p>

        <p>
            Next, let's compare browsers:
        </p>

        <table>
            <thead>
                <tr><th colspan="2">M1, append, best of three</th></tr>
                <tr><th>browser</th><th>components/ms</th></tr>
            </thead>
            <tbody>
                <tr><td>Brave</td><td><del>146</del> 145</td></tr>
                <tr><td>Chrome</td><td><del>233</del> 239</td></tr>
                <tr><td>Edge</td><td><del>224</del> 237</td></tr>
                <tr><td>Firefox</td><td><del>232</del> 299</td></tr>
                <tr><td>Safari</td><td><del>260</del> 239</td></tr>
            </tbody>
        </table>

        <table>
            <thead>
                <tr><th colspan="2">Chi, append, best of three</th></tr>
                <tr><th>browser</th><th>components/ms</th></tr>
            </thead>
            <tbody>
                <tr><td>Chrome</td><td><del>55</del> 55</td></tr>
                <tr><td>Firefox</td><td><del>180</del> 77</td></tr>
            </tbody>
        </table>

        <p>
            Brave is really slow, probably because of its built-in ad blocking. Ad blocking extensions also slow down the other browsers by a lot.
            Safari, Chrome and Edge end up in roughly the same performance bucket. Firefox is the best performer overall.
            Using the "wrong" browser can halve the performance of a machine.
        </p>
        <p>
            <strong>Author's note:</strong>
            due to a measurement error in measuring elapsed time, the previous version of this article had Safari as fastest and Firefox as middle of the pack.
        </p>
        <p>
            There is a large performance gap when you compare the slowest technique on the slowest browser on the slowest device,
            with its fastest opposite combo. Specifically, there is a 16x performance gap:
        </p>
        <ul>
            <li>textContent, Firefox on M1: 430 components/ms</li>
            <li>Shadow DOM + innerHTML, Chrome on Chi: 26 components/ms</li>
        </ul>
        <p>
            That means it becomes worthwhile to carefully consider technique when having to support a wide range of browsers and devices,
            because a bad combination may lead to a meaningfully degraded user experience.
            And of course, you should always test your web app on a slow device to make sure it still works ok.
        </p>
        
        <h3>Bottom line</h3>

        <p>
            I feel confident now that web components can be fast enough for almost all use cases where someone might consider React instead.
        </p>
        <p>
            However, it does matter how they are built. Shadow DOM should not be used for smaller often used web components,
            and the contents of those smaller components should be built using append operations instead of innerHTML.
            The use of web component frameworks might impact their performance significantly,
            and given how easy it is to write vanilla web components I personally don't see the point behind Lit or Stencil. YMMV.
        </p>

        <p>
            The full benchmark code and results can be <a href="https://github.com/jsebrech/vanilla-benchmarks">found on Github</a>.
        </p>

    ]]></content>
    </entry>
    <entry>
        <title><![CDATA[A unix philosophy for web development]]></title>
        <link rel="alternate" type="text/html" href="https://plainvanillaweb.com/blog/articles/2024-09-03-unix-philosophy/"/>
        <id>https://plainvanillaweb.com/blog/articles/2024-09-03-unix-philosophy/</id>
        <published>2024-09-03T12:00:00.000Z</published>
        <updated>2024-09-03T12:00:00.000Z</updated>
        <summary><![CDATA[Maybe all web components need to be a light-weight framework is the right set of helper functions.]]></summary>
        <media:content url="https://plainvanillaweb.com/blog/articles/2024-09-03-unix-philosophy/image.webp" type="image/webp" medium="image" />
        <author><name><![CDATA[Joeri Sebrechts]]></name></author>
        <content type="html"><![CDATA[
        <p>
            Web components have their malcontents. While frameworks have done their best to provide
            a place for web components to fit into their architecture, the suit never fits quite right,
            and framework authors have not been shy about expressing their disappointment.
            Here's Ryan Carniato of SolidJS explaining what's wrong with web components:
        </p>
        <blockquote>
            The collection of standards (Custom Elements, HTML Templates, Shadow DOM, and formerly HTML Imports) 
            put together to form Web Components on the surface seem like they could be used to replace 
            your favourite library or framework. But they are not an advanced templating solution. 
            They don't improve your ability to render or update the DOM. 
            They don't manage higher-level concerns for you like state management.
        </blockquote>
        <cite><a href="https://dev.to/ryansolid/maybe-web-components-are-not-the-future-hfh">Ryan Carniato</a></cite>
        <p>
            While this criticism is true, perhaps it's besides the point.
            Maybe web components were never meant to solve those problems anyway.
            Maybe there are ways to solve those problems in a way that dovetails with web components as they exist.
            In the main <a href="../../../pages/components.html">components tutorial</a> I've already explained what they <em>can</em> do,
            now let's see what can be done about the things that they <em>can't</em> do.
        </p>

        <h3>The Unix Philosophy</h3>

        <p>
            The Unix operating system carries with it a culture and philosophy of system design,
            which carries over to the command lines of today's Unix-like systems like Linux and MacOS. 
            This philosophy can be summarized as follows:
        </p>
        <ul>
            <li>Write programs that do one thing and do it well.</li>
            <li>Write programs to work together.</li>
            <li>Write programs to handle text streams, because that is a universal interface.</li>
        </ul>
        <p>
            What if we look at the various technologies that comprise web components as just programs, 
            part of a Unix-like system of web development that we collectively call the browser platform?
            In that system we can do better than text and use the DOM as the universal interface between programs, 
            and we can extend the system with a set of single purpose independent "programs" (functions) 
            that fully embrace the DOM by augmenting it instead of replacing it.
        </p>
        <p>
            In a sense this is the most old-school way of building web projects, the one people who "don't know any better"
            automatically gravitate to. What us old-school web developers did before Vue and Solid and Svelte, before Angular and React,
            before Knockout and Ember and Backbone, before even jQuery, was have a bunch of functions in <code>utilities.js</code>
            that we copied along from project to project.
            But, you know, sometimes old things can become new again.
        </p>
        <p>
            In previous posts I've already covered a <code>html()</code> function for <a href="../2024-08-25-vanilla-entity-encoding/">vanilla entity encoding</a>,
            and a <code>signal()</code> function that provides a <a href="../2024-08-30-poor-mans-signals/">tiny signals</a> implementation 
            that can serve as a lightweight system for state management.
            That still leaves a missing link between the state managed by the signals and the DOM that is rendered from safely entity-encoded HTML.
            What we need is a <code>bind()</code> function that can bind data to DOM elements and bind DOM events back to data.
        </p>

        <h3>Finding inspiration</h3>

        <p>
            In order to bind a template to data, we need a way of describing that behavior in the HTML markup.
            Well-trodden paths are often the best starting place to look for inspiration. I like <a href="https://vuejs.org/guide/essentials/template-syntax.html">Vue's template syntax</a>,
            because it is valid HTML but just augmented, and because it is proven. Vue's templates only pretend to be HTML
            because they're actually compiled to JavaScript behind the scenes, but let's start there as an API.
            This is what it looks like:
        </p>
        <dl>
            <dt><code>&lt;img :src="imageSrc" /&gt;</code></dt>
            <dd>Bind <em>src</em> to track the value of the <em>imageSrc</em> property of the current component.
                Vue is smart enough to set a property if one exists, and falls back to setting an attribute otherwise.
                (If that confuses you, read about <a href="https://javascript.info/dom-attributes-and-properties">attributes and properties</a> first.)</dd>
            <dt><code>&lt;button @click="doThis"&gt;&lt;/button&gt;</code></dt>
            <dd>Bind the <em>click</em> event to the <em>doThis</em> method of the current component.</dd>
        </dl>
        <p>
            By chance I came across this article about <a href="https://hawkticehurst.com/2024/05/bring-your-own-base-class/">making a web component base class</a>.
            In the section <em>Declarative interactivity</em> the author shows a way to do the Vue-like event binding syntax
            on a vanilla web component. This is what inspired me to develop the concept into a generic binding function and write this article.
        </p>

        <h3>Just an iterator</h3>

        <p>
            The heart of the binding function is an HTML fragment iterator. 
            After all, before we can bind attributes we need to first find the ones that have binding directives.
        </p>
        <div><pre><code>export const bind = (template) =&gt; {
    const fragment = template.content.cloneNode(true);
    // iterate over all nodes in the fragment
    const iterator = document.createNodeIterator(
        fragment,
        NodeFilter.SHOW_ELEMENT,
        {
            // reject any node that is not an HTML element
            acceptNode: (node) =&gt; {
                if (!(node instanceof HTMLElement))
                    return NodeFilter.FILTER_REJECT;
                return NodeFilter.FILTER_ACCEPT;
            },
        }
    );
    let node;
    while (node = iterator.nextNode()) {
        if (!node) return;
        const elem = node;
        for (const attr of Array(...node.attributes)) {
            // check for event binding directive
            if (attr.name.startsWith('@')) {

                // TODO: bind event ...
                
                elem.removeAttributeNode(attr);
            // check for property/attribute binding directive
            } else if (attr.name.startsWith(':')) {
                
                // TODO: bind data ...
                
                elem.removeAttributeNode(attr);
            }
        }
    }
    return fragment;
}</code></pre></div>
        <p>
            This code will take an <a href="https://developer.mozilla.org/en-US/docs/Web/HTML/Element/template">HTML template element</a>, 
            clone it to a <a href="https://developer.mozilla.org/en-US/docs/Web/API/DocumentFragment">document fragment</a>, 
            and then iterate over all the nodes in the fragment, discovering their attributes. 
            Then for each attribute a check is made to see if it's a binding directive (@ or :). 
            The node is then bound to data according to the directive attribute (shown here as TODO's), 
            and the attribute is removed from the node. At the end the bound fragment is returned for inserting into the DOM.
        </p>
        <p>
            The benefit of using a fragment is that it is disconnected from the main DOM, while still offering all of the DOM API's. 
            That means we can easily create a node iterator to walk over it and discover all the attributes 
            with binding directives, modify those nodes and attributes in-place, and still be sure we're not causing 
            DOM updates in the main page until the fragment is inserted there. This makes the bind function very fast.
        </p>
        <p>
            If you're thinking "woah dude, that's a lot of code and a lot of technobabble, I ain't reading all that,"
            then please, I implore you to read through the code line by line, and you'll see it will all make sense.
        </p>
        <p>
            Of course, we also need to have something to bind <em>to</em>, so we need to add a second parameter.
            At the same time, it would be nice to just be able to pass in a string and have it auto-converted into a template.
            The beginning of our bind function then ends up looking like this:
        </p>
        <div><pre><code>export const bind = (template, target) =&gt; {
    if (!template.content) {
        const text = template;
        template = document.createElement('template');
        template.innerHTML = text;
    }
    const fragment = template.content.cloneNode(true);
// ...
}</code></pre></div>
        <p>That just leaves us the TODO's. We can make those as simple or complicated as we want. I'll pick a middle ground.</p>

        <h3>Binding to events</h3>

        <p>This 20 line handler binds events to methods, signals or properties:</p>
        <div><pre><code>// check for custom event listener attributes
if (attr.name.startsWith('@')) {
    const event = attr.name.slice(1);
    const property = attr.value;
    let listener;
    // if we're binding the event to a function, call it directly
    if (typeof target[property] === 'function') {
        listener = target[property].bind(target);
    // if we're binding to a signal, set the signal's value
    } else if (typeof target[property] === 'object' &amp;&amp; 
                typeof target[property].value !== 'undefined') {
        listener = e =&gt; target[property].value = e.target.value;
    // fallback: assume we're binding to a property, set the property's value
    } else {
        listener = e =&gt; target[property] = e.target.value;
    }
    elem.addEventListener(event, listener);
    // remove (non-standard) attribute from element
    elem.removeAttributeNode(attr);
}</code></pre></div>

        <p>That probably doesn't explain much, so let me give an example of what this enables:</p>
        <p><a href="https://plainvanillaweb.com/blog/articles/2024-09-03-unix-philosophy/example-bind3/example.html">Binding to events example</a></p>
        <div><pre><code>import { bind } from './bind.js';
import { signal } from './signals.js';

customElements.define('x-example', class Example extends HTMLElement {

    set a(value) { 
        this.setAttribute('a', value);
        this.querySelector('label[for=a] span').textContent = value;
    }
    set b(value) {
        this.setAttribute('b', value);
        this.querySelector('label[for=b] span').textContent = value;
    }
    c = signal('');

    connectedCallback() {
        this.append(bind(`
            &lt;div&gt;
                &lt;input id="a" type="number" @input="onInputA"&gt;
                &lt;label for="a"&gt;A = &lt;span&gt;&lt;/span&gt;&lt;/label&gt;
            &lt;/div&gt;
            &lt;div&gt;
                &lt;input id="b" type="number" @input="b"&gt;
                &lt;label for="b"&gt;B = &lt;span&gt;&lt;/span&gt;&lt;/label&gt;
            &lt;/div&gt;
            &lt;div&gt;
                &lt;input id="c" type="number" @input="c"&gt;
                &lt;label for="c"&gt;C = &lt;span&gt;&lt;/span&gt;&lt;/label&gt;
            &lt;/div&gt;
            &lt;button @click="onClick"&gt;Add&lt;/button&gt;
            &lt;div&gt;Result: &lt;span id="result"&gt;&lt;/span&gt;&lt;/div&gt;
        `, this));
        this.c.effect(() =&gt; 
            this.querySelector('label[for=c] span').textContent = this.c);
    }

    onInputA (e) {
        this.a = e.target.value;
    }

    onClick() {
        this.querySelector('#result').textContent =
            +this.getAttribute('a') + +this.getAttribute('b') + +this.c;
    }
});
</code></pre></div>

        <ul>
            <li><code>input#a</code>'s input event is handled by calling the <code>onClickA()</code> method.</li>
            <li><code>input#b</code>'s input event is handled by assigning <code>e.target.value</code> to the <code>b</code> property.</li>
            <li><code>input#c</code>'s input event is handled by setting the value of the <code>c</code> signal.</li>
        </ul>
        <p>
            If you're not familiar with the <code>signal()</code> function, check out the <a href="../2024-08-30-poor-mans-signals/">tiny signals</a> 
            implementation in the previous post. For now you can also just roll with it.
        </p>
        <p>Not a bad result for 20 lines of code.</p>

        <h3>Binding to data</h3>
        <p>
            Having established the pattern for events that automatically update properties, 
            we now reverse the polarity to make data values automatically set element properties or attributes.
        </p>
        <div><pre><code>// ...
    if (attr.name.startsWith(':')) {
        // extract the name and value of the attribute/property
        let name = attr.name.slice(1);
        const property = getPropertyForAttribute(name, target);
        const setter = property ?
            () =&gt; elem[property] = target[attr.value] :
            () =&gt; elem.setAttribute(name, target[attr.value]);
        setter();
        // if we're binding to a signal, listen to updates
        if (target[attr.value]?.effect) {
            target[attr.value].effect(setter);
        // if we're binding to a property, listen to the target's updates
        } else if (target.addEventListener) {
            target.addEventListener('change', setter);
        }
        // remove (non-standard) attribute from element
        elem.removeAttributeNode(attr);
    }
// ...

function getPropertyForAttribute(name, obj) {
    switch (name.toLowerCase()) {
        case 'text': case 'textcontent':
            return 'textContent';
        case 'html': case 'innerhtml':
            return 'innerHTML';
        default:
            for (let prop of Object.getOwnPropertyNames(obj)) {
                if (prop.toLowerCase() === name.toLowerCase()) {
                    return prop;
                }
            }   
    }
}</code></pre></div>
        <p>
            The <code>getPropertyForAttribute</code> function is necessary because the attributes that contain the directives
            will have names that are case-insensitive, and these must be mapped to property names that are case-sensitive.
            Also, the <code>:text</code> and <code>:html</code> shorthand notations replace the role of <code>v-text</code>
            and <code>v-html</code> in Vue's template syntax.
        </p>
        <p>
            When the value of the target's observed property changes, we need to update the bound element's property or attribute.
            This means a triggering <code>'change'</code> event is needed that is then subscribed to.
            A framework's templating system will compare state across time, and detect the changed values automatically. 
            Lacking such a system we need a light-weight alternative.
        </p>
        <p>
            When the property being bound to is a signal, this code registers an effect on the signal.
            When the property is just a value, it registers an event listener on the target object,
            making it the responsibility of that target object to dispatch the <code>'change'</code> event when values change.
            This approach isn't going to get many points for style, but it does work.
        </p>
        <p>
            Check out the <a href="example-combined/bind.js">completed bind.js</a> code.
        </p>

        <h3>Bringing the band together</h3>

        <p>
            In the article <a href="https://dev.to/richharris/why-i-don-t-use-web-components-2cia">Why I don't use web components</a> 
            Svelte's Rich Harris lays out the case against web components. He demonstrates how this simple 9 line Svelte component
            <code>&lt;Adder a={1} b={2}/&gt;</code> becomes an incredible verbose 59 line monstrosity when ported to a vanilla web component.
        </p>
        <div><pre><code>&lt;script&gt;
  export let a;
  export let b;
&lt;/script&gt;

&lt;input type="number" bind:value={a}&gt;
&lt;input type="number" bind:value={b}&gt;

&lt;p&gt;{a} + {b} = {a + b}&lt;/p&gt;</code></pre></div>

        <p>
            Now that we have assembled our three helper functions <code>html()</code>, <code>signal()</code> and <code>bind()</code>
            on top of the web components baseline, at a total budget of around 150 lines of code, how close can we get for a web component <code>&lt;x-adder a="1" b="2"&gt;&lt;/x-adder&gt;</code>?
        </p>
        <div><pre><code>import { bind } from './bind.js';
import { signal, computed } from './signals.js';
import { html } from './html.js';

customElements.define('x-adder', class Adder extends HTMLElement {
    a = signal();
    b = signal();
    result = computed(() =&gt; 
        html`${+this.a} + ${+this.b} = ${+this.a + +this.b}`, [this.a, this.b]);

    connectedCallback() {
        this.a.value ??= this.getAttribute('a') || 0;
        this.b.value ??= this.getAttribute('b') || 0;
        this.append(bind(html`
            &lt;input type="number" :value="a" @input="a" /&gt;
            &lt;input type="number" :value="b" @input="b" /&gt;
            &lt;p :html="result"&gt;&lt;/p&gt;
        `, this));
    }
});
</code></pre></div>
        <p><a href="https://plainvanillaweb.com/blog/articles/2024-09-03-unix-philosophy/example-combined/example.html">combined example</a></p>

        <p>
            To be fair, that's still twice the lines of code, but it describes clearly what it does, and really that is all you need. 
            And I'm just shooting in the wind here, trying stuff out.
            Somewhere out there could be a minimal set of functions that transforms web components into something resembling a framework,
            and the idea excites me! Who knows, maybe in a few years the web community will return to writing projects in 
            vanilla web code, dragging along the modern equivalent of <code>utilities.js</code> from project to project...
        </p>
        <br>
        <p><em>What do you think?</em></p>
    ]]></content>
    </entry>
    <entry>
        <title><![CDATA[Poor man's signals]]></title>
        <link rel="alternate" type="text/html" href="https://plainvanillaweb.com/blog/articles/2024-08-30-poor-mans-signals/"/>
        <id>https://plainvanillaweb.com/blog/articles/2024-08-30-poor-mans-signals/</id>
        <published>2024-08-30T12:00:00.000Z</published>
        <updated>2024-08-30T12:00:00.000Z</updated>
        <summary><![CDATA[Signals are all the rage over in frameworkland, so let's bring them to vanilla JS.]]></summary>
        <media:content url="https://plainvanillaweb.com/blog/articles/2024-08-30-poor-mans-signals/image.webp" type="image/webp" medium="image" />
        <author><name><![CDATA[Joeri Sebrechts]]></name></author>
        <content type="html"><![CDATA[
        <p>
            Signals are all the rage right now. Everyone's doing them.
            <a href="https://angular.dev/guide/signals">Angular</a>,
            and <a href="https://docs.solidjs.com/concepts/signals">Solid</a>,
            and <a href="https://preactjs.com/guide/v10/signals/">Preact</a>,
            and there are third party packages for just about every framework that doesn't already have them.
            There's even a <a href="https://github.com/tc39/proposal-signals">proposal</a>
            to add them to the language, and if that passes it's just a 
            <a href="https://thenewstack.io/did-signals-just-land-in-react/">matter of time</a> before all frameworks 
            have them built in.
        </p>

        <h3>Living under a rock</h3>
        <p>
            In case you've been living under a rock, here's the example from Preact's documentation 
            that neatly summarizes what signals do:
        </p>
        <div><pre><code>import { signal, computed, effect } from "@preact/signals";

const name = signal("Jane");
const surname = signal("Doe");
const fullName = computed(() =&gt; `${name.value} ${surname.value}`);

// Logs name every time it changes:
effect(() =&gt; console.log(fullName.value));
// Logs: "Jane Doe"

// Updating `name` updates `fullName`, which triggers the effect again:
name.value = "John";
// Logs: "John Doe"
</code></pre></div>
        <p>
            Simply put, signals wrap values and computations 
            in a way that allows us to easily respond to every change to those values and results in a targeted way,
            without having to rerender the entire application in the way that we would do in React.
            In short, signals are an efficient and targeted way to respond to changes without having to do state comparison and DOM-diffing.
        </p>
        <p>
            OK, so, if signals are so great, why am I trying to sell you on them on a vanilla web development blog?
            Don't worry! Vanilla web developers can have signals too.
        </p>

        <h3>Just a wrapper</h3>
        <p>
            Signals are at heart nothing more than a wrapper for a value that sends events when the value changes.
            That's nothing that a little trickery with the not well known but very handy <code>EventTarget</code> base class can't fix for us.
        </p>
        <div><pre><code>class Signal extends EventTarget {
    #value;
    get value () { return this.#value; }
    set value (value) {
        if (this.#value === value) return;
        this.#value = value;
        this.dispatchEvent(new CustomEvent('change')); 
    }

    constructor (value) {
        super();
        this.#value = value;
    }
}</code></pre></div>
        <p>
            This gets us a very barebones signals experience:
        </p>
        <div><pre><code>const name = new Signal('Jane');
name.addEventListener('change', () =&gt; console.log(name.value));
name.value = 'John';
// Logs: John</code></pre></div>
        <p>
            But that's kind of ugly. The <code>new</code> keyword went out of fashion a decade ago,
            and that <code>addEventListener</code> sure is unwieldy.
            So let's add a little syntactic sugar.
        </p>
        <div><pre><code>class Signal extends EventTarget {
    #value;
    get value () { return this.#value; }
    set value (value) {
        if (this.#value === value) return;
        this.#value = value;
        this.dispatchEvent(new CustomEvent('change')); 
    }

    constructor (value) {
        super();
        this.#value = value;
    }

    effect(fn) {
        fn();
        this.addEventListener('change', fn);
        return () =&gt; this.removeEventListener('change', fn);
    }

    valueOf () { return this.#value; }
    toString () { return String(this.#value); }
}

const signal = _ =&gt; new Signal(_);
</code></pre></div>
        <p>
            Now our barebones example is a lot nicer to use:
        </p>
        <div><pre><code>const name = signal('Jane');
name.effect(() =&gt; console.log(name.value));
// Logs: Jane
name.value = 'John';
// Logs: John</code></pre></div>
        <p>
            The <code>effect(fn)</code> method will call the specified function,
            and also subscribe it to changes in the signal's value.
        </p>
        <p>
            It also returns a dispose function that can be used to unregister the effect.
            However, a nice side effect of using <code>EventTarget</code> and browser built-in events as the reactivity primitive
            is that it makes the browser smart enough to garbage collect the signal and its effect when the signal goes out of scope.
            This means less chance for memory leaks even if we never call the dispose function.
        </p>
        <p>
            Finally, the <code>toString</code> and <code>valueOf</code> magic methods allow for dropping <code>.value</code> in most places
            that the signal's value gets used. (But not in this example, because the console is far too clever for that.)
        </p>

        <h3>Does not compute</h3>
        <p>
            This signals implementation is already capable, but at some point it might be handy to have an effect based on more than one signal.
            That means supporting computed values. Where the base signals are a wrapper around a value,
            computed signals are a wrapper around a function.
        </p>
        <div><pre><code>class Computed extends Signal {
    constructor (fn, deps) {
        super(fn(...deps));
        for (const dep of deps) {
            if (dep instanceof Signal) 
                dep.addEventListener('change', () =&gt; this.value = fn(...deps));
        }
    }
}

const computed = (fn, deps) =&gt; new Computed(fn, deps);
</code></pre></div>
        <p>
            The computed signal calculates its value from a function.
            It also depends on other signals, and when they change it will recompute its value.
            It's a bit obnoxious to have to pass the signals that it depends on
            as an additional parameter, but hey, I didn't title this article <em>Rich man's signals</em>.
        </p>
        <p>
            This enables porting Preact's signals example to vanilla JS.
        </p>
        <div><pre><code>const name = signal('Jane');
const surname = signal('Doe');
const fullName = computed(() =&gt; `${name} ${surname}`, [name, surname]);
// Logs name every time it changes:
fullName.effect(() =&gt; console.log(fullName.value));
// -&gt; Jane Doe

// Updating `name` updates `fullName`, which triggers the effect again:
name.value = 'John';
// -&gt; John Doe
</code></pre></div>

        <h3>Can you use it in a sentence?</h3>
        <p>
            You may be thinking, all these <code>console.log</code> examples are fine and dandy,
            but how do you use this stuff in actual web development?
            This simple adder demonstrates how signals can be combined with web components:
        </p>
        <div><pre><code>import { signal, computed } from './signals.js';

customElements.define('x-adder', class extends HTMLElement {
    a = signal(1);
    b = signal(2);
    result = computed((a, b) =&gt; `${a} + ${b} = ${+a + +b}`, [this.a, this.b]);

    connectedCallback() {
        if (this.querySelector('input')) return;

        this.innerHTML = `
            &lt;input type="number" name="a" value="${this.a}"&gt;
            &lt;input type="number" name="b" value="${this.b}"&gt;
            &lt;p&gt;&lt;/p&gt;
        `;
        this.result.effect(
            () =&gt; this.querySelector('p').textContent = this.result);
        this.addEventListener('input', 
            e =&gt; this[e.target.name].value = e.target.value);
    }
});
</code></pre></div>
        <p>
            And here's a live demo:
        </p>
        <p><a href="https://plainvanillaweb.com/blog/articles/2024-08-30-poor-mans-signals/adder.html">adder.html</a></p>
        <p>
            In case you were wondering, the <code>if</code> is there to prevent adding the effect twice
            if connectedCallback is called when the component is already rendered.
        </p>
        <p>
            The full poor man's signals code in all its 36 line glory can be found in the <a href="https://github.com/jsebrech/tiny-signals/">tiny-signals repo</a> on Github.
        </p>
    ]]></content>
    </entry>
    <entry>
        <title><![CDATA[Vanilla entity encoding]]></title>
        <link rel="alternate" type="text/html" href="https://plainvanillaweb.com/blog/articles/2024-08-25-vanilla-entity-encoding/"/>
        <id>https://plainvanillaweb.com/blog/articles/2024-08-25-vanilla-entity-encoding/</id>
        <published>2024-08-25T12:00:00.000Z</published>
        <updated>2024-08-25T12:00:00.000Z</updated>
        <summary><![CDATA[The first version of this site didn't use entity encoding in the examples. Now it does.]]></summary>
        <media:content url="https://plainvanillaweb.com/blog/articles/2024-08-25-vanilla-entity-encoding/image.webp" type="image/webp" medium="image" />
        <author><name><![CDATA[Joeri Sebrechts]]></name></author>
        <content type="html"><![CDATA[
        <h3>Good enough</h3>
        <p>
            When I made the first version of the Plain Vanilla website, there were things that I would have liked
            to spend more time on, but that I felt didn't belong in a Good Enough™ version of the site.
            One of those things was defending against <a href="https://cheatsheetseries.owasp.org/cheatsheets/Cross_Site_Scripting_Prevention_Cheat_Sheet.html">Cross-Site Scripting</a> (XSS).
        </p>
        <p>
            XSS is still in the <a href="https://owasp.org/www-project-top-ten/">OWASP Top Ten</a> of security issues, 
            but it's no longer as prevalent as it used to be. Frameworks have built in a lot of defenses, 
            and when using their templating systems you have to go out of your way to inject code into the generated HTML.
            When eschewing frameworks we're reduced to standard templating in our web components, and those offer no defense against XSS.
        </p>
        <p>
            Because of this, in the original site the <a href="https://plainvanillaweb.com/pages/components.html#passing-data">Passing Data example</a> 
            on the <em>Components</em> page had an undocumented XSS bug.
            The <em>name</em> field could have scripts injected into it. I felt ambivalent about leaving that bug in.
            On the one hand, the code was very compact and neat by leaving it in.
            On the other hand it made that code a bad example that shouldn't be copied.
            I ended up choosing to leave it as-is because an example doesn't have to be production-grade
            and generating properly encoded HTML was not the point of that specific example.
            It's time however to circle back to that XSS bug and figure out how it would have been solved in a clean and readable way,
            if Santa really did want to bring his List application to production-level quality.
        </p>

        <h3>The problem</h3>
        <p>
            The basic problem we need to solve is that vanilla web components end up having a lot of code that looks like this:
        </p>
        <div><pre><code>class MyComponent extends HTMLElement {
    connectedCallback() {
        const btn = `&lt;button&gt;${this.getAttribute('foo')}&lt;/button&gt;`;
        this.innerHTML = `
            &lt;header&gt;&lt;h1&gt;${this.getAttribute('bar')}&lt;/h1&gt;&lt;/header&gt;
            &lt;article&gt;
                &lt;p class="${this.getAttribute('baz')}"&gt;${this.getAttribute('xyzzy')}&lt;/p&gt;
                ${btn}
            &lt;/article&gt;
        `;
    }
}
customElements.define('my-component', MyComponent);</code></pre></div>
        <p>
            If any of <code>foo</code>, <code>bar</code>, <code>baz</code> or <code>xyzzy</code> contain one of the dangerous HTML entities,
            we risk seeing our component break, and worst-case risk seeing an attacker inject a malicious payload into the page.
            Just as a reminder, those dangerous HTML entities are &lt;, &gt;, &amp;, ' and ".
        </p>

        <h3>The fix, take one</h3>
        <p>
            A naive fix is creating a html-encoding function and using it consistently:
        </p>
        <div><pre><code>function htmlEncode(s) {
    return s.replace(/[&amp;&lt;&gt;'"]/g,
        tag =&gt; ({
            '&amp;': '&amp;amp;',
            '&lt;': '&amp;lt;',
            '&gt;': '&amp;gt;',
            "'": '&amp;#39;',
            '"': '&amp;quot;'
        }[tag]))
}

class MyComponent extends HTMLElement {
    connectedCallback() {
        const btn = `&lt;button&gt;${htmlEncode(this.getAttribute('foo'))}&lt;/button&gt;`;
        this.innerHTML = `
            &lt;header&gt;&lt;h1&gt;${htmlEncode(this.getAttribute('bar'))}&lt;/h1&gt;&lt;/header&gt;
            &lt;article&gt;
                &lt;p class="${htmlEncode(this.getAttribute('baz'))}"&gt;${htmlEncode(this.getAttribute('xyzzy'))}&lt;/p&gt;
                ${btn}
            &lt;/article&gt;
        `;
    }
}
customElements.define('my-component', MyComponent);</code></pre></div>
        <p>
            While this does work to defend against XSS, it is verbose and ugly, not pleasant to type and not pleasant to read.
            What really kills it though, is that it assumes attention to detail from us messy humans. We can never forget,
            never ever, to put a <code>htmlEncode()</code> around each and every variable.
            In the real world, that is somewhat unlikely.
        </p>
        <p>
            What is needed is a solution that allows us to forget about entity encoding, by doing it automatically
            when we're templating. I drew inspiration from templating libraries that work in-browser and are based on tagged templates, 
            like <a href="https://lit.dev/docs/api/templates/#html">lit-html</a> 
            and <a href="https://github.com/developit/htm">htm</a>. The quest was on to build the most minimalistic
            html templating function that encoded entities automatically.
        </p>

        <h3>The fix, take two</h3>
        <p>
            Ideally, the fixed example should look more like this:
        </p>
        <div><pre><code>import { html } from './html.js';

class MyComponent extends HTMLElement {
    connectedCallback() {
        const btn = html`&lt;button&gt;${this.getAttribute('foo')}&lt;/button&gt;`;
        this.innerHTML = html`
            &lt;header&gt;&lt;h1&gt;${this.getAttribute('bar')}&lt;/h1&gt;&lt;/header&gt;
            &lt;article&gt;
                &lt;p class="${this.getAttribute('baz')}"&gt;${this.getAttribute('xyzzy')}&lt;/p&gt;
                ${btn}
            &lt;/article&gt;
        `;
    }
}
customElements.define('my-component', MyComponent);</code></pre></div>
        <p>
            The <code>html``</code> <a href="https://developer.mozilla.org/en-US/docs/Web/JavaScript/Reference/Template_literals#tagged_templates">tagged template function</a> 
            would automatically encode entities, in a way that we don't even have to think about it.
            Even when we nest generated HTML inside of another template, like with <code>${btn}</code>, it should just magically work.
            It would be so minimal as to disappear in the background, barely impacting readability, maybe even improving it.
            You may be thinking that doing that correctly would involve an impressive amount of code. I must disappoint.
        </p>
        <div><pre><code>class Html extends String { }

/** 
 * tag a string as html not to be encoded
 * @param {string} str
 * @returns {string}
 */
export const htmlRaw = str =&gt; new Html(str);

/** 
 * entity encode a string as html
 * @param {*} value The value to encode
 * @returns {string}
 */
export const htmlEncode = (value) =&gt; {
    // avoid double-encoding the same string
    if (value instanceof Html) {
        return value;
    } else {
        // https://stackoverflow.com/a/57448862/20980
        return htmlRaw(
            String(value).replace(/[&amp;&lt;&gt;'"]/g, 
                tag =&gt; ({
                    '&amp;': '&amp;amp;',
                    '&lt;': '&amp;lt;',
                    '&gt;': '&amp;gt;',
                    "'": '&amp;#39;',
                    '"': '&amp;quot;'
                }[tag]))
        );
    }
}

/** 
 * html tagged template literal, auto-encodes entities
 */
export const html = (strings, ...values) =&gt; 
    htmlRaw(String.raw({ raw: strings }, ...values.map(htmlEncode)));
</code></pre></div>
        <p>
            Those couple dozen lines of code are all that is needed. Let's go through it from top to bottom.
        </p>
        <dl>
            <dt><code>class Html extends String { }</code></dt>
            <dd>The Html class is used to mark strings as encoded, so that they won't be encoded again.</dd>
            <dt><code>export const htmlRaw = str =&gt; new Html(str);</code></dt>
            <dd>Case in point, the htmlRaw function does the marking.</dd>
            <dt><code>export const htmlEncode = ...</code></dt>
            <dd>The earlier htmlEncode function is still doing useful work, only this time it will mark the resulting string as HTML, and it won't double-encode.</dd>
            <dt><code>export const html = ...</code></dt>
            <dd>The tagged template function that binds it together.</dd>
        </dl>

        <p>
            A nice upside of the html template function is that the <em>html-in-template-string</em> Visual Studio Code extension
            can detect it automatically and will syntax highlight the templated HTML. This is what example 3 looked like after I made it:
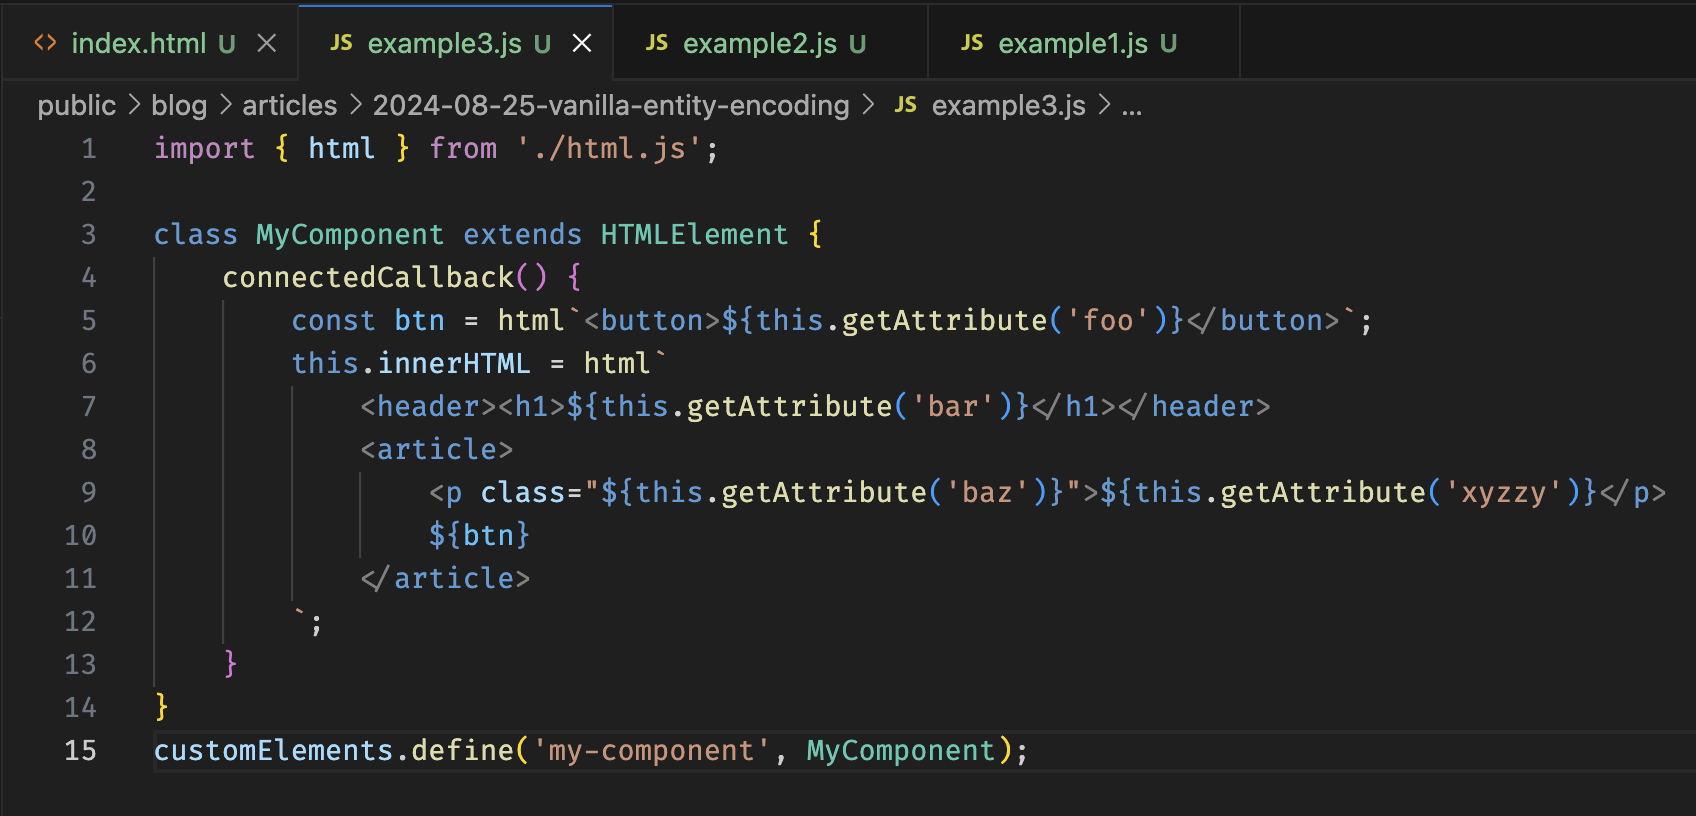
        </p>

        <img src="https://plainvanillaweb.com/blog/articles/2024-08-25-vanilla-entity-encoding/syntax-highlighting.webp" alt="example 3 with syntax highlighting">

        <p>
            Granted, there's still a bunch of boilerplate here, and that <code>getAttribute</code> gets unwieldy.
            But with this syntax highlighting enabled sometimes when I'm working on vanilla web components I forget it's not React and JSX, but just HTML and JS.
            It's surprising how nice of a development experience web standards can be if you embrace them.
        </p>

        <p>
            I decided to leave the XSS bug in the <em>Passing Data</em> example, but now the <em>Applications</em> page
            has an explanation about entity encoding documenting this html template function.
            I can only hope people that work their way through the tutorial make it that far.
            For your convenience I also put the HTML templating function in its own separate 
            <a href="https://github.com/jsebrech/html-literal">html-literal repo on Github</a>.
        </p>

    ]]></content>
    </entry>
</feed>